
Welcome to Beyond the Prompt: Advanced Techniques for AI Image Generation Mastery. In the rapidly evolving landscape of artificial intelligence, the ability to generate stunning, hyperrealistic images has captivated artists, designers, and enthusiasts alike. What once seemed like science fiction is now an everyday reality, with AI models capable of rendering visuals so lifelike they can be indistinguishable from photographs. But how do we move beyond the rudimentary outputs and truly master the art of photorealism?
This comprehensive guide delves deep into the expert techniques required to unlock the full potential of AI art generation, transforming your concepts into breathtakingly realistic visuals. We will explore everything from advanced prompt engineering and model selection to sophisticated post-processing methods and ethical considerations. Whether you are an aspiring AI artist, a seasoned digital creator, or simply curious about the frontiers of image synthesis, prepare to elevate your understanding and practical skills to achieve truly hyperrealistic AI art.
Understanding the Foundation: Latent Diffusion Models and Their Evolution
At the heart of today’s photorealistic AI art lies a class of generative models known as Latent Diffusion Models (LDMs). Unlike earlier generative adversarial networks (GANs) which often struggled with consistency and high-fidelity details, LDMs offer a more robust and controllable framework for image synthesis. They operate by learning to reverse a diffusion process, gradually denoising a random noise signal to reveal a coherent image guided by text prompts or other conditioning inputs. This iterative refinement process is what allows them to achieve such intricate details and realistic textures.
The journey from abstract concepts to hyperrealistic imagery began with foundational models like OpenAI’s DALL-E, followed by Midjourney, and the open-source revolution brought by Stable Diffusion. Each iteration brought significant advancements:
- DALL-E (and later DALL-E 2, DALL-E 3): Pioneered the text-to-image generation paradigm, demonstrating impressive conceptual understanding and artistic versatility. DALL-E 3, integrated with ChatGPT, has significantly enhanced prompt understanding and adherence, leading to more precise and realistic outputs. Its ability to interpret complex, nuanced prompts directly translates to higher fidelity and realism in specific contexts.
- Midjourney: Quickly gained popularity for its artistic flair and aesthetically pleasing outputs, often with a distinct stylistic signature. Its continuous updates (V4, V5, V5.2, V6) have pushed the boundaries of realism, especially in lighting, shadows, and subtle textural details, making it a strong contender for photorealistic portraits, cinematic scenes, and expressive landscapes. Midjourney V6, in particular, introduced greater prompt adherence and higher default realism.
- Stable Diffusion (SD): This open-source model democratized AI art. Its adaptability, combined with a vast ecosystem of fine-tuned models (checkpoints) and extensions, offers unparalleled control and customization. Users can host it locally, train their own models, and integrate numerous advanced techniques like ControlNet, making it a powerhouse for achieving specific photorealistic goals. The introduction of SDXL significantly boosted its native realism and image quality.
Choosing the right base model is often the first critical step towards photorealism. While Midjourney excels in out-of-the-box aesthetic quality and artistic interpretation, Stable Diffusion’s extensibility provides a deeper level of control necessary for hyperrealistic precision and bespoke creations. Understanding the strengths and weaknesses of each platform allows artists to select the best tool for their specific project and integrate them into a comprehensive workflow.
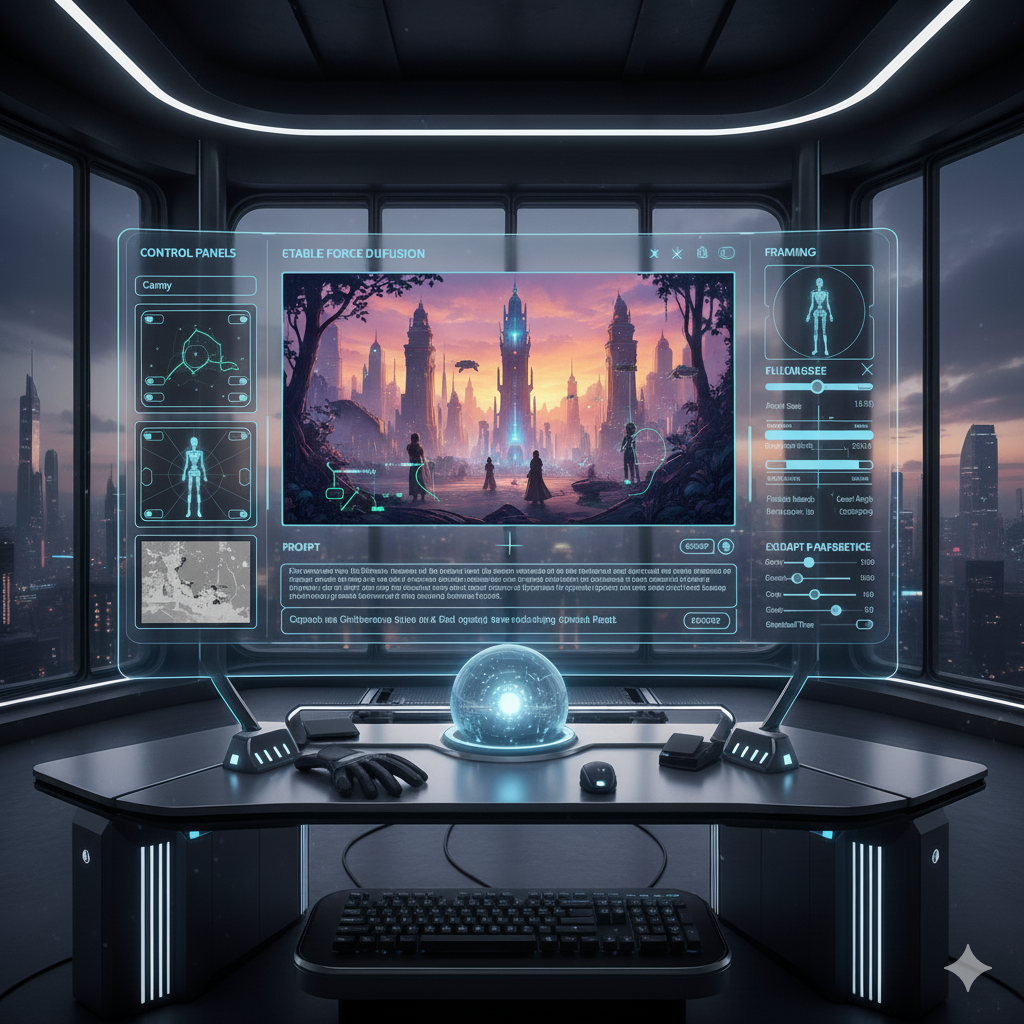
Mastering the Prompt: Beyond Simple Keywords
Prompt engineering is the bedrock of AI art, but achieving photorealism demands a level of sophistication far beyond merely listing desired objects. It involves crafting intricate textual descriptions that guide the AI model with precision, instructing it on every conceivable visual element. Think of it less as a command and more as writing a detailed visual script for an invisible director, focusing on every nuance of a real photograph.
1. Structured Prompting for Clarity and Detail
Effective prompts are often structured, moving from broad concepts to minute details, akin to how a professional photographer plans a shot. A good structure might include:
- Subject Description: Who or what is the main focus? Provide age, gender, ethnicity, facial features, body type, clothing details, and emotional state. (e.g., “A young woman, 20s, long wavy brown hair, delicate features, freckles across her nose, wearing a worn denim jacket, a hint of a melancholic smile”)
- Setting and Environment: Where is it? Time of day? Weather conditions? Specific architectural details or natural elements. (e.g., “standing in a bustling Tokyo street, neon lights reflecting on wet asphalt, light rain falling, late evening, steam rising from grates”)
- Composition and Angle: How is the scene framed? Camera perspective? Specific shot types. (e.g., “close-up portrait, eye-level shot, shallow depth of field, wide-angle street photography, Dutch angle, rule of thirds composition”)
- Lighting and Atmosphere: Light source, quality (soft, harsh), direction, color, shadows, mood. (e.g., “soft diffused light, volumetric fog, dramatic chiaroscuro, cinematic golden hour backlight, cyberpunk neon glow, moody street lamp illumination”)
- Art Style or Photography Medium: Explicitly state “photorealistic” or “hyperrealistic.” Mention film types, camera brands, lens effects, or specific photographic aesthetics. (e.g., “photorealistic, hyperdetailed, professional photography, Canon EOS R5, 85mm f/1.4 lens, 4K, ultra-realistic textures, incredibly detailed skin, subtle pores, high dynamic range, Fujifilm Astia 100 film emulation, editorial quality”)
- Negative Prompts: Crucial for telling the AI what not to include or to avoid common AI artifacts that break realism. (e.g., “low quality, bad anatomy, deformed, ugly, blurry, duplicate, extra limbs, cartoon, illustration, painting, sketch, grayscale, worst quality, text, watermark, bad hands, mutated fingers, unrealistic shadows, plastic skin, CGI, 3D render”)
Example Hyperrealistic Prompt Segment: “ultra-realistic RAW photograph of an elderly man with deeply weathered hands, intricate wrinkles etched around his deep thoughtful blue eyes, sitting by a sun-drenched window in an antique study, soft natural light streaming through venetian blinds illuminating microscopic dust particles, hyperdetailed textures of his vintage tweed jacket and worn leather armchair, 50mm f/1.8 lens, exquisite bokeh background, award-winning portrait photography, 8K, cinematic color grading, (photorealistic:1.3), incredibly detailed skin pores, individual silver hair strands, subtle chromatic aberration, realistic depth of field”
2. Weighting and Emphasis
Many AI models allow you to assign weight to specific words or phrases in your prompt, influencing their importance. In Stable Diffusion, parentheses and numbers (e.g., (word:1.2)) can increase emphasis, while brackets decrease it. Midjourney uses :: to separate prompt parts and assign weights. This allows for granular control, ensuring that critical elements for realism (like “detailed skin textures” or “soft natural light”) stand out in the final image and are prioritized by the AI.
3. Camera and Lens Terminology
To achieve a truly photographic look, speak the language of professional photography. Include terms that define not just what is in the shot, but how it is shot:
- Lens types and focal lengths:
85mm lens,50mm prime,wide-angle,macro lens,telephoto,anamorphic lens. - Aperture and Depth of Field:
f/1.8 bokeh(for shallow depth of field, blurring the background),deep focus(for everything in focus),creamy bokeh. - Lighting Specifics:
rim light,softbox lighting,golden hour,blue hour,chiaroscuro,studio lighting,natural light,overcast light,backlight,sidelight. - Camera settings and film characteristics:
shutter speed,ISO 400,film grain,Kodak Portra 400,Fujifilm Provia,RAW photo,high dynamic range,cinematic still,documentary photography. - Compositional terms:
rule of thirds,leading lines,symmetry,close-up shot,full-body shot,headshot,establishing shot.
Leveraging ControlNet and Image-to-Image Techniques
While powerful prompting sets the stage, true photorealism often requires a level of precise compositional control that text alone cannot provide. This is where tools like ControlNet for Stable Diffusion and advanced image-to-image (img2img) techniques become indispensable, allowing artists to dictate structure, pose, depth, and specific visual elements with unprecedented accuracy, moving beyond mere suggestion to explicit instruction.
1. ControlNet: Precision Guided Generation
ControlNet is an architectural breakthrough that allows Stable Diffusion models to take an additional input image, alongside the text prompt, to guide the generation process. This input image is processed by a specific ‘preprocessor’ and ‘model’ within ControlNet, extracting structural information and enforcing it on the output. This is crucial for maintaining consistency and achieving precise photorealistic layouts. Key ControlNet models for photorealism include:
- Canny: Detects strong edges in an input image (like a blueprint or a simple line drawing), then guides the AI to generate new content that adheres to those exact edges. Ideal for maintaining specific outlines of objects, architecture, or complex mechanical structures in a photorealistic manner.
- Depth (MiDaS, LERES, ZOE): Analyzes the depth map of an input image, telling the AI how far objects are from the camera. This is crucial for realistic perspective, scene composition, and generating accurate spatial relationships, especially for complex environments, interior designs, or landscapes.
- OpenPose: Extracts skeletal information (pose, hand gestures, facial expressions) from human or animal figures in an input image. Essential for generating characters in specific, natural-looking postures or with precise emotional expressions without anatomical distortion or “AI hands.”
- Lineart/Scribble: Allows users to provide simple line drawings or even rough sketches, which the AI then elaborates into photorealistic scenes, respecting the initial drawing’s composition and artistic intent. This is powerful for translating quick ideas into detailed visuals.
- Tile/Upscale: Excellent for enhancing details and upscaling images while preserving overall composition. It works by breaking the image into tiles, processing each one, and then stitching them back together, preventing resolution degradation and enhancing micro-details, often used in conjunction with other ControlNet models or img2img for a final polish.
- Reference Only: This newer ControlNet variant allows the AI to consider a reference image for style, color, or overall aesthetic without strictly enforcing its composition. It’s useful for guiding the AI towards a specific photographic mood or lighting while maintaining prompt freedom.
By using ControlNet, artists can precisely control the composition of an AI-generated image, ensuring that the subject’s pose, the arrangement of objects, or the architectural layout matches their vision, overcoming the inherent randomness and compositional inconsistencies of text-only generation. This bridging of creative intent with AI’s generative power is a game-changer for photorealism, especially when working on specific client briefs or recreating real-world scenarios.
2. Image-to-Image (Img2Img) Techniques
Img2Img involves using an existing image as a starting point for the AI generation process. The AI then “denoises” this input image based on a text prompt and a ‘denoising strength’ parameter. This is incredibly useful for iterative refinement and controlled transformation, often essential for pushing towards hyperrealism:
- Refining existing images: Taking a less-than-perfect AI output, a real photo, or even a basic render and enhancing its realism, changing specific elements, or applying a new photographic style while largely retaining the core composition.
- Style transfer with realism: Transforming a sketch, a painting, or even a low-fidelity 3D render into a photorealistic rendering, using the original’s composition but applying a photographic aesthetic and intricate details.
- Iterative refinement: Generating an initial image, then feeding it back into img2img with adjusted prompts or lower denoising strength to incrementally improve details, correct imperfections, or add subtle textural layers without drastic changes to the overall scene. This allows for a highly controlled “painting over” process by the AI.
- Varying output based on an input seed: Using the same initial image but varying the prompt or seed can produce different, yet structurally similar, photorealistic variations. This is useful for exploring different lighting conditions or slight mood changes of the same scene.
The denoising strength is a critical parameter here. A low denoising strength (e.g., 0.2-0.4) will keep the output very close to the input image, only making subtle changes and enhancing existing details. A high denoising strength (e.g., 0.6-0.8) will allow the AI more freedom to transform the image, potentially leading to more significant changes but also risking deviation from the original structure. Finding the sweet spot is key to controlled photorealistic enhancements, allowing for both subtle corrections and significant stylistic shifts when needed.
The Art of Post-Processing and AI-Assisted Editing
Even with the most sophisticated prompts and control techniques, AI-generated images often benefit from a final layer of refinement. Post-processing, encompassing both traditional and AI-assisted methods, is crucial for pushing an image from “almost real” to “indistinguishable from reality.” This stage involves meticulous attention to detail, correction of subtle AI artifacts, and enhancing the overall visual impact, much like a professional photographer’s final edit.
1. Inpainting and Outpainting for Refinement and Expansion
These techniques, often available directly within AI image generation interfaces (like Stable Diffusion’s Automatic1111 web UI) or through dedicated tools, are vital for precise adjustments to elevate realism:
- Inpainting: Allows you to selectively regenerate specific masked areas of an image while keeping the rest intact. This is invaluable for:
- Correcting minor anatomical errors that persist even after ControlNet (e.g., fixing distorted fingers, refining eye details, perfecting teeth).
- Removing unwanted elements (e.g., a stray hair, an accidental artifact, a background distraction) or adding new ones (e.g., a specific prop, a tattoo, a logo).
- Refining textures or details on a subject’s face, clothing, or environment to achieve ultra-realism (e.g., adding subtle skin imperfections, enhancing fabric weave).
You essentially “mask” an area, provide a new prompt specific to that area, and the AI regenerates only within the mask, seamlessly blending it with the surrounding image, preserving the overall photorealistic consistency.
- Outpainting: Extends an image beyond its original boundaries, intelligently filling in new content that matches the existing style, lighting, and context. This is perfect for:
- Changing aspect ratios (e.g., from square to widescreen) without cropping essential elements.
- Expanding a scene to reveal more of the environment, creating a sense of grandeur or depth.
- Creating panoramic views from a smaller initial generation, allowing for broader compositional possibilities.
The AI analyzes the edges of your image and generates coherent, photorealistic content in the expanded canvas, maintaining seamless continuity. This is particularly powerful for creating immersive environments that appear limitless.
2. Upscaling and Detail Enhancement
AI-generated images often come at a standard resolution. To truly achieve hyperrealism, higher resolutions and crisp, intricate details are essential. AI upscalers use neural networks to intelligently increase image resolution, not just by stretching pixels, but by inferring and adding details, making the image appear as if it was captured at a much higher resolution.
- Traditional AI Upscalers (ESRGAN, SwinIR, Real-ESRGAN): These models are specifically trained for super-resolution, dramatically increasing image size (e.g., 2x, 4x) while sharpening details, restoring textures, and removing typical upscaling artifacts. They are excellent for general-purpose high-quality upscaling of any image.
- Latent Upscalers: Often integrated within diffusion models (e.g., SD upscale in Automatic1111), these operate in the latent space, providing more coherent upscaling that aligns better with the original generation process. They are particularly effective for maintaining the “AI aesthetic” and adding details that feel intrinsic to the generated image, rather than merely interpolated.
- Facial Restoration Models (CodeFormer, GFPGAN): Many AI-generated faces can suffer from subtle distortions, lack of fine detail, or fall into the uncanny valley. These specialized models are trained to detect and correct facial features, often restoring naturalism to eyes, mouths, skin textures, and hair without losing the character’s identity. They are indispensable for photorealistic portraits.
- Denoising and Sharpening Tools: After upscaling, subtle noise or softness can be present. AI-powered denoising tools intelligently remove noise without sacrificing detail, while sharpening tools enhance edges and textures for a crisp, lifelike finish.
3. Traditional Image Editing Software for Final Touches
Even with advanced AI tools, the human eye and traditional software like Adobe Photoshop, GIMP, Affinity Photo, or Lightroom remain invaluable. These tools allow for the nuanced adjustments that push an AI image from excellent to truly flawless:
- Color Grading and Correction: Adjusting white balance, contrast, saturation, and tone curves to achieve a professional photographic look, matching specific aesthetic visions or real-world lighting conditions.
- Dodge and Burn: Selectively lightening or darkening areas to sculpt light, enhance three-dimensionality, and bring out specific details or create focal points, mimicking traditional darkroom techniques.
- Cloning and Healing: Precisely removing tiny imperfections, stray pixels, sensor dust effects, or minor AI artifacts that even advanced inpainting might miss, ensuring a pristine finish.
- Liquify and Warping Tools: For subtle anatomical corrections, adjusting proportions, or refining the flow of fabrics without needing to regenerate entire sections.
- Masking and Compositing: Seamlessly integrating AI-generated elements with real-world photographs, other AI elements, or graphic design elements for complex compositions or advertisements.
- Final Sharpening and Noise Reduction: Fine-tuning image crispness and managing any residual digital noise to achieve optimal print or display quality.
The synergy between AI generation and traditional human artistic intervention is where the highest levels of photorealism are achieved. The AI provides the raw material; the human artist, equipped with a comprehensive toolkit and a discerning eye, refines it into a masterpiece, ensuring every detail contributes to the illusion of reality.
Fine-Tuning Models and Utilizing LoRAs
While base models like Stable Diffusion are incredibly versatile, they are generalists. To truly excel at generating specific subjects, styles, or concepts with photorealistic detail, fine-tuning is essential. This involves further training a pre-existing model on a specialized dataset, allowing it to learn particular nuances that are critical for hyperrealism. The most accessible and popular form of fine-tuning for individual artists is the use of LoRAs (Low-Rank Adaptation of Large Language Models).
1. What are LoRAs and Checkpoints?
- Checkpoints (Full Models): These are complete Stable Diffusion models (e.g., SD 1.5, SDXL, or derivatives like Realistic Vision, Juggernaut XL) that have been extensively trained on massive, diverse datasets. They form the foundational “brains” upon which LoRAs are built. Artists often download and use various community-trained checkpoints optimized for specific aesthetics, including highly realistic photography styles or character realism, as their starting point.
- LoRAs (Low-Rank Adaptation): Instead of retraining an entire checkpoint, LoRAs are small, lightweight add-on files (typically 10-100 MB) that are trained on a much smaller, highly specific dataset (e.g., 10-20 high-quality images of a particular person, object, specific fashion style, or artistic rendering technique). When loaded alongside a base checkpoint, a LoRA subtly adjusts the model’s weights, enabling it to generate images consistent with its training data while retaining the overall capabilities of the base model.
For photorealism, LoRAs are invaluable for:
- Specific Subjects and Characters: Training a LoRA on a particular face, character, celebrity, or unique object to ensure consistent, highly detailed, and recognizable representations across different generations, poses, and lighting conditions. This is vital for maintaining character fidelity in narratives or advertisements.
- Artistic Styles or Rendering Approaches: Training a LoRA on a specific photography style, lighting setup, material rendering (e.g., “wet skin textures,” “detailed metallic reflections,” “cinematic film look,” “hyperrealistic water splashes”) to consistently apply these qualities, making the AI a specialist in that particular visual domain.
- Concept Reinforcement: Imparting a strong understanding of a niche concept (e.g., a specific type of flora/fauna, a futuristic vehicle design) that the base model might struggle to render accurately or consistently.
2. Training Custom LoRAs for Hyperrealism
Creating your own LoRAs is a powerful technique for personalized photorealism, granting artists unprecedented control over specific elements. The process generally involves:
- Dataset Curation: Gather 10-20 high-quality, diverse images of the subject or style you want the LoRA to learn. For photorealism, these images must be sharp, well-lit, show the subject from various angles and contexts, and be free of artifacts. The quality of your training data directly impacts the quality of your LoRA.
- Captioning: Accurately describe each image with descriptive tags. For photorealism, include granular details like “photorealistic,” “high detail,” “studio lighting,” “bokeh,” specific features of the subject (e.g., “curly red hair,” “worn leather texture”), and the trigger word for your LoRA.
- Training Configuration: Use a LoRA training script or GUI (e.g., Kohya_ss GUI, Diffusers scripts) to configure parameters like learning rate, number of training steps, batch size, and network rank. These parameters heavily influence the LoRA’s effectiveness and ability to generalize.
- Iterative Testing and Evaluation: After training, test the LoRA with different prompts, base models, and LoRA weights. Pay close attention to consistency, detail, and any artifacts. Adjust training parameters or refine the dataset as needed to achieve the desired level of realism and fidelity without overfitting or underfitting.
The impact of a well-trained LoRA on photorealism cannot be overstated. It transforms a general-purpose AI into a highly specialized tool, capable of generating incredibly specific and consistent hyperrealistic imagery that matches the artist’s precise vision.
3. Merging Models and Community Resources
Beyond individual LoRAs, the Stable Diffusion ecosystem thrives on community-contributed checkpoints and collaborative model development. Artists often experiment with:
- Downloading Pre-trained Checkpoints: Websites like Civitai, Hugging Face, and others host thousands of community-trained models, many specifically fine-tuned for photorealism (e.g., Realistic Vision, Deliberate, Juggernaut XL, various SDXL-based models). These are often the first stop for achieving high-fidelity results, offering a diverse range of aesthetic starting points.
- Model Merging: Advanced users can merge multiple checkpoints or LoRAs to combine their strengths. For example, merging a model strong in facial realism with one excellent at environmental details can create a superior base for hyperrealistic scenes, allowing for highly customized foundational models that blend different stylistic or realistic capabilities.
- Textual Inversion and Embeddings: These are smaller files similar to LoRAs that help the model understand specific concepts or styles through a few example images, offering another layer of customization for fine-tuning realism.
Staying engaged with the AI art community is crucial, as new models, LoRAs, embeddings, and innovative techniques emerge almost daily, constantly pushing the boundaries of what’s possible in photorealistic AI art and providing a wealth of resources for continuous improvement.
Advanced Parameters and Workflow Automation
Achieving photorealism is not just about prompts and models; it’s also about meticulously controlling the underlying mechanics of the diffusion process. Advanced parameters offer granular control over how the AI interprets and renders your vision, while workflow automation streamlines the iterative process of refinement, allowing for systematic exploration and consistent results.
1. Sampler Choice and Steps
- Samplers: These are the algorithms that guide the AI through the denoising process, transforming noise into a coherent image. Different samplers have distinct characteristics in terms of speed, quality, and how they handle details and artifacts. For photorealism, popular choices that balance speed and quality include:
DPM++ 2M Karras: Often considered a gold standard for detail, realism, and aesthetic quality, especially at higher step counts. It produces clean and sharp images.DPM++ SDE Karras: Another excellent choice, often providing slightly different textural qualities or handling of light compared to 2M Karras.Euler A: Fast and efficient, but can sometimes introduce artistic interpretations or less consistent details, making it more suitable for initial explorations than final photorealistic renders.DDIM: A reliable but sometimes slower sampler that can produce good results, though often less aesthetically pleasing than DPM++ variants for realism.UniPC: A newer sampler known for its efficiency and good quality, especially with lower step counts, offering a balance between speed and detail.
Experimentation is key, as the optimal sampler can depend on the specific model, prompt, and desired level of detail.
- Sampling Steps: Refers to how many iterations the AI performs to denoise the image. While more steps generally lead to more detailed and refined images, there’s a point of diminishing returns. For photorealism, a range of 25-50 steps is often sufficient with good samplers; going much higher can sometimes introduce “overcooked” details, repetitive patterns, or simply waste computational resources without significant improvement.
2. CFG Scale (Classifier Free Guidance)
The CFG scale dictates how strongly the AI adheres to your prompt versus how much creative freedom it takes. It’s a critical knob for controlling the “prompt influence”:
- A higher CFG scale (e.g., 8-12) means the AI will try harder to match the prompt, often resulting in more detailed, vibrant, and “on-topic” images. However, if too high (e.g., >15-20), it can lead to over-saturation, noise, distorted details, or “prompt adherence” artifacts, making the image look less natural.
- A lower CFG scale (e.g., 4-7) allows for more artistic interpretation and can yield softer, sometimes more natural or atmospheric results, giving the AI more leeway to be creative.
For photorealism, a range of 5-10 is a common starting point, with subtle adjustments yielding significant changes in detail, adherence, and overall realism. Finding the sweet spot for your specific prompt and model is essential.
3. Seed Management for Consistency
Every AI image generation starts with a “seed” – a random number that initializes the noise pattern. Using the exact same seed, prompt, and parameters will produce the exact same image. This is vital for:
- Iterative Refinement: Making small, controlled adjustments to a prompt word, a parameter (like CFG scale), or a ControlNet weight, and observing their precise, isolated impact on the same underlying composition, enabling targeted improvements.
- Generating Consistent Variations: Keeping the prompt and seed the same, but slightly changing one parameter (e.g., denoising strength in img2img, a minor prompt edit) to explore subtle, consistent variations of an initial concept without losing its core structure.
- Reproducibility: Documenting the seed used for a successful generation allows you or others to recreate your exact image later, which is essential for collaborative work, sharing techniques, or revisiting old projects.
- Seed Traveling: Generating a sequence of images by smoothly interpolating between two seeds, allowing for exploration of visual transitions.
4. Workflow Automation and Scripting
Advanced users often employ automation to systematically explore parameter space or generate large batches of consistent images, accelerating the iterative process towards photorealism:
- Prompt Matrices/Grids: Generating a grid of images by systematically varying a single word or phrase in a prompt, or a numerical parameter (like CFG scale, steps, or denoising strength), to quickly identify optimal settings or compare different variations.
- Batch Processing: Applying the same prompt and settings to multiple seeds or initial images to generate a large volume of variations. This is useful for finding the “best” output from many attempts or for generating a series of similar images.
- Scripting and API Integration: For those comfortable with coding (e.g., Python), custom scripts can automate complex sequences of generation, img2img, inpainting, upscaling, and even image analysis. Integrating with model APIs allows for highly efficient and reproducible workflows, especially for large-scale projects or continuous development of photorealistic assets.
- A/B Testing: Systematically comparing the realism of outputs from different prompts, models, or parameter sets to scientifically determine which combinations yield the most convincing results.
By mastering these parameters and integrating automation, artists gain unparalleled control over the AI’s output, transforming the generation process from a game of chance into a precise, deliberate craft for achieving consistent and stunning photorealism, mirroring the controlled environment of a professional photo studio.
Ethical Considerations and Future Trends in Photorealistic AI Art
As AI’s ability to create hyperrealistic images advances, so too do the ethical complexities and societal implications. Navigating these challenges responsibly is as crucial as mastering the technical aspects of generation. Simultaneously, the field continues to evolve at a breakneck pace, promising even more astounding capabilities that will redefine creativity and our interaction with digital media.
1. Ethical Challenges of Photorealistic AI Art
- Deepfakes and Misinformation: The ability to generate highly convincing fake images of individuals or events poses significant risks, enabling the spread of disinformation, defamation, and malicious content. Responsible use requires transparency and clear disclosure of AI origins, perhaps through robust watermarking or metadata.
- Copyright and Attribution: The vast majority of training data for AI models includes copyrighted images. This raises complex questions about intellectual property, fair use, and whether AI-generated art infringes on the rights of original artists whose work contributed to the model’s learning. New legal frameworks and compensation models may be necessary to address these issues.
- Bias and Representation: AI models learn from the data they are fed. If this data contains societal biases (e.g., underrepresentation of certain demographics, perpetuation of stereotypes), the AI will inevitably manifest these biases in its photorealistic outputs, leading to non-diverse or even harmful portrayals. Conscious effort in prompt engineering, dataset curation, and model training is needed to mitigate and correct these biases.
- Authenticity and Trust in Visual Media: In an era where anything can be digitally fabricated, the concept of photographic evidence and trust in visual media is profoundly challenged. The distinction between reality and AI-generated imagery becomes increasingly blurred, demanding critical literacy from consumers and clear labeling from creators.
- Artist Displacement and Compensation: Concerns exist that the proliferation of AI-generated content could devalue human artistic skill, depress market rates, or displace traditional creative roles. Debates around how original artists should be compensated for their contributions to AI training data, and how to protect human creativity in the face of AI proliferation, are ongoing.
- Consent and Privacy: Generating photorealistic images of individuals, especially without their consent, raises significant privacy concerns. This is particularly relevant with the rise of custom LoRAs trained on personal images.
Addressing these ethical dilemmas requires a multi-faceted approach involving technology developers, policymakers, artists, educators, and the public. Transparency, clear labeling of AI-generated content, robust provenance tracking, and ethical guidelines are essential steps towards responsible integration of this powerful technology.
2. Future Trends in Photorealistic AI Art
- Real-time Generation and Interaction: Imagine generating photorealistic images or even video in real-time based on live inputs, spoken commands, or even direct physiological feedback. This could revolutionize gaming (dynamic NPCs, customizable environments), virtual reality, and interactive storytelling, making experiences far more immersive and personalized.
- Advanced 3D Integration: AI models are increasingly capable of generating high-fidelity 3D assets, textures, and even entire environments from text prompts or 2D inputs. The seamless conversion of photorealistic 2D AI art into animatable 3D models for film, animation, architectural visualization, and product design is a significant frontier, bridging the gap between flat images and interactive worlds.
- Personalized and Adaptive AI Art: Future models might be able to learn an individual’s specific aesthetic preferences, emotional states, or even adapt to physiological responses (e.g., eye-tracking data), generating art that is uniquely resonant, dynamic, and therapeutic.
- Multi-modal Co-creation: Beyond text-to-image, AI will likely enable richer forms of co-creation, where artists can use voice, gesture, emotional cues, haptic feedback, and even basic brainwave patterns to guide photorealistic image generation, leading to more intuitive and expressive workflows that blur the line between thought and creation.
- Generative Video and Animation: While nascent, the ability to generate photorealistic video sequences from text prompts or reference images is rapidly progressing. This will transform film production, advertising, and content creation, allowing for unprecedented visual storytelling.
- Edge AI and Localized Generation: As AI models become more efficient, photorealistic generation might increasingly occur on consumer devices (smartphones, personal computers) rather than exclusively in the cloud, offering greater privacy, speed, and offline capabilities.
The journey towards photorealistic AI art is not merely a technical one; it is a profound exploration of creativity, ethics, and the very definition of reality. As artists and innovators, our role is to not only push the boundaries of what is possible but also to shape a responsible and beneficial future for this transformative technology, ensuring it serves humanity’s highest creative and ethical aspirations.
Comparison Tables
| Feature | Midjourney (V6+) | Stable Diffusion (SDXL/Custom Checkpoints) | DALL-E 3 (via ChatGPT/API) |
|---|---|---|---|
| Ease of Use (Out-of-box) | Very High (natural language, Discord interface; user-friendly for beginners) | Moderate to Low (requires local setup, advanced UI knowledge, parameter tuning; higher learning curve) | High (integrated into chat interfaces, excellent prompt interpretation, very accessible) |
| Photorealism Quality | Excellent (especially for portraits, landscapes, dramatic lighting, out-of-box consistency; often has a cinematic feel) | Outstanding (with expert prompting, ControlNet, LoRAs, fine-tuned models; capable of extreme detail and precision) | Very Good (strong adherence to prompt, good for conceptual realism, less fine-grained control over raw artistic elements) |
| Customization & Control | Moderate (parameters like Chaos, Style, Vary, raw mode, but less granular direct control over generation process) | Extensive (ControlNet, img2img, inpainting, outpainting, custom LoRAs, model merging, API access; unparalleled control) | Moderate (strong prompt interpretation, but limited direct control over generation process compared to SD’s toolkit) |
| Speed & Resources | Fast (cloud-based, optimized for quick generation; subscription required) | Variable (depends on local hardware for self-hosting, or cloud service provider; can be resource-intensive for complex workflows) | Fast (cloud-based, good performance for typical requests; access via OpenAI API or ChatGPT Plus) |
| Community & Ecosystem | Large, active community (Discord-centric, focused on sharing prompts, images, and tips; strong artistic focus) | Massive, developer-centric ecosystem (Civitai, Hugging Face, Github; vast resources, models, tools, extensions, active open-source development) | Integrated into OpenAI’s broader ecosystem (less standalone community for direct model development; more focused on integration and ethical deployment) |
| Ideal Use Cases for Photorealism | High-quality artistic renders, concept art, stunning portraits, architectural visualizations, cinematic stills, expressive photography. | Precise replications, specific character/object generation, architectural renders with blueprints, complex scene construction, highly customized styles, iterative design, academic research. | Illustrative photorealism, conceptual designs, images requiring strong prompt adherence and accurate text rendering, quick realistic mockups. |
| Technique/Element | Description | Impact on Photorealism | Example Keywords for Realism |
|---|---|---|---|
| Detailed Subject Description | Specifying age, gender, ethnicity, clothing, specific expressions, unique physical features of the subject. | Significantly enhances character believability, individuality, and distinctiveness, preventing generic “AI faces” and adding depth. | (weathered skin:1.2), sparkling blue eyes, subtle melancholic smile, tailored tweed suit, aged leather texture, freckles, individual hair strands |
| Environmental Context | Describing the setting, time of day, weather, ambient conditions, and specific elements within the environment. | Creates a coherent, immersive, and believable scene, anchoring the subject in a realistic environment and influencing lighting/mood. | golden hour, misty forest, bustling urban street, neon reflections on wet asphalt, volumetric fog, abandoned warehouse, ancient ruins |
| Camera & Lens Parameters | Using professional photography jargon to control composition, focus, depth of field, and optical effects. | Mimics real-world photography, adding authenticity through accurate depth of field, natural lens aberrations, and specific framing. Essential for a photographic feel. | 85mm f/1.4, cinematic still, shallow depth of field, creamy bokeh, rim light, RAW photo, film grain, wide-angle, macro shot |
| Lighting & Shadows | Explicitly defining the light source, quality (soft/hard), direction, color, and characteristics of shadows. | Crucial for creating realistic volume, mood, atmosphere, and depth; avoids flat, poorly lit scenes and enhances three-dimensionality. | soft natural light, dramatic chiaroscuro, studio lighting setup, dappled sunlight, deep realistic shadows, overcast diffused light, moonlight glow |
| Negative Prompting | Explicitly listing undesirable elements, styles, or common AI artifacts to exclude from the generation. | Removes visual noise, corrects anatomical errors, prevents the “AI look,” and cleans up images, pushing them towards cleaner, more credible realism. | blurry, ugly, deformed, low quality, bad anatomy, cartoon, drawing, text, watermark, extra limbs, plastic skin, CGI, 3D render, unrealistic shadows |
| Quality Modifiers | Adding terms that explicitly demand high fidelity, detail, and professional-grade rendering. | Forces the AI to allocate more attention to intricate textures, fine details, higher resolution, and overall photographic quality. | hyperrealistic, ultra detailed, 4k, 8k, photorealistic, incredibly detailed, award winning photography, editorial quality, professional shot, museum quality |
Practical Examples
Theory is one thing; practical application is where the magic happens. Here are a few real-world scenarios demonstrating how expert techniques achieve photorealism in AI art, showcasing the power of a combined workflow.
Case Study 1: Recreating a Historical Photo with ControlNet
Scenario: An historian wants to digitally reconstruct a lost photograph of a famous historical figure, but only a rough sketch and a textual description exist. The goal is to create a photorealistic image that looks like a genuine, antique photograph from the early 20th century, suitable for a documentary.
Techniques Applied:
- Base Model Selection: A Stable Diffusion checkpoint specifically fine-tuned for realism with an inclination towards older photographic aesthetics (e.g., a custom-trained vintage photography model based on SD 1.5 or SDXL, or a heavily prompted Realistic Vision model).
- ControlNet (Canny & OpenPose):
- The rough sketch of the scene (showing building outlines, object placement) is meticulously traced and fed into ControlNet’s Canny preprocessor. This ensures the foundational composition and structural elements precisely match the historical references.
- For the historical figure’s pose and expression, a modern reference photo of a human model striking a similar pose is used. This is then fed into ControlNet’s OpenPose preprocessor, guaranteeing accurate human anatomy, posture, and convincing hand gestures, crucial for historical authenticity.
- Advanced Prompting:
- Positive prompt includes an extensive list of details:
photorealistic, sepia tone, aged photograph, 1920s portrait, historical figure [Specific Name], authentic period details, shallow depth of field, soft studio lighting, Kodak film grain, intricate wrinkles around eyes, detailed suit fabric, in sharp focus, volumetric dust particles, subtle imperfections, award-winning historical photography. - Negative prompt aggressively targets modern aesthetics and AI artifacts:
modern, colored, painting, illustration, cartoon, low quality, blurry, worst quality, deformed, extra fingers, watermark, digital art, shiny, clean, new, plastic skin.
- Positive prompt includes an extensive list of details:
- Img2Img Refinement: The initial ControlNet output is fed into img2img with a low denoising strength (0.3-0.5). This allows the AI to subtly enhance textural details, add realistic film grain, and fine-tune the sepia toning without fundamentally altering the core composition dictated by ControlNet.
- Post-processing (Traditional): Minor cloning and healing in Photoshop are performed to remove any subtle AI artifacts that slipped through, or to simulate authentic photographic damage like slight scratches or dust. This is followed by professional color grading adjustments to perfectly match the vintage photographic feel, contrast, and overall sharpness, making it indistinguishable from a genuine historical artifact.
Outcome: A hyperrealistic image that convincingly appears to be a rediscovered historical photograph, complete with era-appropriate details, lighting, and photographic imperfections, providing an invaluable visual aid for the historian.
Case Study 2: Designing a Product Advertisement with Precise Details
Scenario: A marketing agency needs to generate a photorealistic image of a new smartphone, showcasing its sleek design, innovative camera features, and premium materials. The phone must be presented on a modern tabletop setup, complete with perfect studio lighting, realistic reflections, and subtle branding, ready for a high-end commercial campaign.
Techniques Applied:
- Model Choice & LoRAs: An SDXL-based model optimized for product photography and material rendering is selected. Crucially, a custom LoRA is trained on multiple high-resolution images of the specific smartphone model. This LoRA ensures accurate branding, precise button placement, correct camera array design, and faithful rendering of material finishes (e.g., matte glass, polished aluminum), making the phone instantly recognizable and perfectly rendered.
- Advanced Prompting for Product Photography:
- Positive prompt:
hyperrealistic product photography, brand new [Smartphone Model Name], sleek design, chrome finish, reflecting subtle studio lights, on a minimalist wooden table with delicate grain, softbox lighting, shallow depth of field, professional photoshoot, 100mm macro lens, ultra detailed, in sharp focus, volumetric shadows, perfect reflections, clean background, high resolution, award-winning commercial photography. - Negative prompt:
blurry, low quality, cartoon, drawing, text, watermark, bad reflections, scratch, dust, old, damaged, deformed, ugly, noisy.
- Positive prompt:
- ControlNet (Tile & Depth):
- An existing simple 3D render or even a reference photo of a similar tabletop setup with placeholder objects is used with ControlNet’s Depth model. This dictates the precise perspective, object placement, and spatial relationships of the smartphone and any accessories, ensuring a perfectly composed scene.
- ControlNet’s Tile model is used during an upscaling pass to ensure every minute detail of the phone’s surface, the tabletop texture, and the background elements is rendered sharply and without loss of information, preventing any blurriness at high resolution.
- Inpainting & Outpainting:
- Inpainting is used with extreme precision to refine elements like screen reflections, ensuring they appear natural and purposeful. It’s also used to add or remove subtle dust particles for a pristine look, or to adjust the texture of the tabletop surface if it needs more realism.
- Outpainting is used to extend the scene slightly if the initial framing is too tight, allowing for more negative space in the advertisement for text or branding without having to regenerate the entire image.
- Post-processing (Traditional): Extensive color grading, sharpening, contrast adjustments, and minor retouching in professional photo editing software (like Capture One or Photoshop) are applied to achieve a polished, high-end commercial aesthetic. This includes fine-tuning reflections and specular highlights for maximum visual impact.
Outcome: A stunning, hyperrealistic product image ready for advertising campaigns, indistinguishable from a costly studio photoshoot, perfectly showcasing the smartphone’s features and design.
Case Study 3: Generating Realistic Character Portraits for Game Development
Scenario: A game developer needs a series of hyperrealistic character portraits for non-player characters (NPCs) in an upcoming RPG. Each character requires unique features, specific emotional expressions, and consistent appearance across different environmental lighting conditions, matching the game’s dark fantasy aesthetic.
Techniques Applied:
- Base Model Selection & LoRAs: A fine-tuned Stable Diffusion checkpoint renowned for character realism and facial details (e.g., Juggernaut XL, or a similar photorealistic SDXL model) is chosen. For recurring characters, a custom LoRA is trained on 10-15 reference images of each specific character’s face, ensuring remarkable consistency in appearance (facial structure, hair, distinguishing marks) across various poses and expressions. Additionally, LoRAs for specific types of worn armor, cultural clothing, or creature features might be used.
- Advanced Prompting for Character Realism:
- Positive prompt includes granular details:
hyperrealistic portrait, [Character Name], 30s male, rugged face, short beard, intense blue eyes, scar above left eye, wearing worn leather armor with intricate engravings, medieval tavern setting, moody oil lamp lighting, deep realistic shadows, cinematic still, 8K, incredibly detailed skin texture, subtle pores, individual hair strands, shot on Arri Alexa, professional photography, expressive face, strong emotion. - Negative prompt targets common AI character flaws:
cartoon, painting, illustration, CGI, plastic skin, bad anatomy, deformed, ugly, blurry, low quality, watermark, text, extra fingers, distorted face, unrealistic lighting, smooth skin, doll-like.
- Positive prompt includes granular details:
- ControlNet (OpenPose & Reference Only):
- OpenPose is used extensively. For each character portrait, a reference image of a human model striking the desired facial expression and body posture is fed into OpenPose, precisely dictating the character’s pose, ensuring natural and consistent anatomy, and accurately conveying emotions.
- Reference Only ControlNet can be used with a reference image of desired clothing or background elements to ensure stylistic consistency without fully imposing the reference’s composition, allowing for variation in the final render.
- Batch Generation and Seed Cycling: Many variations are generated by cycling through different seeds for each character while maintaining the same prompt and ControlNet settings. This allows the game developer to select the best expressions, minor pose variations, and lighting interpretations that best fit the game’s narrative.
- Facial Restoration and Inpainting: CodeFormer/GFPGAN is used as a post-processing step to enhance overall facial realism, correct any uncanny valley effects, and add subtle lifelike details to eyes and skin. Inpainting is then used for minor, pixel-perfect adjustments to eye reflections, individual hair strands, or specific imperfections on clothing, ensuring every character feels unique and real.
Outcome: A library of highly detailed, consistent, and emotionally expressive photorealistic character portraits, ready to be integrated into the game’s visual assets, significantly enhancing immersion and narrative depth for players.
Frequently Asked Questions
Q: What is the biggest challenge in achieving photorealism in AI art?
A: The biggest challenge often lies in overcoming the “uncanny valley” effect and eliminating subtle AI tells. While AI can generate stunning images, achieving absolute photorealism means ensuring every minute detail, from skin pores and hair strands to light reflections, anatomical accuracy, and even the natural imperfections found in reality, is flawless. This requires a deep understanding of advanced prompting, meticulous use of ControlNet to dictate structure, careful selection and fine-tuning of models (especially with LoRAs), and extensive post-processing to refine imperfections that the AI might leave behind. It is the pursuit of perfection and naturalness in every pixel.
Q: How important is prompt engineering for hyperrealistic images?
A: Prompt engineering is critically important and arguably the most foundational skill for hyperrealistic images. It’s the primary way you communicate your vision to the AI, acting as a detailed blueprint. For hyperrealism, basic prompts are insufficient. You need highly detailed, structured prompts that specify camera settings, lighting quality, texture, composition, subject characteristics, and mood, alongside robust negative prompts to guide the AI away from undesirable outputs and common AI artifacts. Think of it as writing a precise photography brief for a human photographer; the more detailed and informed your brief, the closer the result will be to your exact, hyperrealistic vision.
Q: Can I achieve photorealism without powerful local hardware?
A: Yes, absolutely. While running Stable Diffusion locally with advanced features like ControlNet and extensive upscaling benefits from powerful GPUs, many cloud-based services offer access to these capabilities. Platforms like Midjourney (Discord-based), DALL-E 3 (via ChatGPT/API), and various cloud-hosted Stable Diffusion instances (e.g., Google Colab notebooks, dedicated cloud GPUs offered by providers like RunPod, Paperspace, or even services like Leonardo.AI) allow you to generate high-quality, photorealistic images without needing to invest in expensive local hardware. The key is to leverage the computing power and features of these cloud services effectively through their interfaces or APIs.
Q: What role does human artistic skill play in photorealistic AI art?
A: Human artistic skill remains paramount, even with the most advanced AI. AI is a powerful tool, but not a replacement for creativity, vision, and discernment. Artists use their understanding of composition, lighting, color theory, human anatomy, photographic principles, and emotional storytelling to craft effective prompts, select appropriate models and LoRAs, guide ControlNet inputs, and perform crucial post-processing. The human artist’s discerning eye is essential for identifying and correcting subtle AI imperfections, making subjective artistic decisions (e.g., the precise mood, the focal point, the narrative), and infusing the AI’s output with genuine creative intent and emotional depth, transforming raw generations into true art.
Q: Are there free tools available for achieving photorealism with AI?
A: Yes, many options exist for free or with very low cost. Stable Diffusion is open-source and can be run for free locally (if you have compatible hardware) or via free tiers/notebooks on platforms like Google Colab. There are also numerous community-created checkpoints and LoRAs available for free download on platforms like Civitai. While some services like Midjourney and DALL-E have paid tiers, they often offer free trials or limited free access, allowing users to experiment. The learning curve for free, open-source tools can be steeper, but the capabilities for photorealism are immense and constantly expanding.
Q: How do I avoid common “AI tells” like weird fingers or blurry eyes?
A: Avoiding AI tells requires a multi-pronged, systematic approach. Firstly, use strong negative prompts that specifically target these issues (e.g., “bad anatomy, deformed, extra fingers, blurry, ugly, distorted face, mutated hands”). Secondly, leverage ControlNet’s OpenPose model for accurate human poses and anatomy, providing a precise skeletal structure for the AI to follow. Thirdly, generate images at higher native resolutions or use an initial low-resolution pass followed by img2img with a dedicated facial restoration model (like CodeFormer or GFPGAN) during upscaling. Finally, meticulous inpainting for specific problem areas and traditional photo editing (cloning, healing, liquify) are crucial for fine-tuning and correcting any remaining artifacts, especially hands and eyes.
Q: What is the difference between photorealism and hyperrealism in AI art?
A: While often used interchangeably, there’s a subtle distinction. Photorealism aims to create an image that looks exactly like a photograph, indistinguishable from reality. The goal is to perfectly mimic the visual fidelity of a camera. Hyperrealism takes this a step further; it often exaggerates, idealizes, or enhances reality, creating an image that is even “more real than real.” Hyperrealistic AI art might feature impossibly crisp details, flawless textures, perfect lighting, or idealized aesthetics that go beyond what a typical photograph would capture, creating a heightened sense of reality or a dreamlike, perfected quality while maintaining a photographic aesthetic.
Q: How do LoRAs contribute to achieving photorealism?
A: LoRAs (Low-Rank Adaptation) are incredibly valuable for photorealism because they allow AI models to specialize and achieve high fidelity for very specific elements. Instead of relying on a general-purpose model to generate a generic human face, a LoRA trained on a particular individual, a specific type of highly detailed skin texture, or a unique lighting setup can guide the AI to render those specific features with extreme accuracy, consistency, and photorealistic detail. They act as fine-tuned “skill modules” for the base model, enabling it to generate precise subjects, styles, or material details repeatedly with a high degree of photorealistic fidelity that would be difficult, if not impossible, to achieve with general prompts alone.
Q: How do I choose the right base model or checkpoint for photorealism?
A: Choosing the right base model or checkpoint is crucial as it sets the foundational aesthetic. Start by researching community-rated models on platforms like Civitai or Hugging Face, specifically looking for those explicitly labeled as “photorealistic,” “realistic,” “cinematic,” or “photography.” Read user reviews and carefully examine example images to see if they align with your aesthetic goals (e.g., do they excel at portraits, landscapes, or objects?). Consider whether you need a generalist photorealistic model (e.g., Juggernaut XL, Realistic Vision) or one specializing in specific subjects (e.g., character portraits, sci-fi landscapes, fashion). Experiment with a few different highly-regarded models to find one that resonates best with your prompting style and desired output quality.
Q: Can AI art replicate complex human emotions photorealistically?
A: AI has made significant strides in replicating complex human emotions, often achieving highly photorealistic results. This is primarily done through advanced prompting that specifies nuanced expressions, body language, and contextual cues (e.g., “a wistful gaze,” “a subtle smirk of defiance,” “eyes filled with melancholy,” “shoulders slightly slumped in defeat”). Combining these detailed prompts with ControlNet’s OpenPose for precise facial and body poses, and then refining with inpainting for micro-expressions around the eyes and mouth, can lead to highly convincing emotional portrayals. However, truly capturing the profound depth and subtlety of human emotion in a way that resonates authentically still often requires careful human artistic oversight and post-processing to avoid superficial or exaggerated expressions.
Key Takeaways
- Foundation Models are Your Starting Point: Understand the strengths and weaknesses of leading models like Midjourney, Stable Diffusion, and DALL-E 3 to choose the best tool for your photorealistic project.
- Prompt Engineering is an Advanced Skill: Move beyond simple keywords to structured, highly detailed prompts incorporating specific photographic terminology, complex lighting, compositional guidelines, and robust negative prompts.
- ControlNet is Indispensable for Precision: Utilize ControlNet models (Canny, Depth, OpenPose, Tile) to enforce precise composition, poses, structural elements, and stylistic consistency from reference images or sketches.
- Image-to-Image for Controlled Refinement: Employ img2img techniques with varying denoising strengths to refine existing generations, enhance micro-details, and apply stylistic shifts in a controlled, iterative manner.
- Post-processing is the Final Polish: Integrate inpainting, outpainting, AI upscalers (ESRGAN, Latent Upscalers), facial restoration models (CodeFormer), and traditional image editing software for pixel-perfect adjustments and professional finishing.
- LoRAs Enable Deep Specialization: Fine-tune base models with custom or community-trained LoRAs to achieve consistent, highly detailed, and recognizable renderings of specific subjects, styles, or material properties.
- Master Advanced Parameters: Experiment meticulously with samplers, CFG scale, and seed management to gain granular control over the diffusion process and achieve specific visual outcomes.
- Embrace Workflow Automation: Use prompt matrices, batch processing, and scripting to efficiently explore parameter space, generate variations, and streamline your path to consistent photorealism.
- Address Ethical Considerations Responsibly: Be mindful of deepfakes, copyright, bias, authenticity, and consent; strive for transparent and ethical AI art creation and dissemination.
- Continuous Learning is Crucial: The field of AI art is rapidly evolving. Stay engaged with the community, experiment constantly, and adapt to new developments to maintain mastery in photorealism.
Conclusion
Achieving photorealism in AI art is a sophisticated endeavor that transcends merely typing a few words into a prompt box. It is a harmonious blend of technical prowess, keen artistic sensibility, and a deep understanding of the intricate AI models and tools at your disposal. From crafting meticulously detailed prompts that speak the language of professional photography, and leveraging the structural control of ControlNet, to refining every pixel with advanced post-processing techniques and specializing models with custom LoRAs, each technique plays a crucial role in transforming nascent conceptual ideas into breathtakingly lifelike imagery.
The journey to hyperrealism is iterative and demanding, requiring patience, persistent experimentation, and a willingness to continuously learn and adapt. As AI technology continues to advance at an astonishing pace, the boundaries of what’s possible will only expand, opening up unprecedented avenues for creative expression and visual storytelling. By mastering these expert techniques, you are not just generating images; you are shaping realities, creating visuals that challenge perception, and contributing to the exciting, often complex, future of digital art. So, armed with this comprehensive knowledge, step boldly beyond the prompt, unleash your creativity, and embark on your quest to achieve unparalleled photorealism in your AI art.


Leave a Reply