
Troubleshooting Common Issues with AI Image Generation Tools
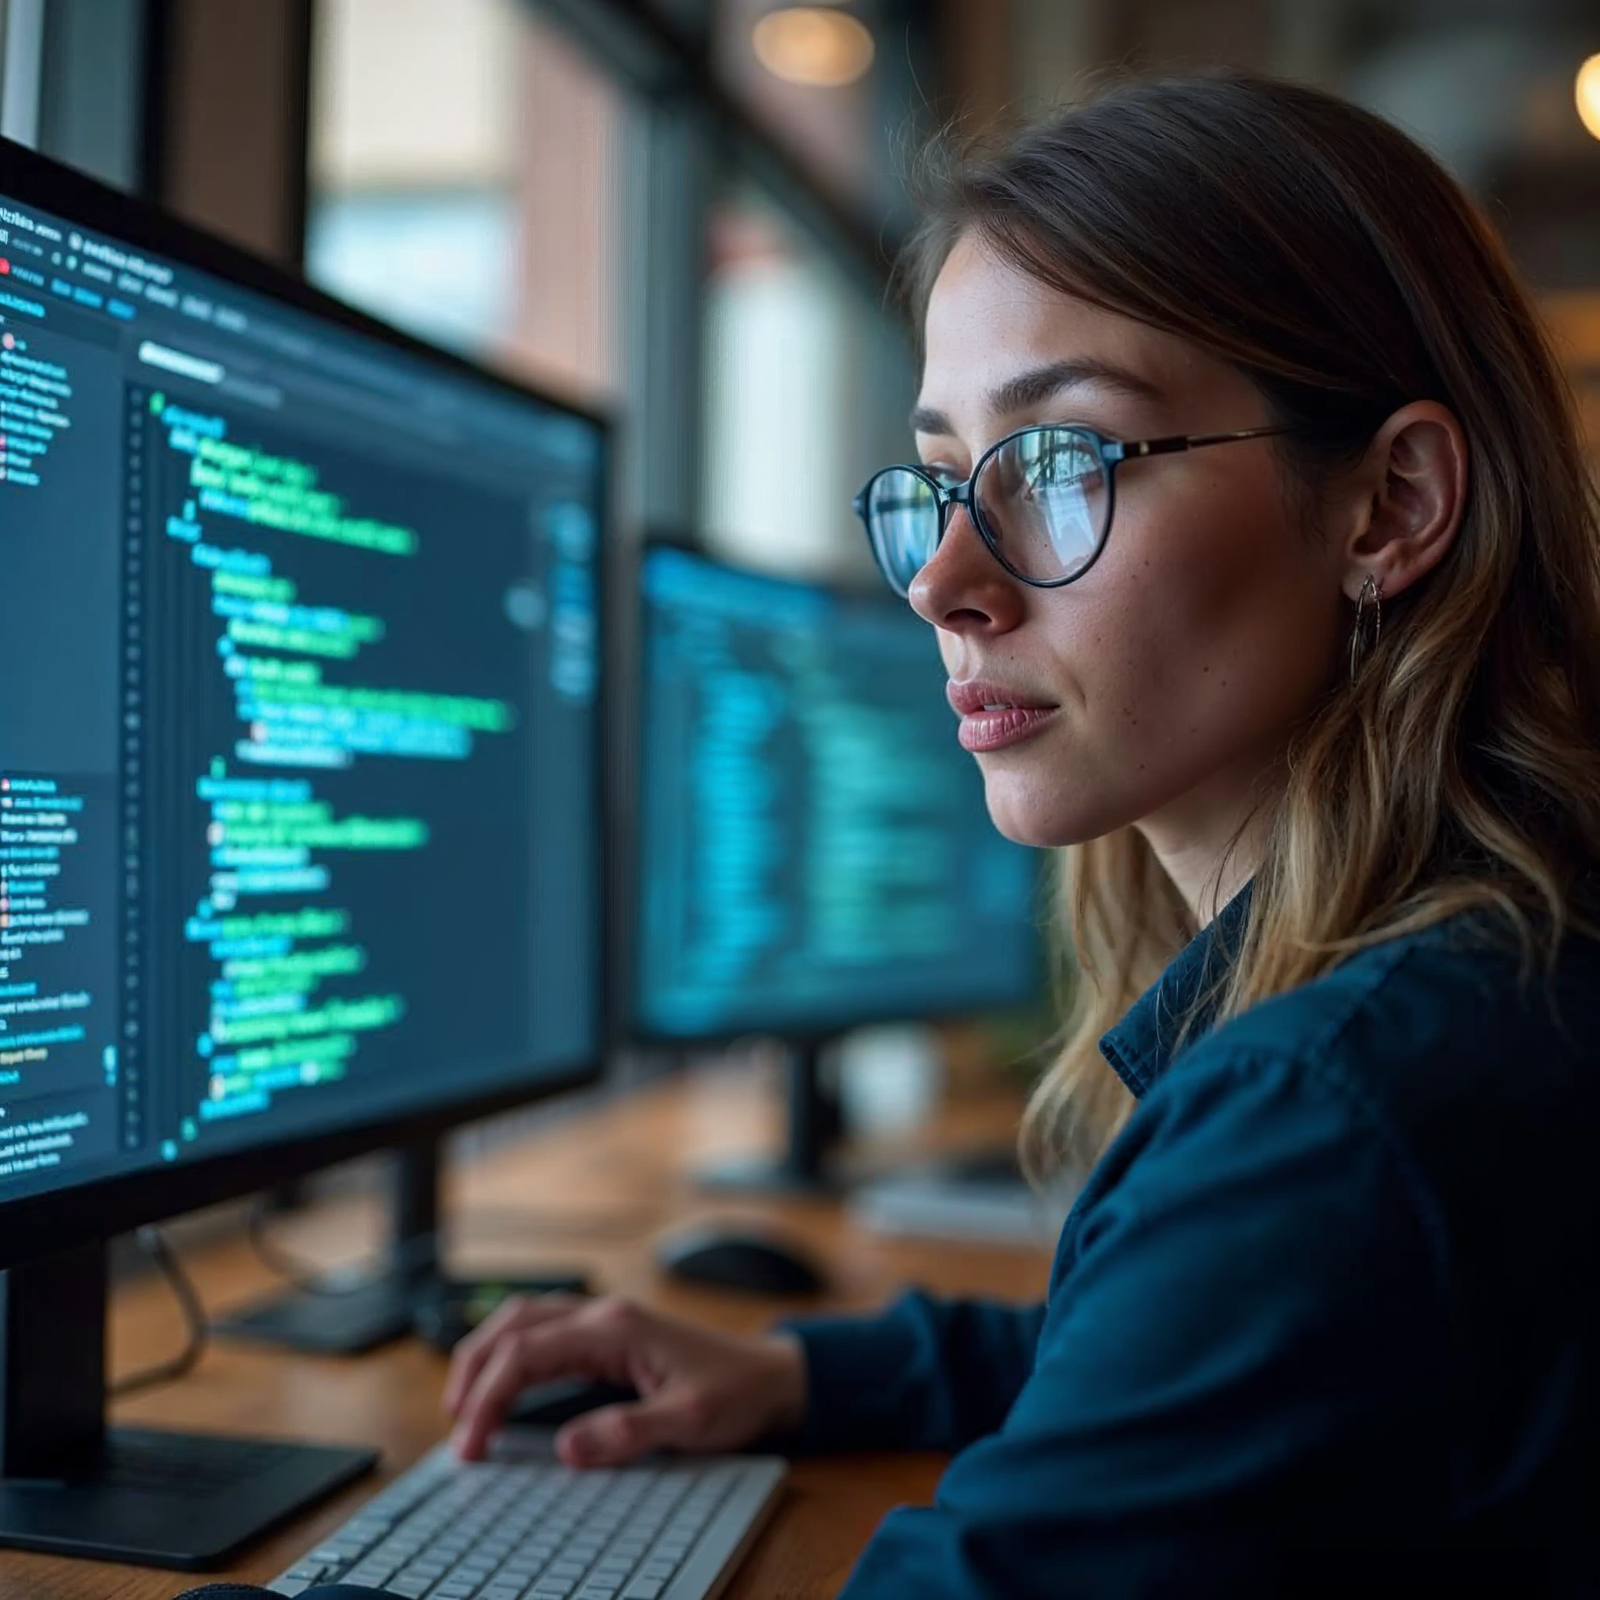
The burgeoning field of Artificial Intelligence image generation has revolutionized creativity, offering unprecedented possibilities to manifest visions into visuals. From Stable Diffusion and Midjourney to DALL-E and numerous specialized tools, artists, designers, and hobbyists alike are leveraging AI to produce stunning imagery. However, despite the rapid advancements and breathtaking results, anyone who has spent significant time with these tools will inevitably encounter a familiar nemesis: image artifacts.
These glitches manifest in various forms, from the subtly uncanny to the downright bizarre. A character might have six fingers, eyes that gaze in different directions, or textures that melt into an abstract mess. Background elements can be repetitive or nonsensical, and text often appears as an illegible scramble of pixels. While initial generations can be frustratingly flawed, the good news is that these aren’t insurmountable obstacles. This comprehensive guide is designed for those ready to move beyond basic prompting and delve into advanced fixes and sophisticated workflows to refine their AI-generated art, transforming rendering glitches into rare occurrences rather than common nuisances.
We will explore the underlying causes of these common rendering glitches, equipping you with the knowledge to diagnose and apply targeted solutions. From mastering the nuances of prompt engineering and understanding model behavior to harnessing the power of ControlNet, inpainting, and advanced upscaling techniques, we will cover a spectrum of strategies. Our goal is to empower you with practical, actionable insights and workflows that elevate your AI image generation quality, allowing you to consistently achieve clean, coherent, and captivating visuals. Prepare to take control of the AI’s creative process and eliminate those pesky artifacts once and for all.
Understanding the Roots of AI Image Artifacts: Why Glitches Occur
Before we can effectively eliminate artifacts, it’s crucial to understand why they appear in the first place. AI image generation models, particularly diffusion models, learn to generate images by “denoising” an initial field of random noise based on the input prompt. This process, while incredibly powerful, is not perfect and relies heavily on the quality and diversity of its training data, as well as the inherent limitations of its architecture. Artifacts are essentially the visible manifestations of these imperfections and uncertainties.
- Training Data Limitations:
- Bias and Imbalance: If the training dataset contains a disproportionate number of images with certain characteristics (e.g., more images of right hands than left hands in specific poses), the model might struggle to generate underrepresented features accurately. This often leads to anatomical deformities like extra fingers, fused limbs, or distorted facial features.
- Lack of Specificity: The model might not have seen enough examples of very specific or niche concepts, leading to generic or blended representations when prompted for them.
- Model Misinterpretation and Latent Space Ambiguity:
- Prompt Overlap: When multiple concepts in a prompt have overlapping representations in the latent space, the model might struggle to differentiate them, leading to blended or contradictory elements.
- Latent Space “Noise”: The diffusion process operates in a high-dimensional latent space. Sometimes, the path through this space, guided by the prompt, might pass through regions that lead to unstable or incoherent visual information.
- Semantic Gaps: AI understands concepts numerically, not semantically like humans. A subtle nuance in a prompt might be entirely missed or misinterpreted, resulting in an unintended visual outcome.
- Sampling Errors and Insufficient Steps:
- Sampler Choice: Different samplers (e.g., DPM++ SDE Karras, Euler A) have distinct algorithms for navigating the latent space. Some are faster but can introduce more artifacts, especially at lower step counts, while others are slower but yield cleaner results.
- Insufficient Steps: The number of sampling steps dictates how many iterations the model takes to refine the image from noise. Too few steps can lead to under-processed, blurry, or noisy images, often exhibiting color banding or a lack of fine detail. Too many steps can sometimes lead to “fried” or over-processed effects, especially with certain CFG scales.
- CFG Scale Mismanagement:
- The Classifier-Free Guidance (CFG) scale determines how strongly the model adheres to your prompt. A very low CFG might result in an image that ignores your prompt and looks generic, while a very high CFG can make the image “overthink” the prompt, leading to oversaturated colors, harsh contrasts, and distorted features, often referred to as “fried” images.
- Resolution and Aspect Ratio Issues:
- Generating images at resolutions far outside the model’s optimal training resolution (e.g., very high or very wide/tall aspect ratios) can lead to repetitive patterns, duplicated objects, or hallucinations as the model tries to fill in unfamiliar territory.
Common types of artifacts include: anatomical deformities (e.g., disfigured hands, mismatched eyes, strange limbs), unnatural textures (e.g., melted objects, smeared surfaces, excessive noise), blurry or inconsistent details (e.g., vague faces, indistinct background elements), text glitches (illegible characters, strange symbols), repetitive patterns, and color banding. Recognizing these patterns is the first step toward applying the correct advanced fix.
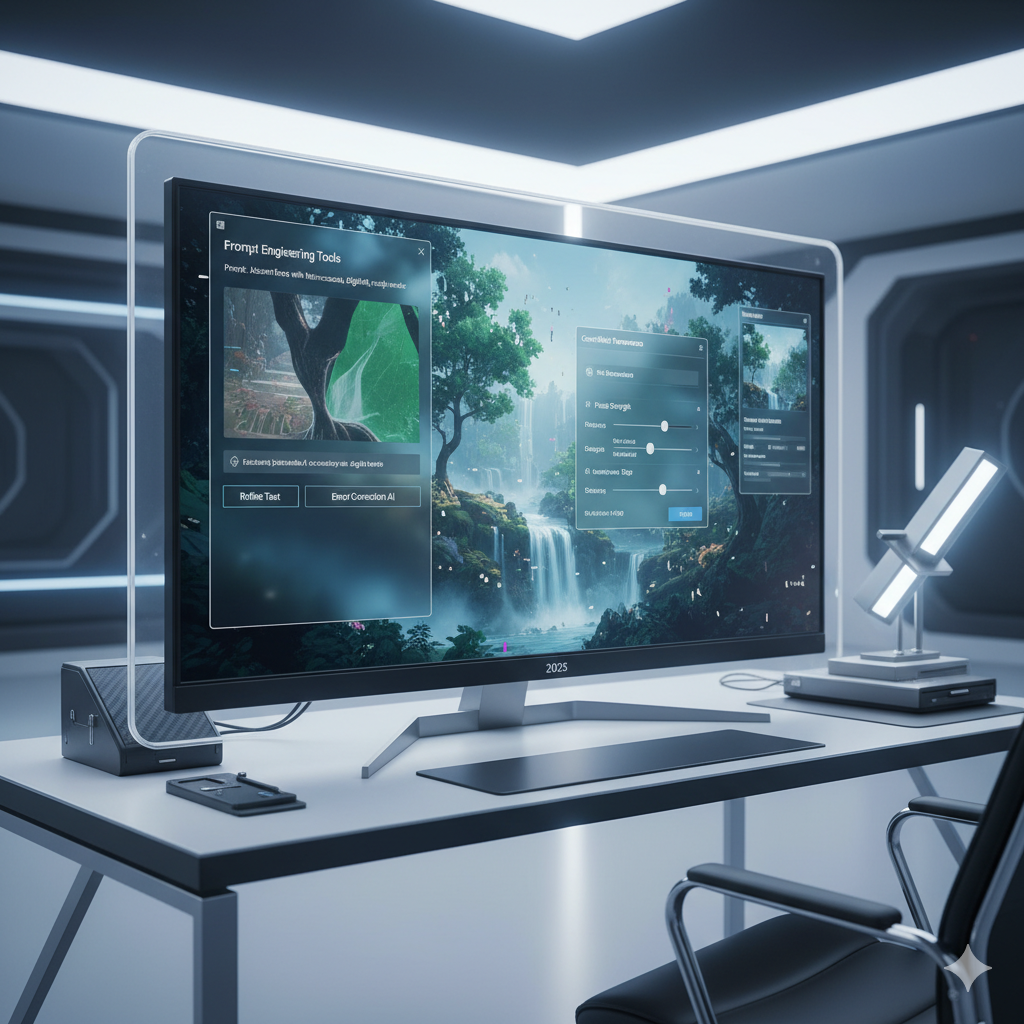
The Power of Precision Prompt Engineering: Beyond Simple Keywords
Effective prompting is the cornerstone of great AI art, and advanced prompt engineering is your first line of defense against artifacts. It’s not just about what you say, but how you say it, what you tell the AI not to say, and how you guide its focus.
- Mastering Negative Prompts: The Art of Omission
A negative prompt tells the AI what *not* to include or generate. This is incredibly powerful for artifact reduction. Instead of a minimalist negative prompt like “bad art,” adopt a comprehensive list. Common effective negative prompts include:
(deformed, distorted, disfigured, poor quality, bad anatomy, ugly, tiling, cropped, low resolution, low quality, worst quality, out of frame, blurry, blurred, watermark, signature, text, error, extra digits, fewer digits, missing fingers, extra fingers, six fingers, extra limbs, extra arms, extra legs, fused fingers, too many fingers, missing arm, missing leg, malformed limbs, disfigured, mutant, mutated, gross proportions, malformed, (bad hands), (bad face), (bad eyes))
Customize this list based on recurring issues. For instance, if you’re generating landscapes, you might add “watermark, text, signature” but remove hand-related terms. Always experiment to see what works best for your specific model and desired output.
- Weighted Prompts: Guiding AI’s Attention
Most advanced AI tools allow you to assign weights to specific terms within your prompt. This tells the AI how much emphasis to place on a particular concept. For example,
(beautiful eyes:1.4)will prioritize generating beautiful eyes more thanbeautiful eyesalone. Conversely,(extra fingers: -1.5)in a negative prompt can aggressively suppress finger deformities. Use weights to emphasize crucial details and de-emphasize elements that frequently cause trouble. - Prompt Chaining and Iterative Refinement: The Dialogical Approach
Instead of trying to cram everything into one mega-prompt, consider an iterative approach. Generate an initial image with a simpler prompt focusing on the main subject. Then, use img2img (image-to-image) with a slightly altered prompt to refine specific details. For example, generate a character, then use img2img with a prompt like “intricate jewelry, detailed eyes” and a low denoising strength to add detail without changing the overall composition too much.
- Specificity vs. Generality: Knowing When to Zoom In or Out
Sometimes, being overly specific can confuse the AI or restrict its creativity, leading to odd results. Other times, a lack of detail can lead to generic artifacts. Learn to balance. If you’re getting mangled hands, try explicitly prompting for “perfectly formed hands, realistic fingers, five fingers” in your positive prompt, coupled with strong negative hand prompts. If an object is consistently appearing deformed, try describing its basic shape and material first, then add intricate details in a subsequent img2img pass.
Leveraging Advanced Models and Fine-tuning for Purity
The choice of your base model and any supplementary fine-tuned models (LoRAs, embeddings) plays a pivotal role in artifact generation. Different models excel at different things and have varying tendencies regarding common glitches.
- Understanding Base Models: Strengths and Weaknesses
- Stable Diffusion 1.5/2.1: These are robust general-purpose models. SD1.5 is renowned for its vast range of styles and flexibility, but can be prone to anatomical errors, especially with hands and eyes, if not guided carefully. SD2.1 offers improved realism but can sometimes be harder to prompt for specific artistic styles.
- SDXL (Stable Diffusion XL): A significant leap forward, SDXL boasts a much larger architecture, leading to superior image quality, better composition, and often fewer anatomical issues right out of the box, particularly with hands and text. It understands prompts more effectively and generates more coherent images. It’s often the first choice for minimizing artifacts.
- Midjourney: While a closed-source platform, Midjourney’s iterative versions (v5, v6, v6.1) have dramatically improved artifact handling, especially for human anatomy and consistency. Understanding its specific prompting style and parameters is key.
- Fine-tuned Models (Checkpoints, LoRAs, Textual Inversions): Specialized Solutions
Fine-tuned models (often called checkpoints) are base models that have undergone additional training on specific datasets, making them proficient in certain styles (e.g., anime, photorealism, fantasy art). Using a fine-tuned model specifically trained on high-quality art of human figures will inherently produce better anatomy than a general-purpose model.
- LoRAs (Low-Rank Adaptation): These are small, plug-and-play files that modify a base model’s behavior for specific styles, characters, or objects without retraining the entire model. Many LoRAs exist specifically to improve aspects like “realistic hands,” “detailed eyes,” or “consistent character design.” Incorporating a well-regarded anatomical LoRA can significantly reduce deformities.
- Textual Inversions (Embeddings): Similar to LoRAs, these allow you to teach the model a new concept or style using a few example images. If you frequently generate specific objects that always appear distorted, training a textual inversion for them can help.
Experiment with different community-created models and LoRAs. Platforms like Civitai host thousands of these resources, often with detailed descriptions of their strengths and weaknesses regarding artifacts.
- Model Merging: Combining Strengths
Advanced users can merge different fine-tuned models to combine their strengths. For instance, you might merge a model known for its stunning landscapes with another known for its exceptional character rendering. This requires a good understanding of the merging process and potential conflicts, but it can lead to unique models perfectly tailored to your needs, often with fewer artifactual tendencies for specific subjects.
Mastering Samplers, Steps, and Seeds for Flawless Generation
Beyond prompts and models, the technical parameters of the diffusion process itself offer significant control over artifact reduction.
- Sampler Selection: The Denoising Algorithm Matters
The sampler dictates how the AI moves from noise to image. Different samplers have distinct properties:
- DPM++ SDE Karras (and variations like 2M Karras, 3M SDE Karras): Often considered top-tier for generating high-quality, detailed images with good coherence. They generally produce fewer artifacts and handle complex scenes well, though they can be slower.
- Euler A: Fast and creative, but can be inconsistent and prone to blurriness or noise, especially at lower step counts. Good for initial exploration, not typically for final, artifact-free images.
- DDIM, PLMS: Older, generally less effective at reducing artifacts compared to newer DPM++ variants.
- Restart/Ancestral Samplers (e.g., DPM++ 2M A Karras): These introduce a small amount of noise at each step, which can help with detail and avoid “plastic” look, but might also occasionally introduce subtle artifacts if not balanced with steps and CFG.
For artifact reduction, prioritize DPM++ SDE Karras or its variants. Experiment to find the one that best suits your model and subject.
- Sampling Steps: Finding the Sweet Spot
The number of sampling steps defines the refinement iterations. Too few (e.g., 10-20) will result in unfinished, noisy, or blurry images prone to color banding. Too many (e.g., 100+) often provide diminishing returns in quality and can sometimes introduce subtle “fried” effects or excessive detail that looks unnatural, especially if the CFG is high. A typical range for good results is 30-60 steps for DPM++ samplers. For Euler A, you might need more steps (60-90) to achieve comparable clarity, but it might still struggle with coherence.
- CFG Scale: Balancing Adherence and Creativity
As mentioned earlier, the CFG scale guides the AI’s adherence to your prompt. For most photorealistic generations, a range of 5-9 is common. For more artistic or abstract styles, you might go higher. If you observe oversaturation, harsh lines, or distorted features (the “fried” look), try lowering your CFG scale. Conversely, if your image is too generic or ignores prompt details, slightly increase it.
- Seeds: Exploring Variations and Reproducibility
The seed is the initial random noise pattern from which the image generation begins. Using the same seed, prompt, model, and parameters will produce the exact same image. This is vital for reproducibility and for iterative refinement. If you generate an image with minor flaws but a good overall composition, note its seed. You can then use that seed with slight prompt modifications, lower denoising strength in img2img, or different ControlNet models to fix specific issues while preserving the general structure.
- Denoising Strength (for Img2Img): Subtle Transformation
When using img2img, denoising strength dictates how much the input image is changed. A low denoising strength (e.g., 0.2-0.5) will make subtle changes, ideal for fixing small artifacts without altering the core image. A high denoising strength (e.g., 0.7-1.0) will drastically transform the image, effectively generating a new image based on the input as a stylistic reference. For artifact correction, always start with lower denoising strengths and incrementally increase if needed.
Inpainting, Outpainting, and Iterative Refinement Workflows
Even with the best prompts and parameters, some artifacts will slip through. This is where inpainting and outpainting become indispensable tools in your artifact elimination arsenal.
- Inpainting: Surgical Precision for Flawed Areas
Inpainting allows you to select a specific area of an image and regenerate only that section, leaving the rest untouched. This is perfect for fixing:
- Distorted hands or feet: Mask the problematic limb, provide a specific prompt for a “perfect hand, five fingers, realistic texture,” and regenerate.
- Uncanny faces or eyes: Mask the face/eyes, prompt for “beautiful detailed face, expressive eyes, symmetrical,” and regenerate. You can even use a specific LoRA for faces during the inpainting step.
- Distracting background elements: Mask the unwanted object and prompt for “empty wall” or “blurred background” to remove it subtly.
- Illegible text: Mask the garbled text and prompt for “smooth wall” or “blank sign” to replace it with a clean surface, then add new text manually in post-processing.
Key to successful inpainting is using a relatively low denoising strength (0.4-0.7) and a very specific prompt for the masked area. Some interfaces offer an “inpaint mask only” option, which focuses the generation purely on the masked area, often yielding better results.
- Outpainting: Expanding and Fixing the Edges
Outpainting extends your canvas beyond the original image, generating new content that seamlessly blends with the existing artwork. While primarily used for expanding images, it can also subtly fix artifacts near the edges or resolve compositional issues. If an object is cut off oddly or has a strange border artifact, outpainting can intelligently fill in the missing parts or blend the edges more naturally.
- Iterative Refinement Workflows: The Power of Step-by-Step Improvement
Rarely does a perfect image come from a single generation. Embrace an iterative workflow:
- Initial Generation: Create a batch of images with your primary prompt and parameters.
- Select Best Base: Choose the image with the strongest composition and fewest major flaws.
- Address Major Artifacts (Img2Img): Use the selected image as input for img2img. Make subtle prompt adjustments, use a low denoising strength, and target specific problem areas. For example, if the entire image is too grainy, use a negative prompt for “grainy, noisy” with low denoising.
- Inpainting for Detail Fixes: For precise corrections (hands, eyes, small object distortions), use inpainting on the refined image.
- Upscale and Enhance: Once satisfied with the composition and detail, move to upscaling.
This systematic approach breaks down complex artifact fixing into manageable steps, making the process more efficient and effective.
Harnessing ControlNet for Structural Integrity and Detail
ControlNet is perhaps the most transformative advancement for managing and eliminating structural and anatomical artifacts. It allows you to guide the AI’s generation process using an input image (the “control map”) that dictates composition, pose, depth, edges, or other structural information. By providing structural guidance, you drastically reduce the AI’s propensity to hallucinate distorted forms.
Here are some key ControlNet models and their applications for artifact remediation:
- OpenPose: For Anatomical Accuracy
This is a game-changer for human and animal figures. You provide a stick-figure pose (either manually drawn or extracted from an existing image/video), and ControlNet ensures the generated character adheres to that pose. This virtually eliminates issues like extra limbs, contorted bodies, and drastically improves hand and finger accuracy, especially when combined with strong negative prompts for hands. Use it for characters, realistic scenes, and any scenario where anatomical consistency is critical.
- Canny / Lineart / Softedge (HED): For Precise Edges and Structure
These models extract edge information from an input image.
- Canny: Provides strong, precise edge detection, ideal for maintaining the exact shape and outline of objects. Use it when an object consistently appears “melted” or loses its defined form.
- Lineart: Specializes in extracting clean line art, excellent for transforming sketches into detailed renders while preserving the original drawing’s structure.
- Softedge (HED): Detects softer, more natural edges than Canny, resulting in a less rigid structure. Great for organic forms, clothing, or when you want some artistic freedom within the structural guidance.
By feeding these edge maps, you prevent the AI from generating wobbly lines, inconsistent shapes, or objects that lack defined boundaries.
- Depth: For Consistent Spatial Relationships
Depth maps provide information about the distance of objects from the camera. Using a depth map ensures that the spatial arrangement and perspective of elements in your scene are consistent, reducing instances of objects floating unnaturally or having illogical scale relative to each other. This helps prevent strange compositional artifacts and improves realism.
- Reference Only: For Style and Detail Consistency
While not directly preventing structural artifacts, “Reference Only” ControlNet allows you to feed a reference image to guide the style, color palette, or even specific details (like texture patterns) in your generated image. This can help reduce stylistic inconsistencies and ensure details are rendered in a desired manner, preventing the AI from introducing its own “noisy” interpretations.
- Tile / Upscale: For High-Resolution Detail Without Artifacts
This ControlNet model is invaluable for upscaling. Instead of generating a large image directly (which can lead to repetitive patterns or distortions), you can generate a smaller image and then use the ControlNet Tile model during the upscaling process. It breaks the image into tiles, processes each one, and then stitches them back together, effectively maintaining detail and consistency across high resolutions without introducing new artifacts.
The strength of ControlNet lies in its modularity. You can often use multiple ControlNet models simultaneously (e.g., OpenPose for character pose and Canny for a precise architectural element) to achieve extremely specific and artifact-free results.
Post-Processing: The Final Polish and Artifact Cleanup
Even after employing all the advanced AI-native techniques, a final touch-up in traditional image editing software can elevate your work and eliminate any residual, stubborn artifacts. Think of this as the master painter’s final brushstrokes.
- External Image Editors: Your Digital Darkroom
Tools like Adobe Photoshop, GIMP, Krita, or Affinity Photo are indispensable for the last mile of artifact removal and enhancement.
- Manual Fixes for Persistent Flaws:
- Liquify Tool: For slight anatomical distortions (e.g., a slightly misaligned eye, a finger that’s almost right but needs a nudge), the liquify tool can non-destructively push and pull pixels to correct the form. This is much faster than repeated inpainting.
- Clone Stamp & Healing Brush: These are your best friends for removing small blemishes, stray pixels, duplicated elements, or seamlessly extending textures. If a texture is slightly repetitive, clone stamp can break the pattern.
- Dodge & Burn: For refining lighting and shadows that might contribute to an artifact’s appearance or make an area look flat.
- Noise Reduction and Sharpening: Balancing Detail
- Noise Reduction: AI-generated images can sometimes have a subtle digital noise or grain. Applying a gentle noise reduction filter can smooth out these minor artifacts without losing detail. Be cautious not to overdo it, as excessive noise reduction can make images look plastic or blurry.
- Sharpening: Conversely, some areas might appear slightly soft or lacking crispness. Selective sharpening can bring out details, but again, use it sparingly. Uncontrolled sharpening can introduce halos or exacerbate existing digital artifacts.
- Color Correction and Grading: Harmonizing the Image
Sometimes, what appears to be a subtle color artifact (e.g., banding or slightly off-tones) can be fixed with proper color correction. Adjusting curves, levels, and color balance can harmonize the entire image, making any lingering minor artifacts less noticeable and enhancing the overall aesthetic.
Post-processing isn’t a substitute for good AI generation techniques, but rather a powerful complement. It allows for the final, precise adjustments that transform a great AI image into a truly polished and professional piece of art.
Advanced Upscaling and Detail Restoration
Upscaling is not just about making an image bigger; it’s about intelligently adding detail and refining textures at higher resolutions, often a critical step in fully eradicating subtle artifacts.
- Latent Upscaling (Hi-res Fix): Native AI Upscaling
Many modern AI image generation tools include native upscaling methods, often called “Hi-res fix” or “Latent Upscale.” This involves generating a low-resolution image, then using an internal AI upscaler (often another diffusion pass) to upscale it while adding detail. The key benefit is that it upscales in the latent space, meaning it’s less prone to the pixelation and repetitive patterns that traditional upscaling methods might introduce. When using Hi-res fix, you control the denoising strength, which determines how much new detail is generated versus simply scaling up existing pixels. A moderate denoising strength (0.4-0.6) is often ideal for adding detail without completely altering the image.
- Dedicated AI Upscalers: Super-Resolution Models
For the highest quality upscaling, dedicated AI upscaling models are often superior. These models are specifically trained for “super-resolution” tasks:
- ESRGAN / Real-ESRGAN: These are highly popular and effective models that use Generative Adversarial Networks (GANs) to upscale images, hallucinating realistic textures and details. They are excellent at making blurry areas sharp and adding convincing fine textures, often effectively masking minor artifacts.
- SwinIR: Another state-of-the-art model known for its performance in various image restoration tasks, including super-resolution. It tends to produce very clean and natural-looking upscales.
- Topaz Gigapixel AI: A commercial solution that offers exceptional upscaling capabilities with various AI models tuned for different image types (e.g., faces, art, low-res photos). It excels at preserving and enhancing details while suppressing noise and blur.
These dedicated upscalers can often clean up remaining noise, sharpen slightly blurry areas, and add a layer of detail that makes any lingering artifacts less apparent or entirely vanish.
- Upscale Pipelines with ControlNet Tile:
As mentioned in the ControlNet section, using the ControlNet Tile model in conjunction with an upscaling script (like the in-built Upscale/Redraw in Automatic1111) is a powerful technique. You provide your lower-resolution image, set the desired upscale factor, and use ControlNet Tile to guide the process. The image is broken into tiles, each is upscaled with AI, and then stitched back. This prevents the “repetitive pattern” artifact often seen when a diffusion model tries to generate very high-resolution images from scratch or if a regular upscaler struggles with complex textures. It ensures consistency across the entire large image.
The choice of upscaling method depends on the nature of the image and the specific artifacts you are trying to address. Often, a combination (e.g., latent upscaling first for a subtle detail pass, followed by a dedicated AI upscaler like Real-ESRGAN for maximum sharpness and detail) yields the best results.
Comparison Tables
To help you navigate the vast array of tools and techniques, here are two comparison tables illustrating specific strategies for artifact remediation and advanced upscaling.
| Artifact Type | Recommended ControlNet Model | Key Benefit | Best Use Case |
|---|---|---|---|
| Distorted Human/Animal Anatomy (hands, limbs, posture) | OpenPose | Guides AI with precise skeletal structure, preventing unnatural poses and improving limb accuracy. | Character art, realistic scenes with figures, dynamic action shots. |
| Wobbly/Melted Objects, Inconsistent Edges, Loss of Form | Canny, Lineart, Softedge (HED) | Enforces sharp (Canny/Lineart) or softer (Softedge) edge detection, maintaining object contours and structural integrity. | Architecture, product design, vehicles, transforming sketches, objects with clear outlines. |
| Inconsistent Spatial Relationships, Floating Objects, Poor Perspective | Depth | Provides a sense of distance and dimension, ensuring objects are correctly placed in 3D space relative to each other. | Landscapes, interior scenes, complex compositions with foreground/background elements. |
| Stylistic Inconsistencies, Texture Glitches, Unwanted Details | Reference Only | Guides the AI to match the style, color palette, or specific textures of a reference image, leading to more coherent outputs. | Maintaining character consistency, applying a specific art style, ensuring texture accuracy (e.g., fabric patterns). |
| Repetitive Patterns, Duplicated Elements at High Resolution | Tile / Upscale | Breaks down images into tiles for consistent upscaling, preventing tiling artifacts and maintaining detail across large canvases. | Upscaling large images, creating detailed murals, panoramic scenes without pattern repetition. |
| Technique | Primary Benefit | Potential Drawback | Ideal Scenario |
|---|---|---|---|
| Latent Upscaling (Hi-res Fix) | Adds new, AI-generated detail during upscaling; native to many AI tools; good for fixing latent issues. | Can sometimes introduce new subtle artifacts if denoising is too high; not as sharp as dedicated upscalers. | Early stage upscaling, initial pass before fine-tuning, when you want to refine details from the latent space. |
| Real-ESRGAN / ESRGAN | Excellent for adding realistic texture and sharpness, especially for photorealistic images; strong artifact suppression. | Can sometimes create an “over-sharpened” or “plastic” look if overused; can be compute-intensive. | Final upscaling pass for maximum detail and realism, fixing blurriness, enhancing textures. |
| SwinIR | Produces very clean and natural upscales, particularly good at handling image noise and preserving fine structures. | Might not introduce as much “hallucinated” detail as GAN-based upscalers; less widely integrated into GUIs. | When naturalness and artifact-free upscaling are prioritized over aggressive detail generation; general image restoration. |
| Topaz Gigapixel AI (Commercial) | Offers multiple AI models optimized for different content types (faces, landscapes, etc.); highly customizable. | Paid software; can be resource-intensive; learning curve for optimal model selection. | Professional use, large-scale projects requiring diverse upscaling needs, when maximum control and quality are paramount. |
| ControlNet Tile Upscale Pipeline | Prevents tiling artifacts and maintains global consistency during high-resolution upscaling by processing in sections. | Requires ControlNet setup and understanding; can be slower due to iterative tiling process. | Upscaling images to extremely high resolutions (e.g., 4K, 8K, or print-ready sizes), avoiding repetitive patterns. |
Practical Examples: Real-World Artifact Remediation
Let’s walk through a few common scenarios and demonstrate how to apply these advanced fixes.
Case Study 1: Fixing a Mangled Hand with OpenPose and Inpainting
Problem: You’ve generated a stunning portrait of a character, but one of their hands is visibly distorted with too many fingers and an unnatural shape.
- Identify the Root Cause: AI models struggle with hands due to complex anatomy and varied training data.
- Initial Fix (ControlNet OpenPose):
- Go back to your base image or generate a new one with a similar prompt.
- Before generation, enable ControlNet and select the OpenPose model.
- As the ControlNet input, you can either:
- Use an OpenPose editor to draw a stick figure with a perfectly formed hand pose.
- Find a reference image of a hand in the desired pose and extract its OpenPose map.
- Set the ControlNet weight appropriately (e.g., 0.8-1.0) and generate. This should yield a more anatomically correct hand.
- Refinement (Inpainting):
- Even with OpenPose, minor imperfections can remain. Load the OpenPose-corrected image into your inpainting tool.
- Carefully mask just the problematic hand area.
- In the inpainting prompt, be highly specific:
"perfectly formed hand, five fingers, realistic skin texture, intricate details, natural shadow". - Add strong negative prompts related to hands:
"bad hand, distorted fingers, extra fingers, malformed hand". - Set a moderate denoising strength (e.g., 0.5-0.6) and regenerate the masked area. Generate a few variations until you find the best one.
- Final Polish (Post-Processing):
- Open the image in Photoshop/GIMP.
- Use the Liquify tool for any microscopic adjustments to finger alignment.
- Apply the Healing Brush or Clone Stamp tool to blend skin textures or remove any minor blemishes introduced by inpainting.
Case Study 2: Resolving Blurry Faces and Inconsistent Details
Problem: You’ve generated a beautiful scene, but the character’s face is slightly blurry, and their eyes lack detail, appearing somewhat lifeless.
- Identify the Root Cause: Insufficient detail resolution in the initial pass, or the model struggled with fine facial features.
- Model/LoRA Selection:
- If not already, ensure you are using a base model or a specific LoRA known for producing high-quality faces (e.g., a photorealistic checkpoint or an “eye detail” LoRA).
- Refinement (Inpainting with High-Detail Checkpoint/LoRA):
- Load your image into the inpainting interface.
- Carefully mask the character’s face (or just the eyes if only they are problematic).
- In your prompt, specify:
"hyper detailed face, expressive eyes, clear pupils, sharp focus, natural skin texture, delicate eyelashes". - Temporarily switch to a highly detailed, photorealistic checkpoint or enable a specific facial LoRA for this inpainting step, if your primary model isn’t specialized for faces.
- Use a moderate to high denoising strength (e.g., 0.6-0.8) to allow for significant regeneration of facial features.
- Generate several inpainting variations.
- Advanced Upscaling for Sharpness:
- Once the face is improved, upscale the entire image using a dedicated AI upscaler like Real-ESRGAN or SwinIR.
- These upscalers will add an extra layer of sharpness and detail to the entire image, making the previously blurry face pop and harmonizing it with the rest of the scene.
- Post-Processing (Optional):
- In Photoshop/GIMP, make minor adjustments to contrast, brightness, or color grading to enhance the facial features further.
- A very subtle sharpening filter applied only to the face area can add extra crispness.
Case Study 3: Eliminating Repetitive Patterns in Complex Scenes
Problem: You’ve generated a sprawling cityscape, but the distant buildings show repetitive window patterns, or a textured wall has an obvious tiling effect.
- Identify the Root Cause: AI struggling with global consistency or filling in large areas when generating beyond its optimal resolution, leading to “tiling.”
- Initial Prevention (Prompt & Parameters):
- Add negative prompts like:
"tiling, seamless, repetitive patterns, duplicated elements". - Ensure your sampler and steps are sufficient (e.g., DPM++ SDE Karras, 40-60 steps) for better coherence.
- Consider generating at a slightly lower base resolution first if the issue persists at higher resolutions.
- Add negative prompts like:
- Advanced Fix (ControlNet Tile Upscale Pipeline):
- Generate your cityscape at a reasonable base resolution (e.g., 768×512 for SD1.5, 1024×768 for SDXL), making sure the overall composition is good.
- Load this image into your upscaling interface (e.g., img2img extras in Automatic1111).
- Select an AI upscaler like Real-ESRGAN or Latent (nearest-exact) for the base upscaling.
- Enable ControlNet and choose the Tile model. Use the generated low-res image as the ControlNet input.
- Set a moderate ControlNet weight (e.g., 0.7-0.9) and a low denoising strength for the upscaling process (e.g., 0.2-0.4). This will guide the upscaler to add new detail without introducing tiling.
- Run the upscale process. The Tile model will ensure that each “tile” of the image is upscaled with awareness of its neighbors, preventing repetition and maintaining global consistency.
- Refinement (Inpainting / Outpainting):
- If any subtle repetitions remain in specific small areas, use inpainting with a very low denoising strength (0.1-0.3) and a descriptive prompt for the correct texture (e.g., “unique architectural details, varied window designs”) to gently rework those areas.
- If the edges still look repetitive, use outpainting to expand the canvas slightly, letting the AI generate new, non-repetitive content.
Frequently Asked Questions
Q: Why do AI models struggle so much with hands and eyes?
A: AI models struggle with hands and eyes primarily because of their intricate and highly variable structures. Hands have numerous small bones, joints, and subtle muscle movements, making them incredibly complex to render accurately in various poses. Similarly, eyes, while smaller, require precise symmetry, reflection, and light interaction to appear natural and expressive. The training data, despite its vastness, might not contain enough perfectly labeled or diverse examples of these features in every conceivable angle and condition for the AI to perfectly generalize. This leads to the model “hallucinating” or blending features, resulting in deformities like extra fingers, fused digits, or uncanny eyes.
Q: Is it always necessary to use negative prompts?
A: While not strictly “necessary” for every single generation, using effective negative prompts is highly recommended for artifact reduction and overall quality improvement. They provide critical guidance to the AI on what to avoid, preemptively addressing common flaws like poor anatomy, low quality, or unwanted stylistic elements. Without them, the AI might default to less desirable outcomes, especially in complex prompts or when generating specific subjects. Think of them as guardrails for your creative process.
Q: How many sampling steps should I use for optimal quality?
A: The optimal number of sampling steps varies depending on the sampler, model, and desired output. For most advanced samplers like DPM++ SDE Karras, a range of 30-60 steps is often sufficient to achieve high quality and minimize artifacts. Beyond this range, you typically see diminishing returns in quality and may even introduce subtle “fried” effects or increased generation time. For faster samplers like Euler A, you might need more steps (e.g., 60-90), but the coherence might still not match DPM++ variants. Always experiment, but start within the 30-60 range for a good balance of speed and quality.
Q: What is the CFG scale, and how does it affect artifacts?
A: The CFG (Classifier-Free Guidance) scale determines how strictly the AI model adheres to your prompt. A higher CFG scale means the AI will try harder to match your prompt, leading to more “opinionated” and often more detailed results. However, if too high (e.g., above 10-12 for photorealism), it can lead to artifacts like oversaturation, harsh contrasts, exaggerated features, or the “fried” look, where the image appears over-processed and distorted. A lower CFG (e.g., 3-5) might result in images that stray from your prompt but are often softer and less prone to aggressive artifacts. For artifact reduction, a balanced CFG scale (typically 5-9 for most generations) is crucial.
Q: Can ControlNet really fix bad anatomy consistently?
A: Yes, ControlNet, especially with the OpenPose model, is incredibly effective at fixing bad anatomy consistently. By providing explicit skeletal guidance, you remove the AI’s need to “guess” the pose, forcing it to adhere to a structurally sound figure. While it might not solve every single finger issue perfectly in one go, combining OpenPose with targeted negative prompts and subsequent inpainting for fine details dramatically increases the consistency and accuracy of human and animal anatomy, making it one of the most powerful tools for this specific type of artifact.
Q: When should I use inpainting versus simply regenerating the entire image?
A: Use inpainting when the majority of your image is good, and only specific, localized areas have artifacts (e.g., a hand, an eye, a small background element). It’s a precise, efficient way to surgically fix flaws without altering the overall composition, lighting, or style of the rest of the image. You should regenerate the entire image if the core composition is fundamentally flawed, if multiple widespread artifacts exist, or if the overall aesthetic is not what you desired. Inpainting is for refinement; full regeneration is for a fresh start.
Q: Are AI upscalers always better than traditional image resizing?
A: Yes, AI upscalers are almost always superior to traditional image resizing methods (like bilinear or bicubic interpolation) for enhancing AI-generated images. Traditional methods simply interpolate existing pixels, often resulting in blurriness and pixelation. AI upscalers, particularly those based on GANs (like ESRGAN) or diffusion models, use machine learning to “hallucinate” new details and textures, effectively adding information that wasn’t present in the lower-resolution image. This not only makes the image larger but also sharper, more detailed, and helps to suppress minor artifacts, significantly improving perceived quality.
Q: Can I combine multiple ControlNet models to fix different artifacts at once?
A: Absolutely! Many advanced AI image generation interfaces support running multiple ControlNet models simultaneously. This is a powerful technique for addressing various artifact types in a single generation pass. For example, you could use an OpenPose model to ensure accurate character anatomy, a Canny model to maintain the structural integrity of a building in the background, and a Depth model for consistent perspective – all applied to the same initial image generation. Each ControlNet model acts as an independent “guide” for its specific aspect, working together to produce a more coherent and artifact-free result.
Q: How can I prevent text from appearing as gibberish in my AI images?
A: Preventing gibberish text is one of the more challenging aspects of current AI image generation. Diffusion models are generally not designed for text rendering. However, you can significantly reduce its occurrence:
- Use SDXL: SDXL models are significantly better at generating legible text than SD 1.5/2.1, though still imperfect.
- Keep it Short and Simple: Prompt for very short, common words or single letters.
- Strong Negative Prompts: Include terms like
"text, watermark, signature, error, gibberish, writing, symbols, distorted text". - Dedicated Tools: For critical text, generate the image without any text, then use an external image editor (like Photoshop) to add the desired text manually.
- Inpainting: If minor text appears, you can inpaint over it with a blank surface.
Currently, direct, perfect text generation within AI art is still an area of active research.
Q: My images sometimes have a “plastic” or overly smooth look. How can I fix this?
A: A “plastic” or overly smooth look often results from excessive denoising, too many sampling steps, or certain samplers. To fix this:
- Adjust Denoising Strength (Img2Img): If using img2img, slightly lower the denoising strength.
- Sampler Choice: Experiment with samplers like DPM++ SDE Karras or ancestral samplers (e.g., DPM++ 2M A Karras) which sometimes introduce a natural grain.
- Sampling Steps: Ensure you are not using an excessively high number of sampling steps.
- CFG Scale: A slightly lower CFG scale can make images look more natural.
- Add “Texture” to Prompt: Explicitly add terms like
"detailed skin texture, fabric texture, natural imperfections, subtle grain"to your positive prompt. - Post-processing: Add a very subtle film grain or noise overlay in an external editor.
Key Takeaways
- Artifacts are Inherent but Fixable: AI image generation inherently produces glitches due to data and model limitations, but advanced techniques offer effective solutions.
- Precision Prompting is Paramount: Master comprehensive negative prompts, weighted terms, and iterative prompting to guide the AI away from common flaws.
- Model Choice Matters: Select base models (like SDXL) and use fine-tuned models/LoRAs specialized in the content you’re generating to reduce specific artifacts.
- Optimize Technical Parameters: Carefully choose samplers (DPM++ SDE Karras is often best), set appropriate sampling steps (30-60 is common), and balance the CFG scale (5-9 for realism) to enhance coherence.
- Inpainting and Outpainting for Targeted Fixes: Use these tools for surgical correction of specific flawed areas (hands, faces, small objects) without altering the entire image.
- ControlNet is a Game-Changer: Leverage OpenPose for anatomical accuracy, Canny/Lineart for structural integrity, Depth for spatial consistency, and Tile for artifact-free upscaling. Multiple ControlNets can be used simultaneously.
- Post-Processing for the Final Polish: Traditional image editors are crucial for last-mile artifact removal (Liquify, Clone Stamp), noise reduction, sharpening, and color correction.
- Advanced Upscaling Adds Detail: Utilize latent upscaling or dedicated AI upscalers (ESRGAN, SwinIR) to intelligently add detail and suppress remaining artifacts at higher resolutions.
- Embrace Iteration and Experimentation: The most effective workflow is iterative – generate, identify flaws, apply targeted fixes, and refine. Consistent experimentation is key to mastering artifact elimination.
Conclusion
The journey from a prompt to a perfect image in the realm of AI art is less about a single magical incantation and more about a methodical, multi-layered approach. While the initial thrill of generating something extraordinary with a few words is undeniable, the true mastery of AI image generation lies in the ability to consistently produce high-quality, artifact-free visuals. We’ve explored a deep toolkit, from the subtle art of negative prompting to the structural guidance of ControlNet, the surgical precision of inpainting, and the enhancing power of advanced upscaling.
Remember, AI models are continuously evolving, and so should your techniques. The challenges of today—like perfectly rendered hands or legible text—are the solved problems of tomorrow. By understanding the underlying causes of artifacts and diligently applying the advanced fixes outlined in this guide, you are not just troubleshooting; you are becoming a more skilled director of the AI’s creative process. Embrace the iterative workflow, don’t shy away from complex tools, and always keep experimenting. The power to transform rendering glitches into moments of artistic triumph is now firmly within your grasp. Continue to learn, create, and push the boundaries of what’s possible with AI.


Leave a Reply