
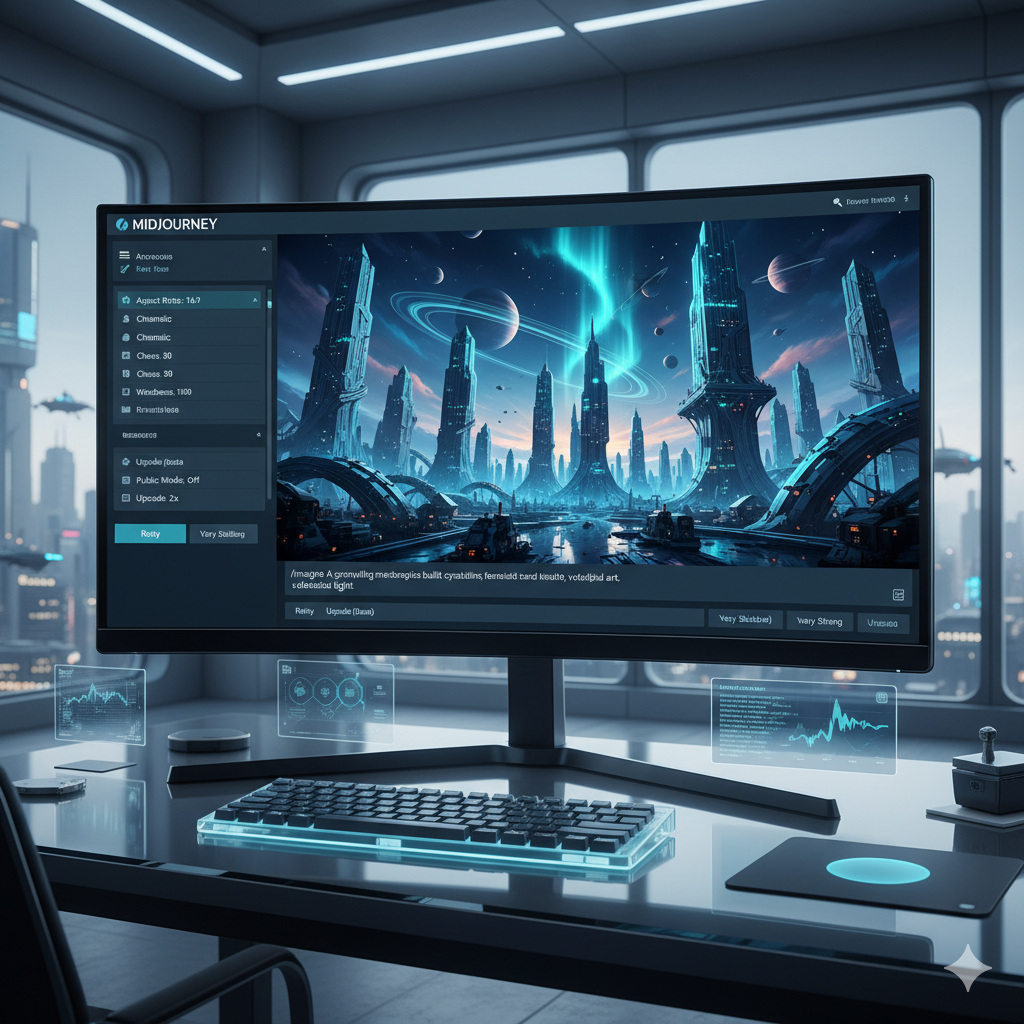
In the rapidly evolving landscape of artificial intelligence, Midjourney has consistently pushed the boundaries of what is possible in image generation. With the advent of Version 6 (V6), the platform has reached an unprecedented level of sophistication, particularly in its ability to render hyperrealistic images. Moving beyond the fantastical and illustrative styles that characterized earlier versions, V6 empowers creators to generate visuals that are indistinguishable from high-quality photographs or meticulously crafted digital art. This comprehensive guide is designed to take you beyond the introductory prompts and basic understanding, delving deep into the nuanced strategies and advanced techniques required to truly master Midjourney V6 for hyperrealistic results. Whether you are aiming for stunning portraits, breathtaking landscapes, intricate product shots, or evocative cinematic scenes, understanding the intricacies of V6 is your key to unlocking a new dimension of creative expression.
Midjourney V6 represents a significant leap forward in AI image synthesis. Previous versions, while impressive, often required a more ‘chatty’ or descriptive prompting style, sometimes leading to interpretations that leaned more artistic than photographic. V6, however, demands a more concise, deliberate, and informed approach to prompting. It understands natural language with greater precision, allowing users to specify minute details that directly impact realism – from the subtleties of lighting and material textures to the precise emotional expressions on a character’s face. This guide will equip you with the knowledge to leverage these advancements, transforming your conceptual ideas into visually stunning, hyperrealistic imagery. We will explore the core enhancements, dissect the art of prompt crafting, demystify advanced parameters, and provide practical examples to elevate your Midjourney workflow.
Understanding Midjourney V6’s Core Enhancements for Realism
Midjourney V6 isn’t just an incremental update; it’s a fundamental architectural shift that redefines how users interact with the AI and, crucially, how the AI interprets and renders prompts for realism. Several core enhancements are paramount to achieving hyperrealistic results, demanding a refined approach from creators.
Native Text Generation
One of the most requested and impactful features introduced in V6 is the ability to generate legible text within images. While not always perfect, especially with complex fonts or long sentences, this capability significantly boosts realism, particularly for scenes involving signage, labels, book titles, or any element that would naturally include text in the real world. Previous versions struggled immensely with text, often producing garbled, nonsensical characters that immediately broke any illusion of reality. V6, however, with careful prompting, can now produce coherent words and phrases. To utilize this effectively for realism, you must enclose the desired text within quotation marks within your prompt. For example, a prompt like “A vintage neon sign above a diner, glowing red letters spelling “EAT” against a rainy street, cinematic, photorealistic” will attempt to render the word “EAT” on the sign, adding a crucial layer of authenticity and detail that was previously unattainable through Midjourney alone. This opens up vast possibilities for advertising, branding, and contextual realism in your generated images.
Improved Coherence and Contextual Understanding
V6 boasts a much deeper understanding of natural language and context, leading to dramatically improved image coherence. It can better grasp complex relationships between objects, actions, and environments described in a prompt. This means less ‘prompt fighting’ – where the AI struggles to reconcile conflicting or complex elements – and more intuitive, logical interpretation. If you describe a ‘person sitting on a park bench under autumn leaves with a dog at their feet, reading a book,’ V6 is far more likely to correctly position the person, the bench, the leaves, the dog, and the book in a coherent, spatially accurate, and visually plausible manner. This enhanced coherence is vital for realism because real-world scenes adhere to physical laws, logical arrangements, and consistent interactions, which V6 now simulates with greater fidelity. This also extends to subtle cues like mood, atmosphere, and even specific photographic styles, which V6 can interpret with remarkable accuracy, ensuring elements are placed convincingly within the overall scene.
Enhanced Detail and Textural Fidelity
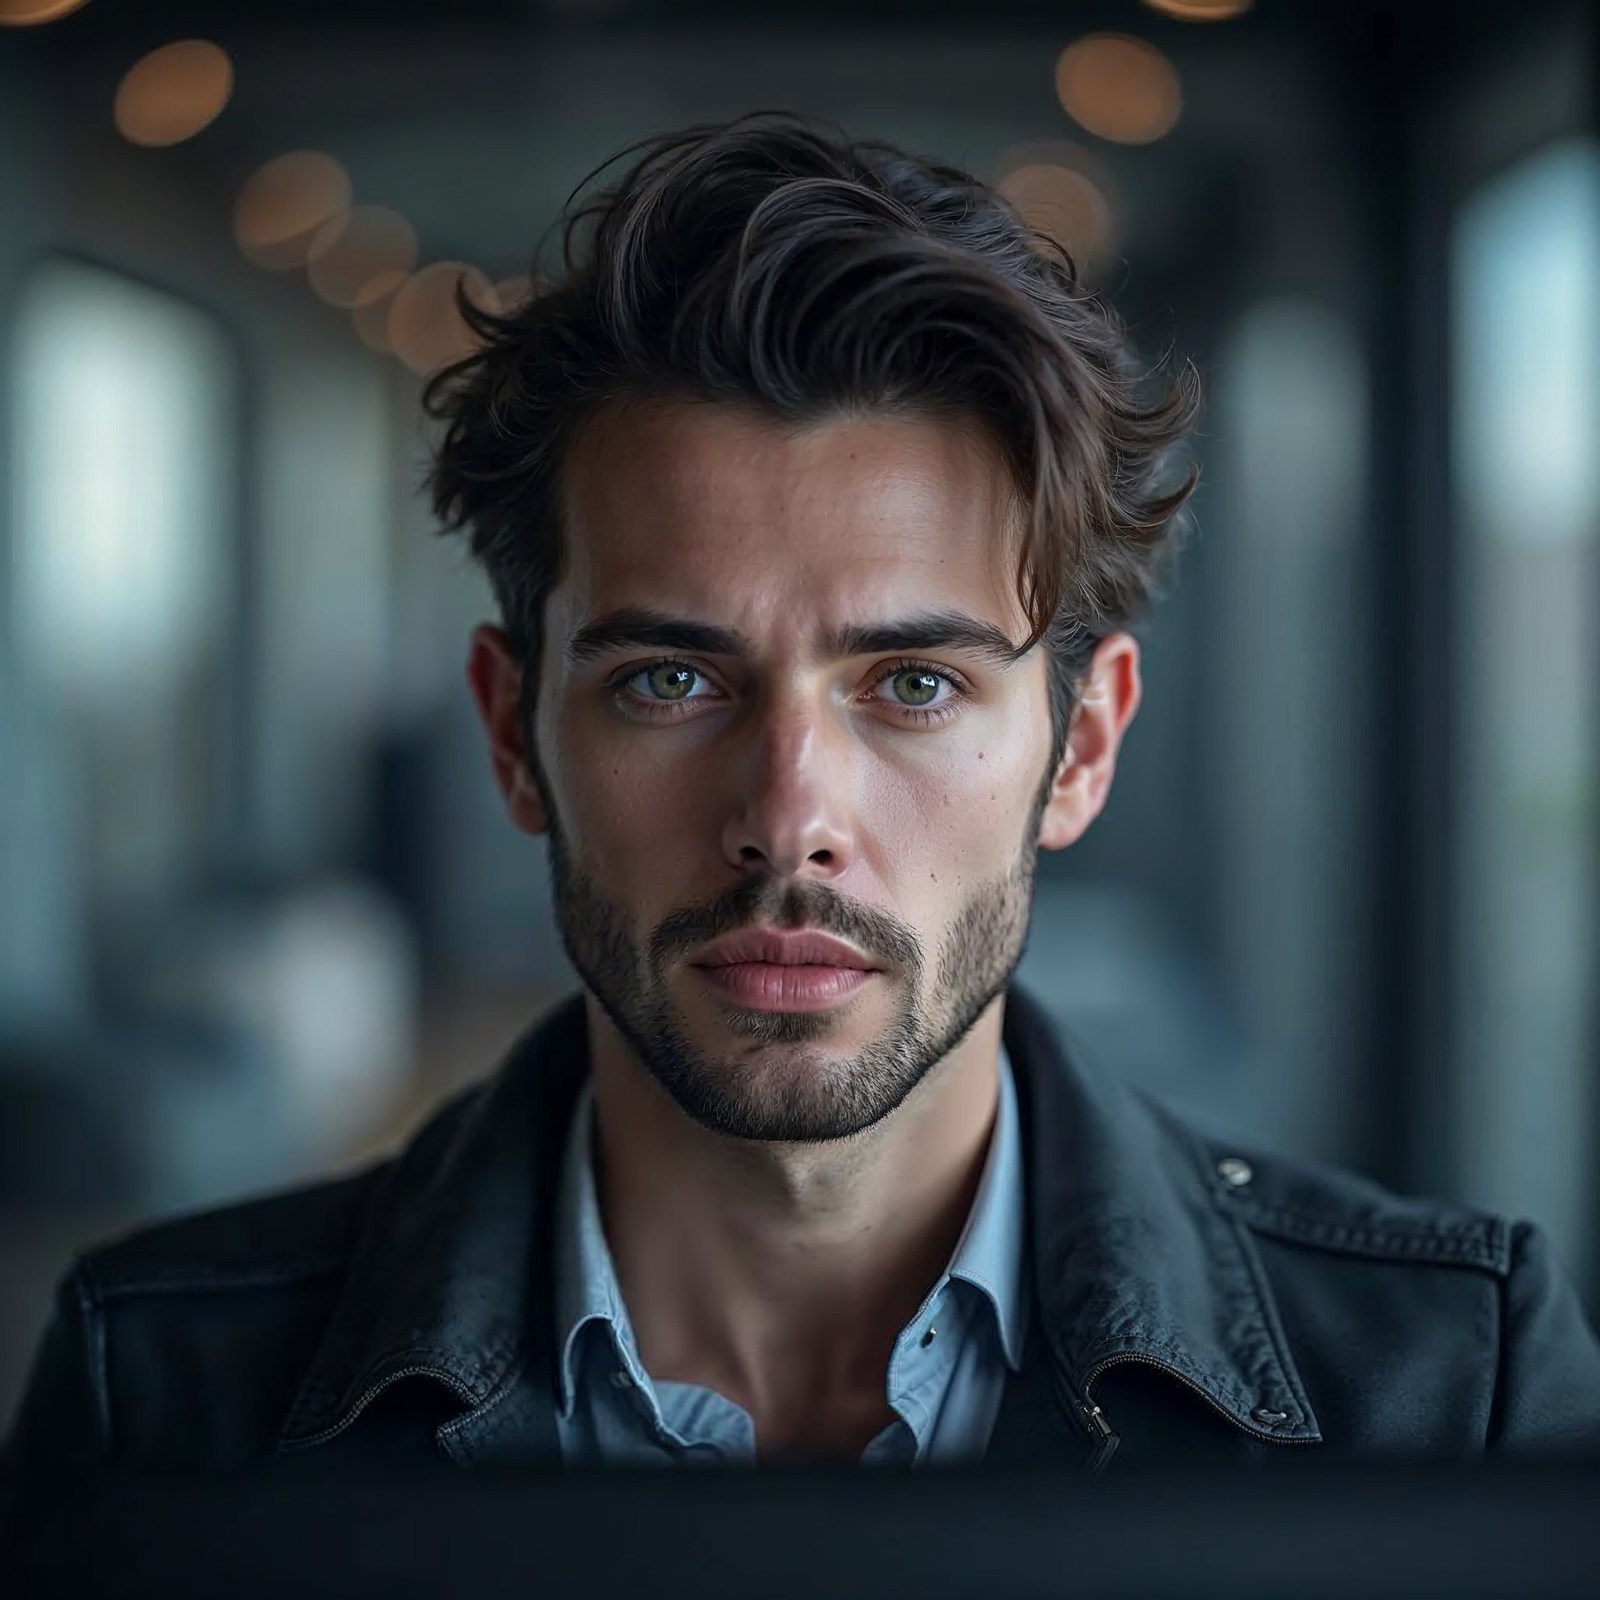
Perhaps the most visually striking improvement in V6 for hyperrealism is its astonishing ability to render intricate details and nuanced textures. From the individual strands of hair on a subject’s head to the minute imperfections on a weathered wooden surface, V6 excels at producing micro-details that contribute significantly to a photorealistic look. Skin textures show pores, subtle blemishes, and natural oil sheen; fabrics display realistic weaves, threads, and folds that react plausibly to light; metallic surfaces exhibit accurate reflections, glints, and signs of wear. This level of textural fidelity is what truly elevates an image from merely ‘good’ to ‘unbelievably real’ and tactile. To maximize this, prompts should include keywords that emphasize detail, such as “ultra-detailed,” “finely textured,” “high resolution,” “photorealistic rendering,” or specific material descriptions like “weathered leather,” “brushed aluminum,” “dew-kissed petals,” “visible skin pores,” and “individual hair strands.” Such explicit descriptions guide the AI to focus on these critical elements that define photographic realism.
New Raw Mode
The introduction of the `–style raw` parameter is a game-changer for those seeking unadulterated realism. By default, Midjourney applies a certain aesthetic ‘style’ to its outputs, often enhancing them with artistic flair, vibrant colors, or a dreamy quality. While beautiful for creative purposes, this default styling can sometimes detract from pure photographic realism, making images appear slightly artificial or “AI-generated.” The `–style raw` parameter instructs Midjourney to produce images with less automatic styling, allowing the prompt to have a more direct and unvarnished influence on the output. This is particularly useful when you want maximum control over the visual characteristics and wish to avoid any artistic interpretations that Midjourney might otherwise inject. Using `–style raw` effectively demands more precise and descriptive prompting, as you are essentially taking on more of the stylistic control yourself, by specifying camera settings, lighting, and explicit details. It’s an excellent choice for mimicking documentary photography, technical renders, or neutral, high-fidelity captures where accuracy is paramount.
Prompting Style Shift for V6
With V6, the optimal prompting style has evolved significantly. Gone are the days of highly descriptive, verbose, and often conversational prompts that worked well in earlier versions. V6 responds best to concise, direct, and intention-focused language. Think of it less like describing a scene to a person and more like providing specific, technical instructions to a highly intelligent camera operator or a meticulous set designer. Focus on key visual elements, desired aesthetics, and technical photographic terms. For instance, instead of “A very happy dog playing fetch in a beautiful park with bright sunlight and green grass and flowers everywhere,” a more effective V6 prompt would be “Golden Retriever, joyful, catching frisbee, motion blur, golden hour lighting, lush park, 85mm lens, f/2.8, cinematic, photorealistic.” This shift requires users to be more intentional with their word choices, prioritizing keywords that convey specific visual attributes, camera settings, and lighting conditions rather than broad narrative descriptions. Less is often more, provided each word carries significant visual weight and specificity.
The Art of Prompt Crafting for Hyperrealism in V6
Crafting prompts for hyperrealism in Midjourney V6 is less about quantity and more about quality and specificity. It’s an art form that combines clear intent with a deep understanding of photographic principles and Midjourney’s interpretative capabilities. The goal is to provide enough detail to guide the AI without over-saturating it with redundant or contradictory information. Every word in your prompt should be purposeful, contributing directly to the hyperrealistic outcome.
Specificity and Granularity: The Devil is in the Details
For truly hyperrealistic images, generic descriptions simply won’t suffice. You need to be granular with your details, painting a vivid mental picture for the AI. Instead of “a flower,” specify “a dew-kissed red rose, velvety petals, water droplets reflecting light, macro shot, soft focus background.” Instead of “a city street,” try “a bustling Tokyo street at night, wet asphalt reflecting vibrant neon signs, light trails from cars, steam rising from grates, cinematic wide shot.” Think about every element that contributes to a real-world scene: the material properties, the surface textures, the environmental conditions (weather, time of day), and the specific characteristics of objects and subjects (age, wear, brand). Use adjectives and nouns that paint a vivid and precise picture. Mention brand names if they are relevant to the authenticity of a product, or specific architectural styles for buildings. The more specific you are, the less Midjourney has to ‘guess,’ leading to more controlled, predictable, and ultimately more realistic outputs. Precision in prompting is directly proportional to precision in rendering.
Avoiding Prompt “Junk” and Over-Description
While specificity is crucial, verbosity is often counterproductive in V6. Avoid repetitive phrases, unnecessary filler words, and overly descriptive prose that doesn’t add new visual information. Earlier versions sometimes benefited from ‘prompt stacking’ or rephrasing concepts multiple times to emphasize them, but V6’s enhanced language understanding makes this redundant and can even dilute your primary intent. Be concise and efficient. Every word should pull its weight and contribute unique information. If a detail isn’t essential for the visual outcome you seek, omit it. For example, instead of “A very beautiful woman with lovely, long, flowing brown hair and sparkling brown eyes, looking directly at the camera with a gentle smile, professional studio lighting, detailed portrait, looking amazing,” try “Studio portrait, captivating woman, mid-30s, long wavy brown hair, warm brown eyes, gentle smile, direct gaze, soft key light, rim light, hyperrealistic, 8K, –ar 2:3.” The latter is more efficient, direct, and less likely to confuse the AI with redundant or vague modifiers, leading to a clearer and more focused interpretation.
Leveraging Compositional Elements
Photography is as much about what’s *in* the frame as it is about *how* it’s framed. Incorporating compositional terms directly into your prompt can dramatically enhance realism, making the image appear like a professionally captured photograph rather than a random AI generation.
- Camera Angles: Specify “low angle shot,” “high angle,” “eye-level,” “worm’s eye view,” “bird’s eye view,” “dutch angle,” “drone shot” to control perspective and narrative impact.
- Framing: Use terms like “close-up,” “medium shot,” “wide shot,” “extreme wide shot,” “full body shot,” “environmental portrait” to define the subject’s prominence and relationship to its surroundings.
- Lenses: Suggest specific lenses to influence depth of field, perspective distortion, and overall aesthetic. Examples include “50mm prime lens,” “85mm portrait lens,” “wide-angle lens (e.g., 24mm),” “telephoto lens (e.g., 200mm),” “macro lens,” “anamorphic lens.”
- Depth of Field: Explicitly ask for “shallow depth of field,” “creamy bokeh background,” “deep depth of field,” “pin sharp foreground, blurry background,” “focus stack.”
- Rule of Thirds / Leading Lines: While Midjourney doesn’t directly understand abstract concepts like “rule of thirds” in a literal, numerical sense, describing compositions that adhere to its principles, such as “subject offset to the left,” “horizon at lower third,” or “road leading into the distance,” can effectively guide it. Similarly, describe “leading lines of a railway track” or “curving river leading to the horizon.”
- Motion: Terms like “motion blur,” “frozen in time,” “long exposure,” “panning shot,” “streaking lights” can add dynamic realism and capture movement.
These elements transform a generic image into a carefully composed photographic work that resonates with real-world photography principles.
Integrating Artistic Styles and References for Realism
Paradoxically, achieving realism often involves specifying a ‘style,’ but not in the sense of abstract art. Instead, think of it as referencing established photographic genres or visual aesthetics. This guides Midjourney towards a particular visual language that reinforces hyperrealism.
- Photorealism Keywords: Explicitly use terms like “photorealistic,” “hyperrealistic,” “ultra-realistic,” “realistic photograph,” “documentary photography,” “high-fidelity render,” “8K,” “16K.”
- Cinematic Aesthetics: For a dramatic, film-like quality, include “cinematic still,” “movie screenshot,” “film grain,” “anamorphic lens flare,” “blockbuster movie scene,” “dramatic lighting.”
- Specific Photographers/Artists (with caution): While not always necessary, referencing a photographer known for their realistic style (e.g., “style of Annie Leibovitz” for dramatic portraits, “style of Ansel Adams” for black and white landscapes) can sometimes guide the AI in terms of composition, lighting, or color grading. However, use this sparingly and test its impact, as V6 prioritizes direct, explicit prompts over vague style references.
- Lighting Styles: Be very specific about lighting. Use terms like “Studio lighting,” “natural light,” “golden hour,” “blue hour,” “rim lighting,” “softbox lighting,” “hard light,” “chiaroscuro,” “specular highlights,” “volumetric lighting.”
- Post-processing effects: While you don’t ‘edit’ in Midjourney, terms that mimic post-production can influence the final look, such as “cinematic color grading,” “HDR photography,” “vibrant colors,” “muted tones,” “monochromatic,” “sepia tone,” “desaturated.” These terms suggest a desired photographic finish.
The key is to use these style cues to reinforce the desired level and type of realism, guiding Midjourney towards a specific visual language that makes the image believable and polished.
Advanced Parameters and Their Impact on Realism
Beyond the descriptive language of your prompt, Midjourney V6 offers a suite of parameters that act as powerful tools to fine-tune your hyperrealistic outputs. Understanding and strategically deploying these parameters is crucial for gaining precise control over your image generation process, allowing you to sculpt the output to meet exacting photographic standards.
The `–style raw` Parameter: Unfiltered Reality
As previously mentioned, `–style raw` is your absolute best friend for pursuing pure, unadulterated realism. By default, Midjourney applies its own inherent artistic ‘flair,’ which often enhances creativity but can frequently detract from a strictly photographic look. `–style raw` minimizes this inherent styling, making the AI’s interpretation of your prompt more literal and less embellished. This is particularly effective when you are describing intricate scenes, highly specific objects, or aiming for a stark documentary aesthetic where artistic interpretation is undesirable. It ensures that the visual characteristics you explicitly describe in your prompt are prioritized, leading to images that are cleaner, sharper, and more factually rendered.
When to use it: Always, if your primary goal is pristine photorealism or technical accuracy. It is the cornerstone of realism in V6.
Example: “Close-up portrait of an elderly man with weathered skin, deep wrinkles, kind eyes, natural daylight, soft shadows, photorealistic, 8K, –ar 2:3 –style raw”
The `–stylize` Parameter: Controlled Artistic Freedom
The `–stylize` (or shorthand `–s`) parameter controls how strongly Midjourney’s aesthetic styling is applied to your images. It operates on a range, typically from 0 to 1000. For achieving hyperrealism, you generally want to use very low values, often between `–s 0` (which is very close to `–style raw` in effect, though not entirely identical) and `–s 50`. Higher values will progressively push the image towards a more artistic, painterly, or abstract interpretation, moving it away from photographic realism. Experiment with `–s 20` or `–s 30` if you feel `–style raw` is too ‘flat’ or clinical and you want to inject a subtle hint of Midjourney’s inherent aesthetic without compromising the overall realistic impression. Remember, the higher the stylize value, the less ‘real’ your image will tend to look.
When to use it: To dial in a subtle level of artistic polish or if `–style raw` feels too stark. For realism, only use very low values (0-50).
Example: “Desert landscape at sunset, vibrant orange and purple sky, saguaro cacti, dramatic shadows, wide shot, hyperrealistic, –ar 16:9 –style raw –s 30”
The `–ar` Parameter: Aspect Ratio for Visual Context
The `–ar` parameter specifies the aspect ratio of your image (width:height). While seemingly a simple technical setting, choosing the right aspect ratio significantly impacts the photographic realism and compositional feel of your image, mimicking real-world camera formats and display conventions.
- `–ar 1:1` (Square): Can feel natural for certain social media platforms or classic, symmetrical compositions, but generally less cinematic.
- `–ar 3:2` or `–ar 4:3`: These are common photographic aspect ratios (e.g., DSLR cameras), ideal for standard prints, portraits, and digital displays, lending a very natural and traditional photographic feel.
- `–ar 16:9` (Widescreen): Ideal for cinematic shots, expansive landscapes, or scenes that require a broad horizontal canvas, mimicking movie screens.
- `–ar 9:16` (Vertical): Great for mobile-first content (e.g., Instagram Stories, TikTok), tall portraits, or architectural shots emphasizing verticality.
Matching the aspect ratio to the intended use or photographic genre significantly enhances realism and visual context.
When to use it: Always, to precisely dictate the image dimensions and enhance specific photographic or cinematic styles, making the output fit real-world formats.
Example: “Bustling street market, vibrant colors, diverse faces, natural light, candid street photography, –ar 3:2 –style raw”
The `–v` Parameter: Ensuring V6 Capabilities (and its Default Nature)
While `v6` is now the default model in Midjourney, it is still good practice to be aware of the `–v` parameter. Explicitly adding `–v 6` (or simply `–v6` as a shorthand) ensures you are leveraging the latest model’s capabilities, especially if you happen to be in an older model mode or if you want to be absolutely certain. For achieving hyperrealism, V6’s advancements in coherence, detail, and prompt understanding are non-negotiable; older versions simply cannot match its fidelity. You can check your current model using the `/settings` command.
When to use it: To explicitly select the V6 model if you’re ever unsure which model you’re using or have switched models for other tasks. For realism, always ensure V6 is active.
Example: (Implicitly used by default, but for clarity) “Rainy city street at night, neon reflections, bokeh lights, wet asphalt, hyperrealistic, –ar 16:9 –v 6”
The `–seed` Parameter: Consistency and Iteration
The `–seed` parameter allows you to reproduce an initial image’s basic structure, composition, and often general characteristics. While it doesn’t guarantee exact duplicates (especially across model versions or if you make significant prompt changes), it’s invaluable for iterating on a specific visual concept while maintaining compositional consistency. If you generate an image you like and want to explore variations by subtly changing lighting, expressions, textures, or minor details, using the `–seed` of that original image will help ensure the variations stay true to the initial layout and subject. This is crucial for controlled refinement in the pursuit of hyperrealism. You can find the seed of a generated image by reacting to it with the envelope emoji (✉️) in Discord or checking its details in the Midjourney web gallery.
When to use it: For fine-tuning, exploring subtle variations, or maintaining character/scene consistency across multiple generations when making small prompt adjustments.
Example: (After finding a good initial image with seed 12345) “Close-up portrait of an elderly man with weathered skin, deep wrinkles, kind eyes, soft studio lighting, photorealistic, 8K, –ar 2:3 –style raw –seed 12345 –s 20” (slightly changing lighting/stylization from original prompt).
The `–weird` Parameter: A Controlled Detour from Realism
The `–weird` parameter (or shorthand `–w`) introduces unconventional and quirky elements into your images, pushing them towards surrealism or abstractness. While generally antithetical to pure hyperrealism, it can be used very sparingly and at very low values (e.g., `–w 5` or `–w 10`) if you’re aiming for a slightly surreal or uncanny realism, or to break free from overly sterile outputs and introduce a touch of controlled imperfection. However, for most hyperrealistic goals, it’s best avoided or used with extreme caution and frequent testing, as it can quickly pull your image away from photographic accuracy and into the realm of the bizarre. Its default value is 0, so if not included, it’s effectively off.
When to use it: Very rarely for hyperrealism, perhaps for subtle uncanny effects or to experiment with ‘controlled imperfection.’ Generally, avoid for pure photographic realism.
Example: “Hyperrealistic still life, stack of pancakes, melting butter, syrup cascading, vintage tabletop, soft morning light, –ar 4:3 –weird 0” (explicitly setting to 0 ensures no weirdness, though it’s the default behavior if not included).
The `–sref` Parameter: Style Reference for Cohesion
The `–sref` (style reference) parameter, introduced to V6, allows you to reference the aesthetic style of an existing Midjourney image or a URL to an image. This is incredibly powerful for maintaining a consistent visual language across a series of images, or for replicating a specific lighting, color grading, or textural feel you’ve already generated. For realism, if you generate a fantastic high-fidelity texture, a particular lighting setup, or a specific atmospheric condition, you can capture its image ID and use it as a `–sref` in subsequent prompts to ensure a cohesive and uniform look throughout a project. This helps in maintaining a professional and consistent visual identity.
When to use it: To ensure a consistent visual style, lighting, color palette, or texture across multiple images in a project, enhancing overall project realism and branding.
Example: “Abandoned warehouse interior, rusty machinery, dusty floor, shafts of light through broken windows, –sref [Image ID of a previously generated dark, moody, realistic industrial scene]”
The `–cref` Parameter: Character Reference for Consistent Subjects
Also introduced to V6, and significantly enhanced in subsequent V6.1, the `–cref` (character reference) parameter is a monumental game-changer for narrative realism. It allows you to maintain the visual characteristics of a specific character (human, animal, or even a detailed object) across multiple prompts and scenes. Simply provide the image ID of a previously generated character (e.g., `12345abcde`), and Midjourney will strive to re-create that character in new contexts, poses, expressions, and outfits. This is invaluable for storyboarding, character design consistency for graphic novels or animations, or any project requiring the same individual to appear in various scenarios, dramatically increasing the realism and continuity of your output. It eliminates the previous painstaking process of trying to prompt the same character repeatedly with inconsistent results.
When to use it: Whenever you need a consistent human or animal character (or highly specific object) across multiple images within a project.
Example: “Full body shot, young woman walking through a bustling city park, carrying a canvas bag, natural afternoon light, photorealistic, –cref [Image ID of your consistent character]”
Mastering Lighting, Composition, and Detail for Photographic Accuracy
The true essence of hyperrealism in photography lies not just in rendering objects accurately, but in how light interacts with them, how they are arranged within the frame, and the minutiae that reveal their existence in the real world. In Midjourney V6, you have unprecedented control over these elements, transforming abstract concepts into tangible visual experiences that mirror the precision of a professional photographer.
The Power of Lighting
Lighting is arguably the single most critical factor in achieving photographic realism. It dictates mood, emphasizes textures, creates depth and dimension, and defines the form of objects and subjects. Mastering lighting descriptions in your prompts is paramount.
- Golden Hour: Describes the period shortly after sunrise or before sunset, characterized by soft, warm, golden light and long, dramatic shadows. Use terms like “golden hour light,” “warm glow,” “late afternoon sun,” “low sun angle.”
- Blue Hour: The twilight period, occurring just before sunrise or after sunset, characterized by a cool, soft, ambient blue light. Prompt with “blue hour photography,” “twilight glow,” “cool ambient light,” “deep blue sky.”
- Studio Lighting: Mimics controlled photographic environments. Be specific: “softbox lighting,” “key light, fill light, back light setup,” “high-key lighting” (bright, minimal shadows), “low-key lighting” (dark, dramatic shadows), “chiaroscuro” (strong contrasts between light and dark).
- Natural Light: Refers to available light from the sun, sky, or environmental sources, often less controlled than studio setups. Use “natural daylight,” “overcast sky,” “dappled sunlight through trees,” “window light,” “ambient light.”
- Backlighting and Rim Lighting: Backlighting places the light source directly behind the subject, creating a silhouette or a glowing outline. Rim lighting is a specific type of backlighting that highlights the edges of the subject, separating it from the background. Use “backlit,” “strong rim light,” “hair light,” “silhouette.”
- Specular Highlights: The bright spots of reflected light that appear on shiny or glossy surfaces. While Midjourney usually generates these naturally when material properties are described, emphasizing terms like “polished chrome,” “wet surface,” “glistening eyes,” “reflective glass” helps ensure their presence and accuracy.
- Volumetric Lighting: Light beams made visible by atmospheric particles like dust, fog, smoke, or haze. This adds immense depth and atmosphere. Use “volumetric light,” “light rays piercing through fog,” “dust motes in sunlight,” “shafts of light.”
Experiment with combining these to create complex and dynamic lighting scenarios that scream realism and evoke specific moods, just as a professional photographer would. The more precise your lighting prompt, the more realistic the outcome.
Crafting Compelling Composition
Composition guides the viewer’s eye and adds aesthetic appeal, but in realism, it also adds believability and a sense of intention. A well-composed scene feels intentional, balanced, and authentic, as if captured by a discerning eye.
- Rule of Thirds: While not a direct numerical prompt, describing elements aligned with its principles (e.g., “subject positioned to the left third, empty space to the right,” “horizon at lower third”) can work effectively.
- Leading Lines: Utilize natural or artificial elements like paths, roads, fences, rivers, or architectural lines that draw the eye into the image and towards the main subject. Prompt with “leading lines of a railway track vanishing into the distance,” “curving road leading to distant mountains.”
- Negative Space: The empty area around and between the main subject(s). Essential for minimalist compositions, emphasizing the subject, or creating a sense of calm. Use “ample negative space,” “minimalist composition,” “subject isolated against vast background.”
- Framing: Using elements within the scene (doorways, windows, tree branches, arches) to create a ‘frame’ around the main subject. Prompt with “subject framed by an old doorway,” “portrait framed by tree branches.”
- Depth of Field and Bokeh: Crucial for separating subjects from backgrounds and mimicking professional camera lenses. Use “shallow depth of field,” “creamy bokeh background,” “blurred background, pin sharp foreground,” “bokeh lights.”
- Symmetry and Asymmetry: Can add balance and harmony or dynamic tension and interest. Use “perfectly symmetrical architecture,” “asymmetrical composition, subject off-center,” “balanced composition.”
- Perspective: Describe the viewpoint. “One-point perspective,” “two-point perspective,” “forced perspective.”
Think like a photographer, pre-visualizing the exact shot you want before you type your prompt, considering how each element contributes to the overall visual narrative and authenticity.
Achieving Intricate Detail
The tiny, seemingly insignificant details are often what sell hyperrealism, convincing the viewer that they are looking at a real photograph. Midjourney V6 excels at this, but you need to guide it with precise language.
- Micro-textures: Focus on the specific surface properties of materials. “Rough concrete,” “smooth polished marble,” “glistening wet pavement,” “velvety rose petals,” “frayed denim,” “brushed metal,” “grainy wood,” “cracked paint.”
- Surface Imperfections: Real-world objects are rarely pristine. Adding subtle imperfections significantly boosts realism. “Subtle scratches on glass,” “worn paint,” “rust spots on metal,” “cracked leather,” “dust particles visible in light,” “small dents,” “faded colors.”
- Skin and Hair: For portraits and character renders, these are critically important for believability. “Visible skin pores,” “fine hair strands,” “peach fuzz,” “individual eyelashes,” “natural oil sheen on skin,” “subtle freckles,” “wrinkles of age,” “strands of grey hair.”
- Reflections and Refractions: Describe surfaces that reflect or refract light accurately. “Reflections in a puddle,” “light refracting through a crystal vase,” “wet surfaces mirroring neon signs,” “chromatic aberration,” “lens flare.”
- Environmental Details: The small, often overlooked elements that ground a scene in reality and add narrative. “Fallen leaves on the ground,” “steam rising from coffee cup,” “condensation on a cold glass,” “drips of rain on a windowpane,” “cracks in the sidewalk,” “spiderwebs in corners.”
- Weather Effects: Use terms like “heavy rain,” “light drizzle,” “misty atmosphere,” “dense fog,” “snowflakes falling,” “wind blowing leaves,” “heat haze.”
The more you think about and explicitly include these minute elements in your prompts, the more convincing and astonishingly real your hyperrealistic images will become. It’s the cumulative effect of these small details that truly sells the illusion.
Iterative Refinement and Upscaling Strategies
Achieving hyperrealism in Midjourney V6 is rarely a one-shot process. It’s an iterative journey of generation, evaluation, and refinement. Understanding how to leverage Midjourney’s variation and upscaling tools is key to pushing your initial ideas towards their most photorealistic potential, much like a photographer would review and edit their shots.
The Importance of Multiple Generations and Variations
Even with the most perfectly crafted prompt, the initial four-grid generation is merely a starting point. Midjourney’s inherent randomness, even within V6’s enhanced coherence, means that slight variations in interpretation can lead to significantly different outputs, and often, one image will stand out above the rest.
- Generate Multiple Times: If your initial grid isn’t quite right, don’t despair. Simply re-run the prompt (click the refresh button or type `/imagine` again). Small changes in the prompt, or even no changes, can yield a fresh set of four images, potentially closer to your vision. It’s a game of probabilities.
- Use V Buttons (V1, V2, V3, V4): Once you identify an image in the grid that has strong potential (e.g., good composition, promising lighting), use the corresponding ‘V’ button (V1, V2, V3, V4) below the grid. This action generates four new variations based specifically on that chosen image’s characteristics, allowing you to explore subtle or significant deviations from your selected direction without starting from scratch.
This continuous process of generating and varying allows you to gradually zero in on the perfect composition, lighting, character, or detail, systematically refining your initial idea towards its hyperrealistic goal.
Leveraging `Vary (Strong)` and `Vary (Subtle)`
After upscaling an image (using the U buttons), Midjourney V6 offers two powerful variation options, giving you fine-grained control over how much the subsequent generations deviate from your chosen image:
- Vary (Subtle): This option creates four new variations of your upscaled image, introducing minor changes while largely preserving the overall composition, subject matter, and key elements. It’s excellent for fine-tuning small details, adjusting lighting nuances, experimenting with slight aesthetic shifts, or tweaking expressions without drastically altering the core of the image. Use this when you’re 90% happy and just need to polish or explore minor alternatives.
- Vary (Strong): This generates four more substantial variations, taking more creative liberties while still drawing inspiration from the original upscaled image. Use Vary (Strong) when you like the general direction of an upscaled image but want to explore more significant compositional changes, different camera angles, alternative environmental elements, or more imaginative reinterpretations while retaining some core elements of the original subject. This is useful for exploring a wider range of possibilities from a successful base image.
These tools are invaluable for evolving your image from a good starting point to a truly exceptional hyperrealistic render, providing flexibility in your refinement process.
Custom Zoom and Pan for Scene Expansion
Midjourney V6 introduced powerful tools for expanding your canvas, allowing you to create larger, more complex, and dynamically framed scenes that enhance narrative realism:
- Zoom Out: After upscaling an image, you can choose to “Zoom Out 2x” or “Zoom Out 1.5x”. This generates a wider perspective of your scene, intelligently filling in the new areas based on the existing image content. This is fantastic for transitioning from a close-up portrait to an environmental portrait, expanding a tight landscape shot, or revealing more of a setting.
- Custom Zoom: This advanced option allows you to specify your own zoom factor (e.g., `–zoom 1.2`, `–zoom 2.5`) and, crucially, to add new prompt text to guide the AI on what to fill in the expanded areas. This offers unparalleled control over scene expansion and composition, allowing you to effectively ‘re-frame’ your shot with new information.
- Pan: The arrow buttons (up, down, left, right) allow you to extend the canvas in a specific direction. This is incredibly useful for fine-tuning composition, adding elements to one side of the frame, correcting off-center subjects, or creating scrolling panoramic views. You can also add prompt modifications during a pan to influence the new content being generated in the expanded area.
These tools are essential for crafting complex, multi-element hyperrealistic scenes that extend beyond the initial frame, adding depth, context, and narrative scope, mimicking the capabilities of a virtual camera operator.
Upscale Options in V6
Once you have an image you’re happy with from the initial grid, clicking one of the ‘U’ buttons (U1, U2, U3, U4) upscales that image to a larger resolution. Midjourney V6 upscales are generally excellent, preserving intricate detail and often enhancing it further, making the image sharper and more refined. While there aren’t distinct “upscale modes” like in earlier versions (e.g., Light Upscale, Beta Upscale), the standard upscaler in V6 is highly optimized for detail retention, sharpness, and textural accuracy, making it perfect for presenting hyperrealistic images at their best. Always upscale your chosen image to see its full potential and prepare it for further variations or direct use. While Midjourney’s native upscaling is robust, for extremely demanding scenarios (e.g., very large prints), you might consider external AI upscalers after downloading the Midjourney output, though for most applications, V6’s native upscale is more than sufficient and of professional quality.
Comparison Tables
Midjourney V6 vs. V5.2: Key Enhancements for Realism
| Feature/Aspect | Midjourney V5.2 (Pre-V6) | Midjourney V6 (Current) | Impact on Hyperrealism |
|---|---|---|---|
| Prompting Style | More verbose, ‘chatty,’ often required detailed descriptions for coherence; susceptible to ‘prompt fighting.’ | Concise, direct, highly sensitive to specific keywords and photographic terms; less conversational. | Greater control and predictability for specific realistic details, less ‘AI interpretation’; more efficient prompting. |
| Text Generation | Extremely poor, often produced gibberish or distorted, unreadable characters. | Native text generation with quoted text, significantly improved legibility and accuracy. | Enhances realism for scenes with signs, labels, book titles, or embedded text, previously impossible for the AI. |
| Detail & Texture Fidelity | Excellent, but sometimes had a slightly ‘dreamy’ or ‘painterly’ quality at micro-levels; could lack fine imperfections. | Exceptional, hyper-detailed rendering of textures (skin, fabric, metal, environmental imperfections, pores, hair strands). | Images appear more tactile, grounded in physical reality, and often indistinguishable from high-resolution photos. |
| Coherence & Contextual Understanding | Good, but could struggle with complex scene layouts, object interactions, or subject consistency across images. | Superior understanding of natural language, spatial relationships, and contextual elements; better scene construction. | More logical and believable compositions, consistent subject interactions, and more authentic environments. |
| Styling Control | Primarily through the `–s` parameter (stylize) which influenced artistic interpretation and aesthetic bias. | Introduced `–style raw` to minimize inherent artistic bias, giving raw, unadulterated prompt control. | Allows for pure, unadulterated photographic realism, reducing Midjourney’s default aesthetic influence for a ‘cleaner’ look. |
| Character Consistency | Very challenging, relied heavily on careful prompting, `–seed` usage, and often required external image editing. | Introduced `–cref` (character reference) for robust and highly effective character consistency across scenes and outfits. | Game-changer for storytelling, animation, product visualization, and any project requiring recurring realistic subjects. |
| Image Expansion (Zoom/Pan) | Limited or experimental versions in previous iterations; less control over new content. | Full-featured Custom Zoom and Pan with prompt modification capabilities. | Allows for dynamic scene expansion, compositional adjustment, and creation of larger, more complex realistic vistas. |
Advanced Parameters for Hyperrealism: A Quick Reference
| Parameter | Description | Recommended Use for Hyperrealism | Example Impact on Image |
|---|---|---|---|
| `–style raw` | Minimizes Midjourney’s default aesthetic styling, giving more direct control to the prompt. | Essential for pure photographic or technical realism, documentary style; always prioritize. | Less ‘artistic flair,’ more literal interpretation of prompt details, sharper focus on photographic accuracy and neutral rendering. |
| `–stylize` or `–s` | Controls the degree of artistic styling. Range typically 0-1000. | Use very low values (e.g., 0-50) for realism. Higher values push towards artistic/painterly. | Low values maintain photographic integrity; high values introduce noticeable stylistic alterations that detract from realism. |
| `–ar` | Sets the aspect ratio (width:height) of the generated image (e.g., 16:9, 3:2, 1:1). | Match to common photographic/cinematic formats (e.g., 3:2 for prints, 16:9 for film, 9:16 for vertical content). | Enhances compositional realism, makes images look professionally framed, and suitable for specific media contexts. |
| `–seed` | Generates an image from a unique initial noise seed. This seed can be reused for consistency. | For iterating on a specific image’s composition or subject while making minor textual or parameter changes for refinement. | Maintains overall layout and core subject, allowing for detailed refinement across multiple generations, ensuring consistency. |
| `–cref` | References an image ID to maintain character consistency across multiple prompts/scenes. | Crucial for projects with recurring human, animal, or specific object characters; ensures visual continuity. | Keeps facial features, body shape, attire, and general appearance consistent across different poses, scenes, and lighting. |
| `–sref` | References an image ID to maintain stylistic consistency (lighting, color palette, texture, overall mood). | For ensuring uniform aesthetic, lighting, or textural qualities across a series of images in a project. | Ensures a cohesive look and feel, like a consistent art direction or a specific photographic treatment throughout a collection. |
| Quoted Text (`”TEXT”`) | Enclosing words in quotation marks within the prompt. | For generating legible and specific text directly within the image (signs, labels, titles, embedded words). | Adds a layer of information and authenticity previously impossible, significantly boosting realism for informational scenes. |
| `–weird` or `–w` | Introduces unconventional and quirky elements; range 0-3000 (default 0). | Generally avoid for hyperrealism; if used, employ extremely low values (e.g., 0-10) for subtle, uncanny effects. | Higher values drastically reduce realism by introducing surreal or abstract qualities; low values might add subtle, unexpected realism. |
Practical Examples: Real-World Use Cases and Scenarios
Theory is one thing; putting it into practice is another. Here are several real-world scenarios and detailed prompts that demonstrate how to apply Midjourney V6’s capabilities for hyperrealistic outcomes, complete with explanations of why each element is crucial for the desired result.
Case Study 1: Photorealistic Studio Portrait with Specific Details
Goal: Generate a professional, high-end studio portrait of a woman, with exquisite detail, controlled lighting, and a tangible sense of presence.
Prompt Breakdown:
/imagine a professional studio portrait of a young woman, mid-30s, natural expression, subtle gentle smile, captivating warm brown eyes, intricate details of skin texture, visible pores, fine individual hair strands, subtle peach fuzz, perfect makeup, dramatic soft key light from the left, subtle fill light from the right, strong rim light defining her profile, dark grey seamless backdrop, shallow depth of field, creamy bokeh, 85mm prime lens, hyperrealistic, ultra detailed, 8K, --ar 2:3 --style raw --s 20
Explanation:
- “professional studio portrait of a young woman, mid-30s, natural expression, subtle gentle smile, captivating warm brown eyes”: Clearly defines the subject, age, and desired emotional tone.
- “intricate details of skin texture, visible pores, fine individual hair strands, subtle peach fuzz, perfect makeup”: These are critical micro-details that V6 excels at, selling the hyperrealism. Explicitly asking for them ensures the AI focuses on these elements.
- “dramatic soft key light from the left, subtle fill light from the right, strong rim light defining her profile”: Specifies a sophisticated, multi-point studio lighting setup, creating depth, dimension, and professional polish.
- “dark grey seamless backdrop”: Ensures a clean, distraction-free studio environment, typical for high-end portraits.
- “shallow depth of field, creamy bokeh, 85mm prime lens”: Technical camera terms for a classic portrait look, emphasizing subject separation and a professional photographic aesthetic.
- “hyperrealistic, ultra detailed, 8K”: Reinforces the desired output quality and fidelity at the highest possible level.
- `–ar 2:3`: A standard, classic portrait aspect ratio.
- `–style raw`: Essential for removing Midjourney’s default artistic styling and achieving pure, unadulterated photography.
- `–s 20`: A very low stylize value, allowing a touch of aesthetic polish without sacrificing the raw realism, balancing photographic accuracy with subtle artistic grace.
Case Study 2: Dynamic Urban Street Scene at Night with Environmental Effects
Goal: Create a vibrant, cinematic shot of a Tokyo street at night, capturing reflections, neon, motion, and a rainy atmosphere that feels truly immersive.
Prompt Breakdown:
/imagine a bustling Tokyo street at night, heavy rain, wet asphalt reflecting vibrant neon signs and colorful LED screens, light trails from fast-moving cars, steam rising from street grates, blurred pedestrians with umbrellas, shallow depth of field, a lone ramen shop sign reading "NOODLES", 28mm wide-angle lens, cinematic, gritty photorealism, low angle shot, 4K, --ar 16:9 --style raw
Explanation:
- “bustling Tokyo street at night, heavy rain, wet asphalt reflecting vibrant neon signs and colorful LED screens”: Sets the scene, time, weather, and crucial reflective elements that define such an environment.
- “light trails from fast-moving cars, steam rising from street grates, blurred pedestrians with umbrellas”: Adds dynamic elements, environmental details, and motion blur effects common in candid street photography, enhancing realism and movement.
- “shallow depth of field”: Creates a sense of focus on key elements while blurring distractions.
- “a lone ramen shop sign reading “NOODLES””: Leverages V6’s native text generation for added authenticity and specific detail.
- “28mm wide-angle lens, cinematic, gritty photorealism, low angle shot”: Specifies a lens choice suitable for immersive street photography, defines the visual style, and dictates the camera perspective for dramatic impact.
- `–ar 16:9`: For a widescreen, cinematic feel, perfect for urban landscapes.
- `–style raw`: To prevent over-stylization and maintain a genuine photographic, documentary look, crucial for realism.
Case Study 3: Detailed Product Photography with Material Focus
Goal: Generate a high-fidelity image of a luxury watch, showcasing its intricate material properties, mechanical design, and exquisite craftsmanship in a studio setting.
Prompt Breakdown:
/imagine a macro close-up product shot of a luxury Swiss automatic wristwatch, polished 316L stainless steel casing, intricate mechanical movement visible through sapphire crystal case back, subtle reflections of studio softboxes on metal, perfect light gradient, focused on the dial, sunburst dial texture, genuine alligator leather strap, hyperrealistic, clean studio backdrop, high key lighting, 8K, --ar 4:3 --style raw --s 0
Explanation:
- “macro close-up product shot of a luxury Swiss automatic wristwatch”: Establishes the subject, scale, and context as professional product photography.
- “polished 316L stainless steel casing, intricate mechanical movement visible through sapphire crystal case back, subtle reflections of studio softboxes on metal”: Focuses on material textures, transparent elements, and precise light interaction, critical for high-end product realism. Specifying the steel type adds a layer of authenticity.
- “perfect light gradient, focused on the dial, sunburst dial texture, genuine alligator leather strap”: Specifies exacting lighting conditions and emphasizes key details and textures for compelling product presentation.
- “hyperrealistic, clean studio backdrop, high key lighting, 8K”: Reinforces the desired quality, setting, and bright, even lighting typical of high-end product photography.
- `–ar 4:3`: A common aspect ratio for detailed product photography.
- `–style raw –s 0`: Crucial for eliminating any artistic interpretation and delivering a neutral, accurate, and unembellished product render, allowing the materials and design to speak for themselves.
Case Study 4: Consistent Character for a Narrative Project
Goal: Create two different scenes featuring the same distinct character, demonstrating consistency in appearance and emotion.
Step 1: Generate the initial character. Focus on key features and personality.
/imagine full body shot, rugged male adventurer, early 40s, short dark beard, piercing blue eyes, scar above left eyebrow, wearing a worn leather jacket, faded denim jeans, determined expression, standing on a cliff overlooking a vast mountain range at golden hour, dramatic cloud formation, cinematic, photorealistic, --ar 16:9 --style raw
(Let’s assume this prompt generates an amazing image, and its Image ID is abcde12345. You would replace this placeholder with the actual ID from your Discord reaction or web gallery.)
Step 2: Use the character in a new scene, retaining consistency with `–cref`.
/imagine close-up portrait, same rugged male adventurer, early 40s, short dark beard, piercing blue eyes, scar above left eyebrow, pensive and deep in thought, inside a dimly lit ancient library, surrounded by dusty old books, soft light from a single window, chiaroscuro lighting, hyperrealistic, --ar 3:2 --style raw --cref abcde12345
Explanation:
- The first prompt establishes the character’s core appearance (beard, eyes, scar, outfit) and initial personality in a grand setting.
- The second prompt re-uses the character’s visual identity with `–cref abcde12345` (replace with actual image ID). Notice how the text prompt still describes the character’s key features; this helps reinforce the `–cref` and guide the AI more effectively.
- This `–cref` parameter ensures the man’s facial features, build, and general look remain consistent despite being in a completely different setting (library vs. mountain cliff) with different lighting (dim, chiaroscuro vs. golden hour) and a new pose/expression (pensive vs. determined). This ability to maintain consistency is a monumental leap for realism in narrative generation, essential for any project involving recurring characters.
Frequently Asked Questions
Q: What makes Midjourney V6 so much better for hyperrealism than previous versions?
A: Midjourney V6 boasts several fundamental architectural improvements that directly contribute to superior hyperrealism. Its core language model understands prompts with much greater precision and nuance, leading to more coherent and contextually accurate images. Crucially, it delivers significantly enhanced detail and textural fidelity, making surfaces, skin, and hair appear astonishingly realistic. The introduction of `–style raw` also allows users to bypass Midjourney’s default artistic interpretations, enabling a more direct and unvarnished photographic output. Additionally, new features like native text generation and the `–cref` (character reference) parameter dramatically increase the authenticity and consistency required for true hyperrealism, allowing for believable scenes and recurring subjects.
Q: Do I still need to use lengthy and descriptive prompts in V6 for realism, or has that changed?
A: While specificity is still absolutely key, V6 actually thrives on more concise and direct prompts, contrasting with the verbose, ‘chatty’ style often favored in earlier versions. V6’s enhanced language understanding means it can grasp complex instructions without excessive wordiness. Over-description can sometimes dilute your intent in V6, making the AI less focused. Instead, focus on impactful keywords, specific photographic terms (e.g., lens types, lighting setups, compositional guides), and precise material descriptions. Think of it as giving precise, technical instructions to a professional photographer or art director, rather than telling a long narrative story. Every word should add unique visual information.
Q: What is the `–style raw` parameter and why is it so important for hyperrealism?
A: The `–style raw` parameter is a critical tool for achieving hyperrealism in V6. By default, Midjourney applies its own aesthetic styling to images, which often enhances creativity but can sometimes push them towards an artistic or illustrative look, making them less photorealistic. `–style raw` minimizes this inherent styling, making Midjourney’s interpretation of your prompt more literal and less embellished. It provides a ‘clean slate’ for your prompt, allowing you to dictate every visual aspect with greater control and ensuring the output is as close to a pure, unadulterated photograph as possible, devoid of Midjourney’s typical ‘AI look.’
Q: How can I ensure consistent characters across multiple images in Midjourney V6?
A: Midjourney V6 introduced the `–cref` (character reference) parameter specifically for this purpose, a true game-changer for narrative projects. To use it, you first generate an image of your desired character. Once you have an image you like, obtain its Image ID (by reacting with the envelope emoji ✉️ to the image in Discord, or finding it in your web gallery). Then, in all subsequent prompts where you want that character to appear, append `–cref [Image ID]` (e.g., `–cref abcde12345`). Midjourney will then attempt to render the character with consistent facial features, body shape, and general appearance across different scenes, poses, expressions, and lighting conditions. While you should still describe the character’s key features in the prompt to reinforce the reference, `–cref` provides remarkable visual continuity.
Q: What are the best aspect ratios (`–ar`) to use for realistic images, and why do they matter?
A: The best aspect ratio depends heavily on your intended use and the specific type of realism you’re aiming for. Matching real-world camera formats and display conventions significantly enhances believability.
- `–ar 3:2` or `–ar 4:3`: These are standard photographic aspect ratios (e.g., DSLRs), ideal for general realism, traditional portraits, and prints, feeling very natural.
- `–ar 16:9`: Excellent for cinematic shots, expansive landscapes, or any scene that benefits from a wider, film-like perspective, mimicking movie screens.
- `–ar 9:16`: Suitable for mobile-first content (e.g., Instagram Stories, vertical video), tall portraits, or dramatic architectural shots emphasizing verticality.
- `–ar 1:1`: While a common social media square, it can feel less ‘natural’ for pure photographic realism unless specifically desired for a particular symmetrical or graphic aesthetic.
Choosing the right aspect ratio frames your image appropriately and enhances its professional, realistic appeal.
Q: How do I get specific text to appear legibly and accurately in my Midjourney V6 images?
A: Midjourney V6 introduced groundbreaking native text generation capabilities. To prompt for specific text, simply enclose the desired words or phrases within quotation marks in your prompt. For example: `”/imagine a vintage neon sign on a brick wall reading “OPEN 24 HOURS”, rainy night, cinematic, photorealistic”`. While greatly improved from previous versions, it might still require a few attempts to get perfect results, especially with complex fonts, long sentences, or intricate placements. For best outcomes, keep the text concise, clearly legible, and strategically placed within your scene description.
Q: What role does lighting play in achieving hyperrealism, and what terms should I use in my prompts?
A: Lighting is arguably the single most critical element in achieving hyperrealism, as it defines mood, shape, texture, and depth, making objects appear three-dimensional and grounded in reality. Use specific photographic lighting terms in your prompts to guide the AI precisely:
- For natural ambient light: “Golden hour,” “blue hour,” “twilight,” “natural daylight,” “overcast sky,” “dappled sunlight.”
- For controlled environments: “Studio lighting,” “softbox lighting,” “key light, fill light, back light setup,” “high-key lighting,” “low-key lighting,” “chiaroscuro.”
- For dramatic effects: “Backlit,” “strong rim lighting,” “silhouette,” “volumetric lighting,” “specular highlights.”
Precise lighting descriptions can transform a flat, generic image into a vibrant, three-dimensional scene that evokes real-world photographic aesthetics.
Q: Should I use `–stylize` (or `–s`) for hyperrealistic images in V6, and if so, what values?
A: For pure hyperrealism, you should generally use `–stylize` with very low values, typically between `0` and `50`. If you are already using `–style raw`, `–s 0` is very similar in effect. The `–stylize` parameter controls the degree of Midjourney’s inherent aesthetic styling. Higher `–stylize` values (e.g., 100-1000) push images towards more artistic, painterly, or abstract interpretations, moving them away from photographic accuracy and into a more illustrative realm. Experiment with low values (e.g., `–s 20` or `–s 30`) to find a subtle balance if you want a slight ‘polish’ or a very controlled artistic touch without losing the core realism, but always lean towards the lower end for accurate photographic representation.
Q: How can I ensure extremely detailed textures, like skin pores, fabric weaves, or material imperfections, are rendered in V6?
A: Midjourney V6 naturally excels at rendering micro-details, but you can guide it further by being explicit in your prompts. Use highly descriptive adjectives and nouns for textures and imperfections: “visible skin pores,” “fine peach fuzz,” “individual hair strands,” “weathered leather,” “rough concrete,” “smooth polished granite,” “velvety fabric,” “dew-kissed petals,” “subtle scratches on glass,” “rust spots on metal,” “faded paint.” Combine these with a close-up shot description (`”macro shot,” “extreme close-up”`) and always include `–style raw`. This combination will direct the AI to emphasize these minute details, bringing your images to an astonishing level of realism and tactile presence that truly sells the illusion of reality.
Q: What are the iterative steps to refine a hyperrealistic image once I have an initial four-grid generation?
A: Achieving a perfect hyperrealistic image is usually an iterative process:
- Select and Upscale: Choose the best image from your initial 4-grid by clicking its corresponding ‘U’ button (U1, U2, U3, U4) to generate a larger, higher-resolution version.
- Subtle Variations (Vary Subtle): If you’re mostly satisfied but want minor tweaks (e.g., slight changes in expression, lighting nuance, or minor compositional shifts), use ‘Vary (Subtle)’ to explore small, controlled changes.
- Stronger Variations (Vary Strong): If you like the general direction but want to explore more significant creative changes, different angles, or new elements while retaining the core idea, use ‘Vary (Strong)’.
- Custom Zoom/Pan: Utilize the ‘Zoom Out’ (e.g., 1.5x, 2x, Custom Zoom) or ‘Pan’ (arrow buttons) features to expand the canvas, adjust composition, or add new elements to the scene. You can also add new prompt text during these operations to guide the AI for the newly generated areas.
- Remix (Advanced): For substantial prompt changes while retaining the visual structure of an image, enable Remix mode (`/settings`) and then use the ‘Vary (Strong)’ or ‘Custom Zoom’ options with a modified prompt. This allows for deep iteration on a promising base image.
This iterative loop allows for precise control and progressive enhancement, guiding your initial concept towards a fully realized hyperrealistic image.
Key Takeaways
- V6 Demands Concise Prompts: Move away from ‘chatty’ descriptions; focus on specific, direct, and impactful keywords that precisely define visual elements, rather than verbose narratives.
- `–style raw` is Essential: Always use this parameter to strip away Midjourney’s default artistic stylization, aiming for a pure, unfiltered photographic output that is unbiased.
- Master Detail and Texture: Leverage V6’s unparalleled ability to render micro-details by explicitly describing elements like skin pores, fine hair strands, material textures, and surface imperfections.
- Control Lighting and Composition: Use precise photographic terms (e.g., golden hour, rim light, shallow depth of field, 85mm lens, low angle shot) to guide the AI towards professional-grade imagery that adheres to real-world photographic principles.
- Native Text Generation: Enclose any desired legible text within quotation marks in your prompt (e.g., `”COFFEE”`) to embed words directly into your images, boosting authenticity.
- Consistent Characters with `–cref`: Utilize image IDs with the `–cref` parameter to maintain the appearance of specific characters across multiple scenes, which is crucial for narrative realism and project continuity.
- Iterate and Refine: Make full use of ‘Vary (Subtle)’, ‘Vary (Strong)’, ‘Custom Zoom’, and ‘Pan’ functionalities to meticulously fine-tune your generations into a perfected hyperrealistic image.
- Low `–stylize` Values: For optimal realism, keep the `–s` parameter values very low (typically between 0 and 50), or omit it if `–style raw` is active, to avoid unwanted artistic effects.
- Aspect Ratio Matters: Choose `–ar` parameters that align with real-world photography or cinematic standards (e.g., 3:2, 16:9) to enhance believability and provide professional framing.
- Think Like a Photographer: Pre-visualize your desired shot, considering camera settings, lighting setup, and compositional rules, then translate those thoughts into precise prompt language.
Conclusion
Mastering Midjourney V6 for hyperrealistic images is an exciting journey that blends artistic vision with technical precision. It’s about understanding the subtle shifts in the AI’s interpretation, leveraging advanced parameters, and thinking like a seasoned photographer or cinematographer. No longer limited to fantastical renders, Midjourney V6 empowers creators to produce visuals that challenge the very definition of reality, opening up a myriad of applications from advertising and product design to architectural visualization and complex digital storytelling. The fidelity and control offered by V6 represent a monumental leap in AI image generation.
By diligently applying the advanced techniques outlined in this comprehensive guide – from crafting precise, impactful prompts and consistently utilizing `–style raw` to controlling intricate micro-details and iterating with purpose through variations and scene expansion – you will unlock Midjourney V6’s full, breathtaking potential. The journey to hyperrealism is one of continuous learning, experimentation, and attention to detail, but with the power of V6 at your fingertips, the ability to generate images that are truly indistinguishable from reality is now within your grasp. Dive in, experiment relentlessly, and prepare to be amazed by the lifelike artistry you can create, pushing the boundaries of what you thought was possible with artificial intelligence.


Leave a Reply