
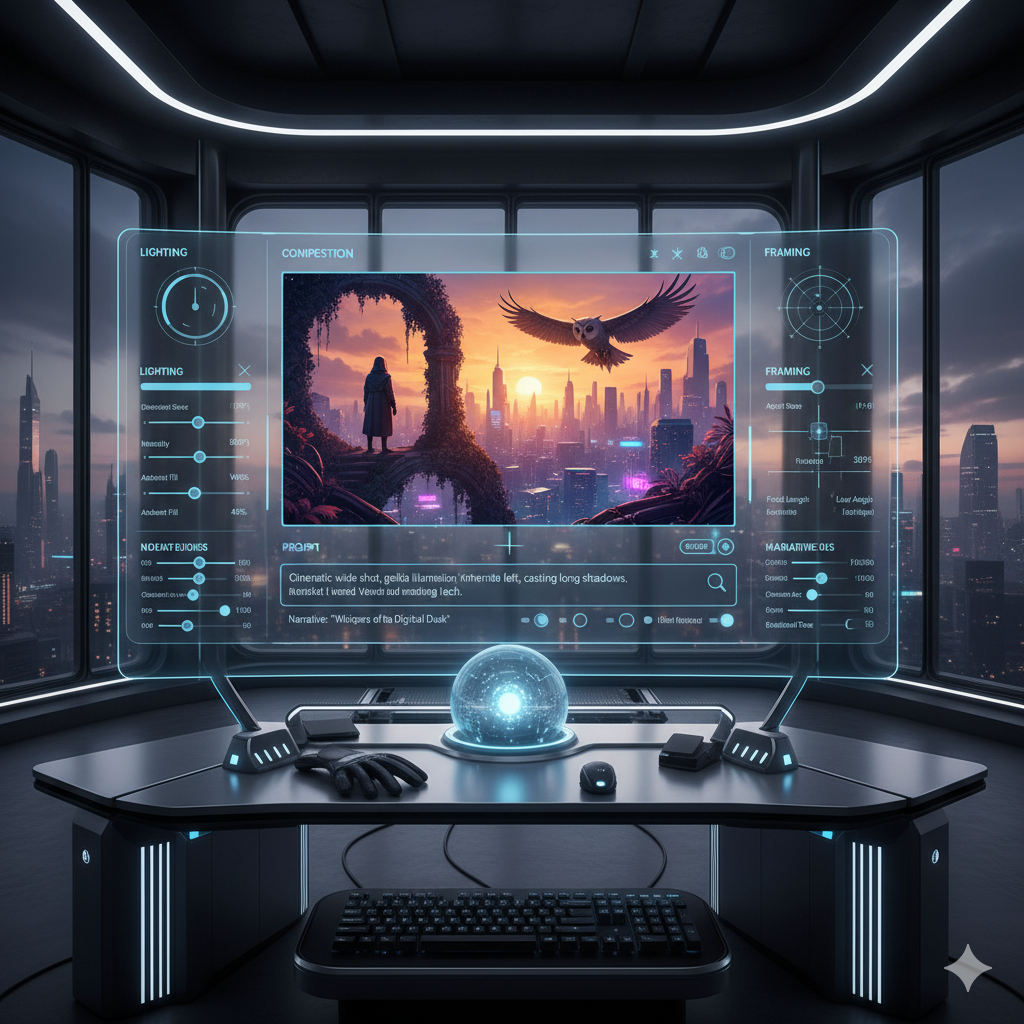
The world of Artificial Intelligence generated art has exploded in recent years, captivating imaginations with its ability to conjure fantastical images from mere text prompts. Tools like Stable Diffusion, Midjourney, and DALL-E have democratized creativity, allowing anyone to become a digital artist. However, as impressive as these generative models are, they often come with a significant limitation: a lack of precise control over the fundamental structure, composition, and pose within the generated image. Users have frequently found themselves in a game of chance, repeatedly tweaking prompts and regenerating images in the hope of aligning the AI’s output with their specific vision. This often leads to frustration, wasted computational resources, and a feeling that the AI is more of a magical genie than a controllable artistic tool.
Imagine trying to create a specific scene: a knight in shining armor, perched on a cliff edge, with a dragon flying in the background, its wings spread wide. While a prompt like “a knight on a cliff, dragon flying behind, epic fantasy art” might give you a knight and a dragon, getting the exact pose of the knight, the specific angle of the dragon’s wings, or the precise depth of field of the cliff would be incredibly difficult, if not impossible, using prompts alone. The AI interprets your words, but it often struggles with spatial relationships, detailed poses, and consistent object placement. This is where the true power of ControlNet emerges.
ControlNet is a groundbreaking neural network structure that has revolutionized how we interact with large diffusion models like Stable Diffusion. It acts as an additional input layer, allowing users to inject specific spatial and structural information into the image generation process. Instead of solely relying on text descriptions, ControlNet enables artists to provide reference images that dictate elements like edges, human poses, depth maps, segmentation masks, and more. This paradigm shift transforms AI art from a largely unpredictable process into a highly controllable and reproducible creative endeavor. It empowers artists to move beyond the hit-or-miss nature of prompt engineering and step into a realm of precise structural mastery, unlocking new levels of artistic freedom and efficiency. This article will delve deep into the mechanics of ControlNet, explore its various models, guide you through practical applications, and unveil the true potential it holds for advanced AI image generation.
The Paradigm Shift: From Text to Structure
Before ControlNet, the primary method for guiding AI image generation was through text prompts. While incredibly powerful for conceptualizing themes, styles, and general subjects, prompts have inherent limitations when it comes to specific structural control. If you wanted a character to point their arm in a particular direction, or for a building to have a certain perspective, you’d often resort to a lengthy trial-and-error process, adding more descriptive words, experimenting with negative prompts, and praying to the AI gods for a favorable outcome. The AI, without explicit spatial guidance, would often invent compositions that might be aesthetically pleasing but rarely matched a precise artistic vision.
The core problem lies in the nature of text. Language describes, but it doesn’t directly dictate pixels or spatial arrangements in a fine-grained manner. Words like “left,” “right,” “above,” and “below” can be ambiguous or lead to inconsistent results when interpreted by a latent diffusion model. The model learns associations between concepts and visual features, but it lacks an inherent understanding of physical space in the way a human artist does. This often meant that creating sequential art, animations, or even consistent character designs across multiple images was a monumental task, fraught with inconsistencies and requiring significant post-processing.
ControlNet changed this narrative entirely. Introduced in early 2023, ControlNet functions as an “end-to-end” neural network that can augment existing large pre-trained diffusion models. Instead of training a new model from scratch for specific control tasks, ControlNet “locks” the parameters of the large diffusion model and trains a copy of its encoding layers. This copy, the “control branch,” learns to condition the diffusion process based on an input control image, such as an edge map or a pose skeleton, while the original “locked” branch continues to provide the general creative context derived from the text prompt. This ingenious architecture allows for high-fidelity control without sacrificing the generative power and artistic quality of the base diffusion model. It’s like giving a highly skilled artist a detailed sketch or a specific pose reference before they begin painting, rather than just describing the scene verbally. The result is unprecedented precision and repeatability in AI art generation.
Understanding ControlNet’s Core Mechanism
To truly master ControlNet, it’s essential to grasp its underlying mechanism. At its heart, ControlNet works by creating a copy of the encoder layers of a diffusion model (like Stable Diffusion’s U-Net). One copy of these layers remains “locked,” meaning its weights are frozen and do not change during the ControlNet training process. This locked copy is responsible for maintaining the general knowledge and artistic style derived from the original pre-trained model. The second copy, known as the “control branch,” is trainable and learns to interpret specific structural input images (e.g., a Canny edge map, an OpenPose skeleton, or a depth map) and integrate this information into the diffusion process.
The control branch takes your structural input image as an additional condition alongside your text prompt. It processes this visual information and then injects its learned features into various layers of the locked diffusion model’s U-Net architecture. This injection happens through “zero convolutions,” which are initialized with zero weights. This clever initialization ensures that when ControlNet is first introduced, it has no effect on the original model, allowing for a gentle, stable training process that gradually teaches it how to integrate structural information without disrupting the base model’s capabilities. As the control branch learns, its output is added to the output of the locked branch, effectively guiding the image generation process towards the desired structure.
This non-destructive approach is one of ControlNet’s most brilliant features. It means you don’t need to fine-tune an entire Stable Diffusion model for every new type of control you want to achieve. Instead, you can simply swap out different ControlNet models, each specialized in a particular type of structural input, and apply them to your existing base Stable Diffusion model. This modularity makes ControlNet incredibly versatile and efficient. It allows for a dynamic interplay between your creative text prompt and your precise structural guidance, offering a level of control previously unattainable in AI art. The result is a powerful synergy where the AI’s creativity is harnessed and directed by your specific artistic intent, rather than simply being unleashed.
Key ControlNet Models and Their Applications
ControlNet’s power comes from its diverse range of pre-trained models, each specialized in interpreting a different type of structural input. Understanding these models is crucial for selecting the right tool for your specific artistic needs.
-
Canny Edge Detection:
The Canny model interprets precise outlines and sharp edges from an input image. It’s excellent for replicating exact shapes, architectural elements, or line art. When you feed it a Canny edge map (derived from a photograph or a simple sketch), ControlNet uses these lines as a blueprint for the generated image. This is incredibly useful for turning line drawings into photorealistic images, replicating existing compositions, or ensuring that specific objects maintain their distinct forms. For instance, an architect could feed in a Canny edge map of a building blueprint and generate photorealistic renders of it in various styles and environments, or an artist could turn a rough line art drawing into a detailed comic book panel.
-
OpenPose:
OpenPose is a game-changer for human and animal posing. It takes an input image and extracts a skeletal representation of detected bodies, including key points for the head, neck, shoulders, elbows, wrists, hips, knees, and ankles. This skeleton, or “pose stick figure,” then dictates the exact stance and posture of characters in your generated image. This is invaluable for illustrators, character designers, and comic artists who need consistent character poses across multiple frames or compositions. Imagine creating a fashion catalogue where models strike specific poses without needing actual models, or generating dynamic action scenes with precisely choreographed movements.
-
Depth Map:
The Depth Map model interprets the spatial arrangement and perceived distance of objects in a scene. A depth map uses varying shades of gray (or other color gradients) to represent how far objects are from the camera, with lighter areas typically indicating closer objects and darker areas indicating those further away. By providing a depth map, you can control the perspective, three-dimensionality, and spatial relationships within your image. This is particularly powerful for landscape generation, interior design visualization, or complex scene composition. You could take a simple 3D render or even a hand-drawn depth sketch and transform it into a richly detailed photorealistic environment, ensuring that foreground, midground, and background elements maintain their intended spatial relationships.
-
Scribble / Line Art:
Similar to Canny, but designed for less precise, more freehand input. The Scribble or Line Art model takes rough sketches, doodles, or simple line drawings and uses them as a structural guide. This is perfect for rapid ideation, concept art, or when you have a basic idea sketched out but want the AI to fill in the details and style. It offers a more forgiving input method compared to the sharp precision of Canny, allowing artists to quickly iterate on visual concepts without needing perfectly clean line work. It empowers artists to sketch an idea and let the AI breathe life into it with various styles.
-
Segmentation (Semantic / Instance):
Segmentation models allow for granular control over object placement and types. Semantic segmentation identifies broad categories (e.g., “sky,” “road,” “tree”), while instance segmentation identifies individual objects (e.g., “person 1,” “car 2”). By providing a segmentation mask (an image where different colors represent different objects or categories), you can explicitly tell the AI where specific objects should be located and what they should be. This is incredibly useful for product photography where you need to place a new item precisely in an existing scene, or for complex scene reconstruction where you want to swap out elements while preserving the overall layout. Imagine designing a virtual set for a film where you can precisely define the location and type of every prop and background element.
-
Normal Maps:
Normal maps describe the surface orientation of objects in a 3D space, influencing how light interacts with them. When applied through ControlNet, a normal map can guide the AI to generate images with consistent lighting and texture details, even if the base prompt doesn’t explicitly describe them. This is particularly valuable for generating realistic 3D-like textures, game assets, or ensuring consistent shading across different generations of the same object. It allows for a level of control over surface characteristics that goes beyond simple photographic references.
-
HED / Softedge:
HED (Holistically-nested Edge Detection) or Softedge models offer a softer, less rigid edge detection compared to Canny. They capture the overall form and general outlines without the sharp, often pixel-perfect precision of Canny. This is ideal for generating images with a more painterly, artistic, or less defined aesthetic. If Canny is for blueprints, HED is for a charcoal sketch. It’s excellent for achieving smoother transitions, artistic interpretations of photos, or when you want the AI to have a little more creative freedom within the structural bounds.
-
Reference-only / IP-Adapter:
While technically a slightly different mechanism, ‘Reference-only’ ControlNet or IP-Adapter is often used in conjunction with ControlNet workflows. It allows the AI to extract and apply the style, color palette, or general aesthetic from a reference image without necessarily focusing on its structure. This is incredibly powerful for style transfer, maintaining consistent branding, or ensuring a cohesive visual language across a series of images. You can combine it with other ControlNet models, for example, using OpenPose for character stance and a Reference-only model for artistic style.
Each of these models offers a unique lens through which to guide the AI, allowing artists to select the most appropriate tool for the specific aspect of control they wish to exert. The true mastery comes from understanding their individual strengths and, as we will explore next, how to combine them for even greater precision.
The Workflow: Integrating ControlNet into Your Creative Process
Integrating ControlNet into your AI art generation workflow is a transformative experience, moving you from a passive observer to an active director. While the exact steps might vary slightly depending on your chosen interface (e.g., Automatic1111’s Stable Diffusion web UI, ComfyUI, InvokeAI), the general principles remain consistent.
1. Conceptualization and Reference Gathering:
Begin by clearly defining your artistic vision. What do you want to create? What specific structural elements are crucial? This might involve sketching a rough outline, finding a reference photo for a pose, or identifying an existing scene’s depth map. The quality and relevance of your input reference image are paramount. A clear, well-defined Canny edge map will yield better results than a blurry, chaotic one. For example, if you want a character in a dynamic pose, find a strong reference image or create a simple stick figure that clearly shows the intended posture.
2. Preparing Your ControlNet Input Image:
Once you have your reference, you need to process it into the format expected by the chosen ControlNet model. Most web UIs and tools include “pre-processors” that automatically convert an ordinary image into a Canny map, OpenPose skeleton, depth map, etc. This is a crucial step:
- For Canny, upload an image and select the “Canny” pre-processor. It will extract the edges.
- For OpenPose, upload an image of a person or use a manual pose editor to create a stick figure. The “OpenPose” pre-processor will detect the joints.
- For Depth, upload an image, and the “Depth” pre-processor will generate a grayscale depth map.
- For Scribble, you might simply upload a rough sketch or even draw directly in some interfaces.
Experiment with the pre-processor settings (e.g., Canny’s low and high thresholds) to achieve the desired level of detail and abstraction in your structural input.
3. Crafting Your Text Prompt:
Your text prompt remains vital. It defines the style, subject matter, color palette, and overall artistic direction that ControlNet will then structurally guide. A good prompt might include details like “a majestic fantasy landscape, golden hour, highly detailed, volumetric lighting, epic.” ControlNet ensures the composition and layout are precise, while your prompt layers on the creative details. Remember, the prompt and the ControlNet input work in synergy; neither entirely overrides the other.
4. Configuring ControlNet in Your UI:
In your Stable Diffusion interface, you’ll typically find a dedicated ControlNet section. Here, you will:
- Enable ControlNet: Check the box to activate it.
- Upload Processed Image: If you manually pre-processed, upload your structural image. If using an in-built pre-processor, upload your original reference image and select the desired pre-processor and ControlNet model.
- Select ControlNet Model: Choose the specific ControlNet model (e.g., ‘control_v11p_sd15_canny’ for Canny).
- Set Control Weight: This parameter dictates how much influence ControlNet has on the generation. A higher weight (e.g., 1.0 to 1.5) means ControlNet will strictly adhere to the structural input, while a lower weight (e.g., 0.5 to 0.8) allows the AI more creative freedom to deviate slightly.
- Set Starting and Ending ControlNet Step: These parameters determine at which points in the diffusion process ControlNet’s influence begins and ends. Using these can help prevent “ControlNet bleed” or allow the AI to refine details after the structural guidance has largely been applied.
- Select Control Mode: Options like “Balanced,” “My prompt is more important,” or “ControlNet is more important” allow you to fine-tune the interplay between your text prompt and the structural input.
5. Generate and Iterate:
With your prompt and ControlNet configured, hit generate. Review the output. If the structure isn’t perfect, adjust the Control Weight or try a different pre-processor setting. If the style or details aren’t right, refine your text prompt. ControlNet encourages an iterative process, allowing you to gradually hone in on your desired image with remarkable precision. Don’t be afraid to experiment with different seeds, sampling methods, and minor adjustments to your input images or control parameters.
By systematically following these steps, you transform the often unpredictable world of AI art into a highly controlled creative environment, where your artistic vision can be consistently realized.
Advanced Techniques and Blending ControlNets
While using a single ControlNet model offers significant control, the true mastery of this technology often lies in combining multiple models, employing advanced masking, and understanding nuanced parameters. This unlocks an even deeper level of precision and creative flexibility.
Using Multiple ControlNet Models Simultaneously:
One of the most powerful features of ControlNet is the ability to run multiple instances concurrently. This means you can combine different types of structural guidance in a single generation. For example:
- OpenPose + Depth Map: Imagine wanting to place a character in a specific pose within a scene that has a particular perspective and depth. You could use an OpenPose model to dictate the character’s exact body language and a Depth Map model to define the spatial layout of the background. This ensures both the character’s actions and their environment are precisely controlled. A common use case is creating complex narrative illustrations where both character interaction and scene context are critical.
- Canny + Segmentation: If you need to replicate the precise outline of a specific object (using Canny) while also dictating the type and general placement of other elements in the scene (using Segmentation), you can run both. For instance, creating a product shot where the product itself needs to be pixel-perfect, but the background elements can be semantically defined for variety.
- Scribble + Reference-only: Sketch a rough idea of a landscape (Scribble) and then feed a painting as a style reference (Reference-only) to generate a unique, stylistically consistent piece.
When using multiple ControlNets, pay close attention to their individual weights. A high weight for one might overpower another. Experimentation is key to finding the right balance for your combined control.
Masking and Regional Control:
Many ControlNet implementations allow for masking, either directly within the ControlNet module or through iterative inpainting/outpainting. This enables you to apply ControlNet guidance only to specific regions of an image. For example, if you want to change the pose of a single character in a group photo without affecting the others, you could create a mask around that character, apply OpenPose to only that masked area, and then perform an inpainting operation. This gives you surgical precision over which parts of your image are influenced by ControlNet’s structural input.
Negative ControlNet Prompts (and similar concepts):
While not a “negative prompt” in the traditional sense, you can sometimes achieve a similar effect by manipulating the ControlNet inputs or weights. For instance, if you want to avoid a certain structural element, you might process an image to intentionally remove those elements from your ControlNet input, or use masking to exclude them. Furthermore, understanding the “Control Mode” options (e.g., “My prompt is more important,” “ControlNet is more important”) helps you balance the influence. In scenarios where ControlNet is too dominant and stifling creativity, adjusting the control mode or lowering the weight can allow the base diffusion model more freedom to innovate within the structural constraints.
Chaining ControlNet Operations:
For highly complex scenes or multi-stage creative projects, you might chain ControlNet operations. This involves generating an image with one ControlNet configuration, saving it, and then using that generated image (or a derivative of it) as input for a subsequent ControlNet pass with a different model or objective. For example, you might first use OpenPose to define character positions, then use Depth to define the scene’s perspective, and finally use Canny on the character’s clothes to refine specific garment folds. This multi-pass approach allows for incremental refinement and greater overall control.
Scripting and Automation (Brief Mention):
For users comfortable with programming, integrating ControlNet into custom Python scripts or workflows (e.g., in ComfyUI) opens up possibilities for automated sequences, batch processing, and even more dynamic control. This can involve programmatically adjusting weights, swapping models, or generating a series of images with gradual changes, significantly enhancing workflow efficiency for professional artists and researchers.
Mastering these advanced techniques requires experimentation and a deep understanding of each ControlNet model’s strengths and how they interact. However, the reward is an unparalleled level of creative control over AI-generated art, enabling the realization of complex artistic visions with remarkable fidelity.
Overcoming Challenges and Troubleshooting
While ControlNet is incredibly powerful, like any advanced tool, it comes with its own set of challenges and common pitfalls. Understanding these issues and knowing how to troubleshoot them is crucial for achieving consistent, high-quality results.
Common Issues Encountered:
- “ControlNet Bleed” or Over-Adherence: Sometimes, ControlNet can be too dominant, causing the generated image to look too much like the structural input, losing the generative AI’s creative flair. For instance, a Canny input might result in an image that looks like a colored Canny map rather than a fully rendered scene. This can also manifest as unwanted artifacts or “ghosting” from the input.
- Distorted Anatomy or Uncanny Valley Effects: Especially with OpenPose, if the input pose is unnatural or the prompt conflicts significantly with the pose, the AI might struggle to render realistic anatomy, leading to distorted limbs, extra fingers, or general anatomical oddities.
- Inconsistent Style or Details: While ControlNet excels at structure, if your prompt is weak or your ControlNet weight is too high, the AI might struggle to apply the desired artistic style or fill in details coherently, resulting in a structurally sound but stylistically lacking image.
- Misinterpretation of Structural Input: Sometimes the AI might misinterpret complex or noisy structural inputs. For example, a busy depth map might confuse the AI about what’s foreground and background, leading to jumbled compositions.
- Slow Generation Times: Running ControlNet, especially multiple instances, adds computational overhead, which can significantly increase image generation times, particularly on less powerful hardware.
- “Double Heads” or Duplication: In some cases, if the ControlNet input is ambiguous or the prompt is too vague, the AI might generate duplicate elements, like a person with two heads or an extra limb, trying to fulfill both the structural guidance and the text prompt.
Tips for Optimal Results and Troubleshooting:
- Refine Your Input Image: The cleaner and more precise your ControlNet input image (e.g., Canny map, OpenPose skeleton), the better the output. Use pre-processors carefully and adjust their settings. For instance, lower Canny thresholds capture more detail, higher thresholds capture fewer, broader strokes.
- Adjust Control Weight: This is your most powerful lever. If ControlNet is too strong, reduce the weight (e.g., from 1.0 to 0.7-0.9). If it’s not adhering enough, increase it (e.g., to 1.1-1.3). Experimentation here is vital.
- Experiment with Control Mode: Try “Balanced,” “My prompt is more important,” or “ControlNet is more important” to see how they affect the interplay between text and structure.
- Utilize Start/End ControlNet Steps: If you’re getting “bleed” or artifacts, try reducing the “End ControlNet Step” (e.g., from 1.0 to 0.7-0.8). This tells ControlNet to stop influencing the image later in the diffusion process, allowing the base model to refine details. Conversely, a higher start step might give the AI more freedom initially.
- Strengthen Your Text Prompt: Ensure your text prompt is descriptive and clear, even when using ControlNet. It provides the artistic context and fills in the details that ControlNet doesn’t explicitly define. Negative prompts are also crucial for avoiding unwanted elements.
- Choose the Right Model: Don’t try to use Canny for pose or OpenPose for intricate object details. Select the ControlNet model that aligns perfectly with the specific type of structural control you need.
- Good Base Model: Ensure you are using a high-quality, fine-tuned Stable Diffusion base model that aligns with your desired aesthetic. ControlNet augments, it doesn’t entirely replace the base model’s capabilities.
- Consult Community Resources: The ControlNet community is vast and active. If you encounter a persistent issue, search forums, YouTube tutorials, and Discord channels. Chances are, someone else has faced and solved a similar problem. Websites like Civitai.com often host user-shared workflows and tips for specific ControlNet scenarios.
- Iterate and Observe: Don’t expect perfection on the first try. Make small adjustments, generate, observe the changes, and learn. This iterative process is fundamental to mastering ControlNet.
By approaching ControlNet with a systematic troubleshooting mindset and understanding its parameters, you can overcome common hurdles and consistently produce exceptional AI-generated art.
Comparison Tables
To further illustrate the unique strengths and applications of various ControlNet models, as well as to highlight the fundamental advantages of ControlNet over prompt-only generation, here are two detailed comparison tables.
Table 1: ControlNet Models Comparison
| ControlNet Model | Input Type | Primary Use Case | Strengths | Limitations |
|---|---|---|---|---|
| Canny | Edge Map (from image) | Precise line art replication, architectural rendering, object outlines, logo generation. | Exceptional precision for hard edges and geometric shapes. High fidelity. | Can be too rigid for organic forms. Requires clean edge input. |
| OpenPose | Skeletal Pose (from image/editor) | Human/animal pose control, character animation frames, fashion design, comics. | Highly effective for exact body positioning and limb orientation. | Less effective for facial expressions or hand gestures without additional models (e.g., OpenPose Hand/Face). |
| Depth Map | Grayscale Depth Map (from image/3D render) | Scene perspective, spatial arrangement, 3D realism, interior/landscape design. | Excellent for establishing foreground/background and scene depth. Reproduces perspective. | Can struggle with fine object details. Complex depth maps can be ambiguous. |
| Scribble / Line Art | Rough Sketch / Freehand Drawing | Concept art, quick ideation, turning doodles into detailed images, artistic interpretation. | Forgiving with imprecise input. Great for early-stage creative exploration. | Less precise than Canny for exact forms. Output can be more interpretive. |
| Segmentation (e.g., PxSeg) | Semantic/Instance Mask (colored image) | Object placement, scene composition, background changes, product staging. | Precise control over location and type of elements. Easy object swapping. | Requires clear, accurate segmentation masks. Can be time-consuming to prepare. |
| Normal Maps | Normal Map (from 3D model) | Consistent lighting, surface texture, 3D asset generation, realistic shading. | Guides AI on surface orientation and lighting interaction, adding realism. | Requires 3D knowledge or a good source for normal maps. Less about form, more about surface. |
| HED / Softedge | Soft Edge Map (from image) | Painterly effects, soft artistic outlines, less rigid structural guidance. | Captures general forms without sharp, hard edges. Good for artistic abstraction. | Lacks the precision of Canny for exact replication of complex structures. |
Table 2: ControlNet vs. Prompt-Only Generation
| Feature | Prompt-Only Generation | ControlNet-Enhanced Generation |
|---|---|---|
| Control Precision | Low to Medium. Relies heavily on text interpretation, often leading to unpredictable layouts and compositions. | High to Very High. Direct structural guidance ensures precise control over pose, depth, and object placement. |
| Reproducibility | Low. Difficult to get identical structural outputs across multiple generations, even with the same seed. | High. Consistent structural output is a key feature, making it ideal for sequential art or character consistency. |
| Learning Curve | Medium. Mastering prompt engineering requires understanding AI’s interpretation of language. | Medium to High. Requires understanding different models, pre-processors, and parameter tuning. |
| Creative Scope (Structural) | Limited. Great for ideation and general concepts, but struggles with specific structural visions. | Expanded. Unlocks complex compositions and precise artistic visions that were previously impossible. |
| Output Quality (Structural) | Often generic or aesthetically pleasing but rarely matches a specific structural intent. | Structurally accurate and often more aligned with the artist’s original vision, while retaining generative quality. |
| Workflow Efficiency | Can be inefficient due to extensive trial-and-error for specific structural outcomes. | Significantly more efficient for achieving precise results, reducing regeneration cycles. |
| Input Complexity | Simple text string. | Text prompt + structural image (pre-processed from reference image/sketch). |
| Computational Demand | Standard for diffusion models. | Higher than prompt-only, especially with multiple ControlNets or high-resolution outputs. |
Practical Examples: Real-World Use Cases and Scenarios
The theoretical understanding of ControlNet is best solidified through practical applications. Here, we explore several real-world scenarios where ControlNet isn’t just useful, but transformative.
Case Study 1: Reimagining a Classic Painting with a Modern Twist
Imagine you’re an artist inspired by Van Gogh’s “Starry Night,” but you want to reinterpret its iconic swirling sky and village structure into a futuristic cyberpunk metropolis. Manually translating the brushstrokes and composition into a text prompt would be incredibly challenging. With ControlNet, the process becomes streamlined.
- Step 1 (Reference): Take a high-resolution image of “Starry Night.”
- Step 2 (Pre-process): Use the Canny pre-processor on the painting. This extracts the distinct swirling lines of the sky, the sharp outlines of the cypress tree, and the structures of the village buildings.
- Step 3 (Prompt): Craft a detailed prompt like: “cyberpunk city at night, neon glow, intricate circuitry, flying vehicles, highly detailed, dramatic lighting, synthwave aesthetic, 8k, cinematic.”
- Step 4 (ControlNet): Apply the generated Canny map with a moderate to high Control Weight (e.g., 0.9-1.2) to your Stable Diffusion model.
Result: The AI generates a cyberpunk city that miraculously echoes the compositional flow and structural elements of “Starry Night.” The cypress tree might become a towering, lit-up data spire, the village a cluster of glowing megastructures, and the swirling sky a network of light trails from flying cars – all while retaining the original masterpiece’s foundational structure. This demonstrates how ControlNet allows for stylistic transformation while preserving beloved compositions.
Case Study 2: Designing a Character’s Dynamic Pose for a Comic Book Panel
A comic book artist needs a hero character to strike a very specific, dynamic pose: mid-air, fist extended, cape flowing dramatically. Getting this exact pose with prompts alone is nearly impossible and would result in endless regeneration.
- Step 1 (Reference): The artist sketches a simple stick figure of the desired pose, or uses a 3D posing software to create the exact skeletal structure. Alternatively, they might find a photo of a person in a similar stance.
- Step 2 (Pre-process): Use the OpenPose pre-processor on the stick figure or photo. This extracts the precise skeletal structure of the hero.
- Step 3 (Prompt): Write a prompt detailing the character: “superhero, red and gold armor, flowing cape, dynamic action pose, cinematic lighting, epic, detailed textures, comic book art style.”
- Step 4 (ControlNet): Apply the OpenPose skeleton with a high Control Weight (e.g., 1.0-1.3) to ensure strict adherence to the pose.
Result: The AI generates the superhero in precisely the desired mid-air, fist-extended pose. The artist can then iterate on costumes, lighting, and background elements, confident that the character’s core pose remains consistent across different panels or iterations. This is invaluable for character consistency and complex action sequences.
Case Study 3: Interior Design Visualization from a Simple Floor Plan
An interior designer wants to visualize a client’s new living room based on a basic 2D floor plan or a rough 3D block-out model, needing to maintain exact wall placements, window openings, and furniture arrangement.
- Step 1 (Reference): Create a simple sketch of the room’s layout, including major furniture blocks, or generate a basic 3D render of the room’s geometry.
- Step 2 (Pre-process): Use the Depth Map pre-processor on the 3D render (or even a simple hand-drawn perspective sketch where closer objects are lighter). Alternatively, for object placement, a Segmentation Map could be used to color-code areas for “sofa,” “table,” “window,” etc.
- Step 3 (Prompt): Input a prompt describing the desired aesthetic: “modern minimalist living room, natural light, Scandinavian design, light wood accents, comfortable sofa, large window overlooking a city, photorealistic, interior photography.”
- Step 4 (ControlNet): Apply the Depth Map (and/or Segmentation Map) with a strong Control Weight (e.g., 1.0-1.4).
Result: The AI generates a photorealistic image of the living room, with walls, windows, and furniture exactly where specified in the depth/segmentation map. The designer can then easily change the style, materials, or lighting by simply modifying the text prompt, while the underlying room structure remains constant. This significantly accelerates the visualization process and improves client communication.
These examples highlight ControlNet’s versatility across different creative domains, demonstrating its capability to transform abstract ideas and simple inputs into highly controlled, detailed, and professional-grade AI-generated art.
Frequently Asked Questions
Q: What exactly is ControlNet and how does it work with Stable Diffusion?
A: ControlNet is an add-on neural network architecture that provides Stable Diffusion (and other diffusion models) with additional spatial and structural conditioning. Instead of relying solely on a text prompt, ControlNet allows you to input an image (like a Canny edge map, an OpenPose skeleton, or a depth map) that guides the generation process. It works by creating a copy of the diffusion model’s encoder layers. One copy remains “locked” (unmodified), handling the general creative aspects from the text prompt. The other copy, the “control branch,” is trained to interpret the structural input image and inject that structural information into the locked model during image generation. This allows for precise control over composition, pose, and depth without retraining the entire base model.
Q: How does ControlNet differ from regular prompt engineering in AI art?
A: Regular prompt engineering relies purely on descriptive text to guide the AI, often leading to a trial-and-error process for achieving specific layouts or poses. While excellent for conceptualizing themes and styles, it lacks direct structural control. ControlNet, on the other hand, adds a visual input layer. It allows you to explicitly dictate the structure, pose, edges, or depth of your image using a reference image. This provides a level of precision and reproducibility that prompt engineering alone cannot offer. You use both in synergy: the prompt defines the style and content, while ControlNet defines the exact structure.
Q: Do I need powerful hardware (like a high-end GPU) to run ControlNet?
A: Yes, running ControlNet, especially multiple instances or at higher resolutions, generally requires a capable GPU with sufficient VRAM (Video RAM). While some simpler ControlNet models might run on GPUs with 6GB or 8GB of VRAM, 12GB or 16GB is often recommended for a smoother experience, faster generation times, and the ability to combine multiple ControlNet models without running out of memory. If you have less powerful hardware, you might experience slower generation times or be limited to lower resolutions and fewer simultaneous ControlNet instances. Cloud-based GPU services are an alternative for users with less powerful local machines.
Q: Can I use multiple ControlNet models at once for more intricate control?
A: Absolutely, and this is one of ControlNet’s most powerful advanced features! You can layer multiple ControlNet models simultaneously to combine different types of structural guidance. For instance, you could use an OpenPose model for a character’s exact pose, a Depth Map model for the scene’s perspective, and a Canny model for specific object outlines, all in a single generation. Each ControlNet instance typically has its own set of parameters (like control weight), allowing you to fine-tune the influence of each structural input independently. This enables incredibly complex and precise artistic compositions.
Q: What are “pre-processors” in the context of ControlNet?
A: Pre-processors are algorithms that take a regular input image (like a photograph or a simple drawing) and automatically convert it into the specific structural format that a ControlNet model understands. For example, if you upload a photograph of a person, the “OpenPose” pre-processor will analyze it and generate a stick figure representing the person’s pose. Similarly, a “Canny” pre-processor will extract edge lines, and a “Depth” pre-processor will create a depth map. These tools simplify the workflow, allowing you to use everyday images as structural references without needing specialized software to create the control maps manually.
Q: Why are my ControlNet outputs sometimes distorted or inconsistent?
A: Several factors can lead to distorted or inconsistent ControlNet outputs:
- Conflicting Inputs: Your text prompt might be conflicting with your ControlNet input (e.g., prompt for a cat, but OpenPose input is a human).
- Unnatural Input: The structural input itself might be unnatural or ambiguous (e.g., a twisted OpenPose skeleton, a noisy Canny map).
- Incorrect Control Weight: If the Control Weight is too high, ControlNet might over-adhere to even subtle imperfections in your input. If it’s too low, the AI might ignore the guidance.
- Low-Quality Base Model: The underlying Stable Diffusion model might not be robust enough or suitable for the task.
- Seed Issues: Sometimes, unlucky seeds can lead to poorer results.
- Insufficient Steps: Not enough sampling steps can lead to under-baked images.
Troubleshooting usually involves refining your input, adjusting control weights, ensuring your prompt aligns, and experimenting with different seeds or sampling methods.
Q: Is ControlNet available for all Stable Diffusion versions, and where can I find models?
A: ControlNet was initially developed for Stable Diffusion 1.5 and 2.1, and there are many models compatible with these versions. Newer iterations and community-trained ControlNet models are continually being developed for more recent Stable Diffusion versions like SDXL. You can typically find ControlNet models and pre-processors within popular Stable Diffusion web UIs like Automatic1111’s Web UI or ComfyUI, often downloadable from platforms like Hugging Face, Civitai.com, or directly from the project’s GitHub repository. Always ensure the ControlNet model you download is compatible with your base Stable Diffusion checkpoint.
Q: Can ControlNet be used for video generation or consistent image sequences?
A: Yes, ControlNet is exceptionally valuable for consistent image sequences and is a foundational tool for AI video generation. By applying ControlNet to each frame of a video (e.g., using a sequence of OpenPose skeletons or Canny maps derived from an existing video), you can maintain structural and positional consistency across frames. This allows for tasks like rotoscoping, style transfer to video, or animating characters with precise movements. Tools built on Stable Diffusion and ControlNet (like AnimateDiff) specifically leverage this capability to generate coherent, animated video clips from still images and structural guidance.
Q: What is the ‘Control Weight’ parameter and how should I adjust it?
A: The ‘Control Weight’ parameter determines the strength of ControlNet’s influence over the image generation process. A higher weight (e.g., 1.0 to 1.5) means ControlNet will strictly adhere to the structural input, leaving less room for the base diffusion model to deviate. A lower weight (e.g., 0.5 to 0.8) gives the AI more creative freedom to interpret the structural guidance, potentially resulting in more varied or artistic outputs that might stray slightly from the input. You should adjust this parameter based on how precisely you need to follow your structural input. If the output is too rigid or too close to the input, lower the weight. If the AI is ignoring your input, increase the weight.
Q: Where can I find more resources or learn advanced ControlNet techniques?
A: The AI art community is a fantastic resource. You can find comprehensive tutorials on YouTube (search for “ControlNet Stable Diffusion tutorial”), detailed guides on blogs and forums (e.g., Reddit’s r/StableDiffusion), and an abundance of user-shared workflows and models on platforms like Civitai.com. The official ControlNet GitHub repository is also an excellent source for technical documentation and updates. Exploring custom node setups in ComfyUI or experimenting with different pre-processor settings and chaining multiple ControlNets will lead to advanced mastery.
Key Takeaways
- ControlNet is a revolutionary neural network architecture that adds precise structural control to AI image generation, moving beyond the limitations of text-only prompts.
- It operates by using a “control branch” to inject structural information (like edges, poses, depth maps) into a locked pre-trained diffusion model, ensuring non-destructive guidance.
- A diverse array of ControlNet models exists, each specialized for different types of structural input, including Canny (edges), OpenPose (human/animal poses), Depth Map (perspective/spatial arrangement), Segmentation (object placement), Scribble (rough sketches), and Normal Maps (surface orientation).
- Integrating ControlNet into your workflow involves selecting the right model, preparing a clean structural input image (often with pre-processors), balancing the Control Weight, and crafting a descriptive text prompt.
- Advanced techniques include combining multiple ControlNet models simultaneously, using masking for regional control, and understanding parameters like Start/End ControlNet Steps for nuanced influence.
- While powerful, ControlNet requires troubleshooting common issues such as over-adherence, distorted anatomy, or inconsistent style, often resolved by adjusting weights, refining inputs, or modifying prompts.
- ControlNet has profound practical applications across various fields, from art and illustration to architecture, product design, and even video production, enabling unprecedented precision and creative efficiency.
- Mastering ControlNet empowers artists to exert unparalleled control over AI-generated visuals, transforming unpredictable outcomes into reliably controlled artistic expressions.
Conclusion
The journey through the capabilities of ControlNet reveals a pivotal moment in the evolution of AI art generation. We’ve moved beyond merely describing a desired image to actively sculpting its foundational structure, dictating poses, manipulating depth, and refining compositions with unprecedented precision. ControlNet has effectively bridged the gap between the imaginative power of generative AI and the precise demands of artistic intent, offering a level of mastery that was once the sole domain of traditional creative tools.
By understanding the mechanics behind its “locked” and “control” branches, and by skillfully leveraging its diverse range of models—from the sharp precision of Canny to the dynamic control of OpenPose and the spatial awareness of Depth Maps—artists can now translate their clearest visions into pixel-perfect realities. This isn’t just about making AI art easier; it’s about making it more predictable, more reproducible, and ultimately, more aligned with the nuanced demands of human creativity.
ControlNet is not just another feature; it is a fundamental shift in how we interact with AI image generation, transforming it from a magical black box into a sophisticated, controllable instrument. For any aspiring or established AI artist, mastering ControlNet is no longer an optional skill but a crucial step towards unlocking the full potential of this revolutionary technology. Embrace the structural mastery it offers, experiment with its multifaceted tools, and discover how you can push the boundaries of what’s possible in the captivating world of AI-generated art. The canvas is yours, and with ControlNet, you hold the definitive brushstrokes.


Leave a Reply